LMSMart | LMS Education WordPress Theme
- Author: Pixelcurve
- Update: 20 January, 2025
If you have any questions, ideas or suggestions, please create ticket through our support channel Support Desk.
How to install LMSMart Education WordPress Theme
Video Tutorials
Visit the Pixelcurve youtube channel for tutorials video that will help you build your new site.
Installation
Follow the steps below to setup install WordPress Theme:
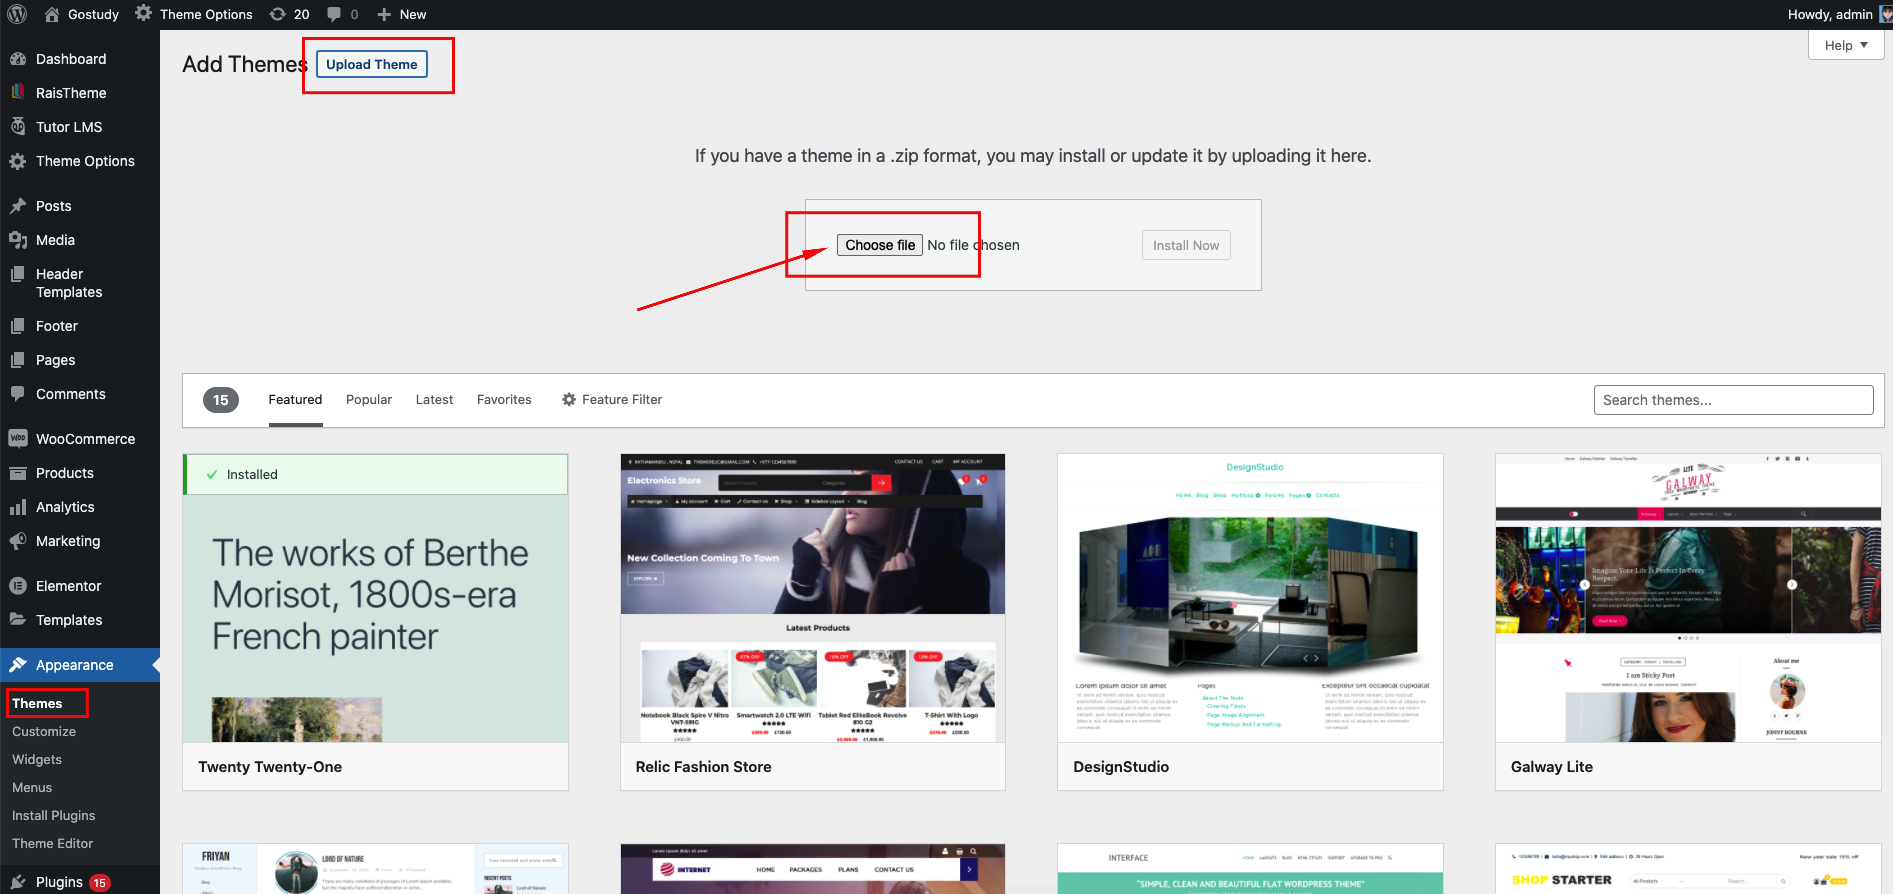
- Login to WordPress admin panel
- Go to: Appearance > Themes
- Click on the Add New button, then click on the Upload New
- Upload theme zip file
- Click on the Activate button
Run Setup Wizard
After activating the theme installation process will be started.
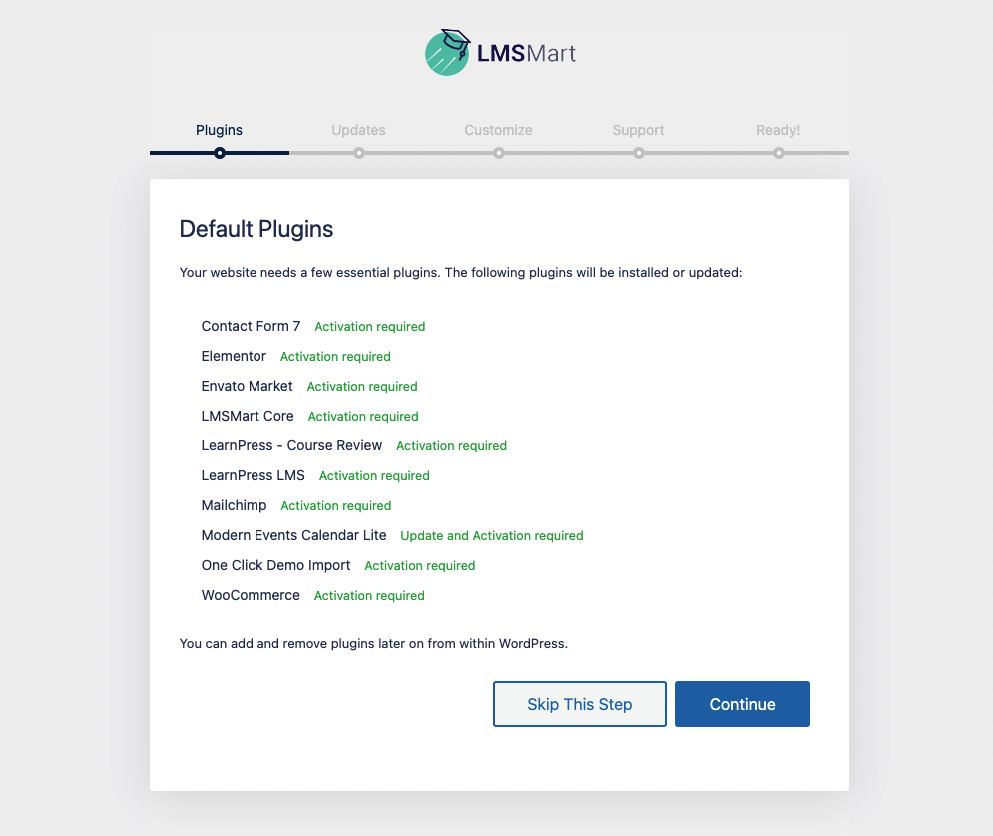
- LMSMart Core - Required and must install plugin.
- Elementor Page Builder - Required Page builder plugin.
- WooCommerce - Optional. Install if you want commerce/store functionality.
- Modern Events Calendar - This plugin will help you to build & edit the event section of our theme.
- Envato Market - Recommended. This plugin helps you automatic updates to your Themes & Plugins purchased through Envato Market.
- Tutor LMS Plugin - Install if you want LMS(Learning Management System) feature.
- Tutor LMS Pro - This plugin will allow you to use the professional versions of Tutor LMS.
- Tutor LMS Certificate Builder - Optional. Tutor LMS Certificate Builder allows anyone to create certificates that they want to present to their users.
- Certificate customizer for Tutor LMS - Optional. An example of a custom certificate development process for Tutor LMS Pro.
- Tutor LMS - Migration Tool - Optional. Move all your course, quiz, order data information and everything else from your LMS to the better Tutor LMS by simply clicking a button.
- Tutor LMS Elementor Addons - Optional. Tutor LMS Elementor widgets to create an entire eLearning site and design custom course pages, course carousels, listings, and more.
- LearnDash LMS Plugin - Install if you want LMS(Learning Management System) feature.
- LearnDash LMS - Course Grid - Adds extra feature Intro video, short description and duration etc.
- LearnDash LMS - Optional. Certificate Builder - Create certificates for online courses.
- LearnDash LMS - Optional. WooCommerce For LearnDash - Easy to connect WooCommerce to your LMS website
To get more 3rd party addons for LearnDash. click here.
- LearnPress LMS Plugin - Install if you want LMS(Learning Management System) feature.
- LearnPress - Course Review - It will add review for course
- LearnPress - Course Wishlist - Optional. It will add wishlist feature for the course
- LearnPress - WooCommerce Payment Methods Integration - Optional. Easy to connect WooCommerce to your LMS website
- LearnPress - 2checkout Payment - Optional. Authorize.Net payment gateway for LearnPress.
- LearnPress - Paid Membership Pro Integration - Optional. Allow to buy courses via subscriptions.
- LearnPress - Co-Instructors - Optional. Allow multiple instructors to edit content.
- LearnPress - Certificates - Optional. Create certificates for online courses.
- LearnPress - Instructor Commission - Optional. Manage percent of commission for each course & support withdrawal via PayPal
- LearnPress - Students List - Optional. Student List let people check the list of students who have signed up for the course.
- LearnPress - Collections - Optional. Collecting related courses into one collection by administrator.
- LearnPress - Content Drip - Optional. Allows you to manage course's opening time.
- LearnPress - Fill In Blank Question - Optional. Supports type of question Fill In Blank lets user fill out the text into one ( or more than one ) space.
- LearnPress - H5P Content - Optional. H5P Content add-on for LearnPress.
- LearnPress - myCRED Integration - Optional. Running with the point management system - myCRED.
- LearnPress - Prerequisites Courses - Optional. Course you have to finish before you can enroll to this course.
- LearnPress - Random Quiz - Optional. Randomize questions inside quiz.
- LearnPress - Sorting Choice Question - Optional. Sorting Choice provide ability to sorting the options of a question to the right order.
Demo Import
Our Theme have one click demo import feature. Please follow the video to install theme and import the demo.
You'll find 3 different LMS plugin supported Demo. Choose demo with your favorite LMS plugin. Simply click on the LMS name on the tab. Then import your demo.
Theme Options
Like a theme options panel in our theme, we use redux framework. It is very easy to use.
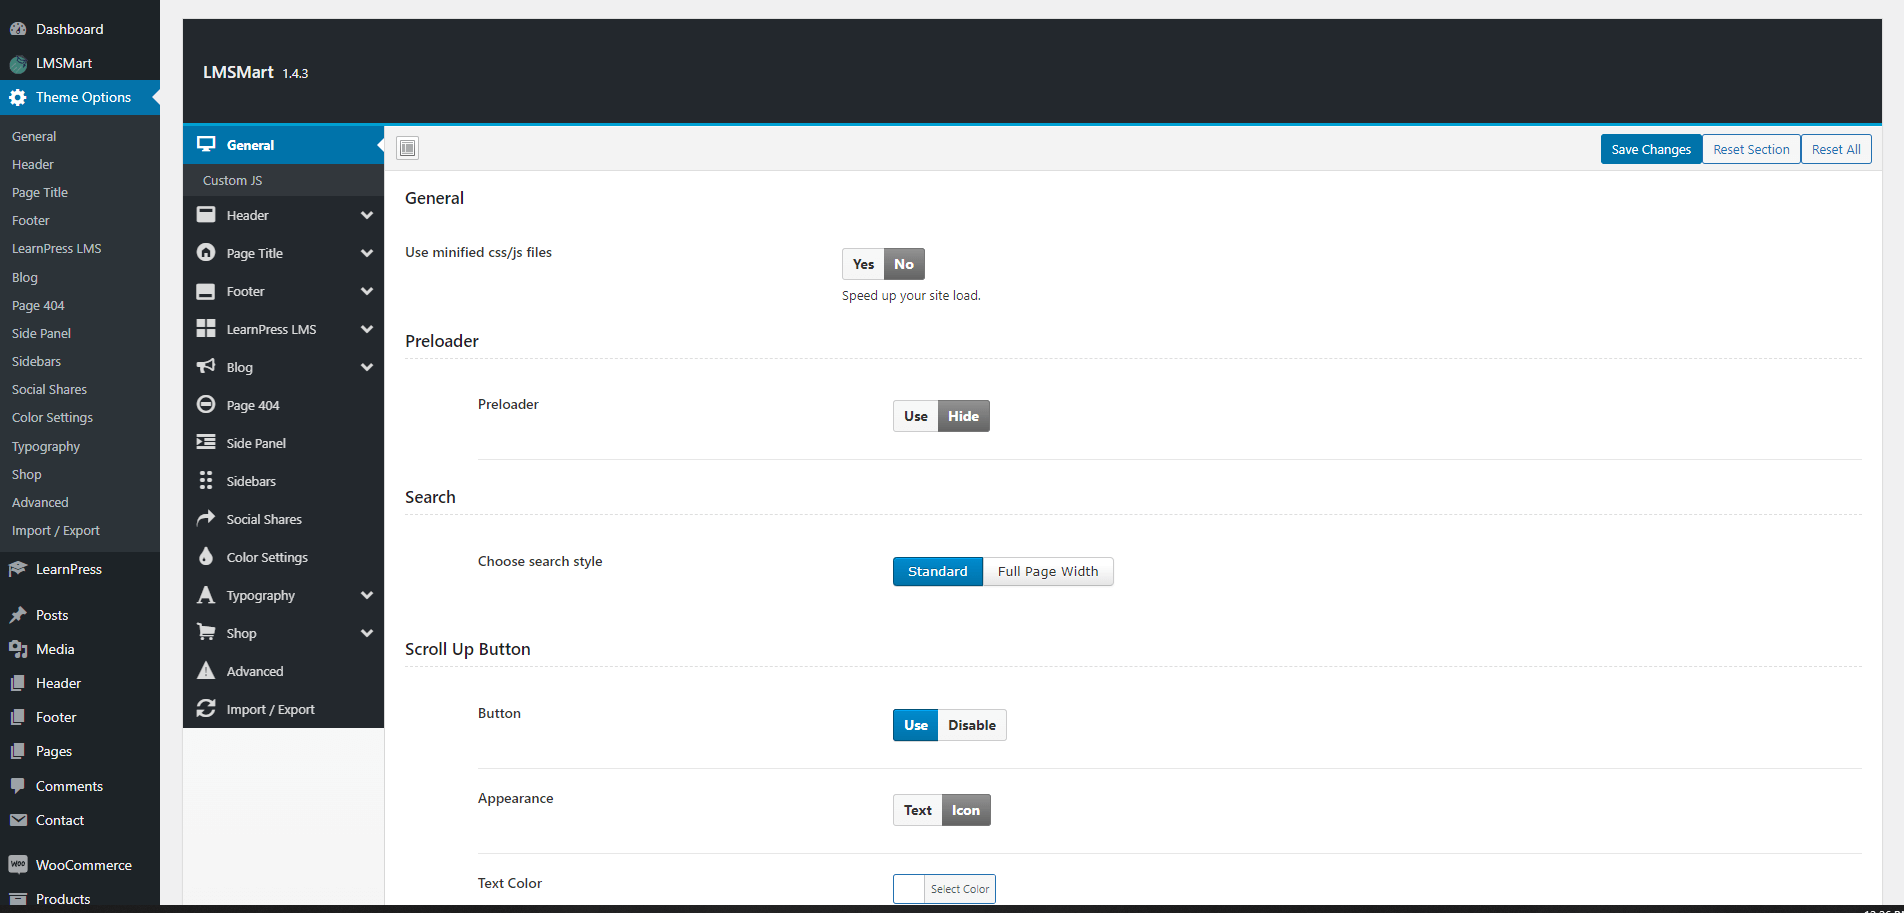
General
Minified CSS/JS
To load your site faster you can use this option.
Preloader
You can show or hide the preloader in the site.
Search
You can change the style of search bar pop up. There are two style. Standard & Full page width.
Scroll Up Button
You can enable of disable the scroll up button from here. You can also change the style from appearance section.
Layout
You can set the container width of a page. "Elementor Width" is Recommended!

Custom JS
If you wanted to write some custom JavaScript code you've to click the submenu option "Custom JS" under general tab.
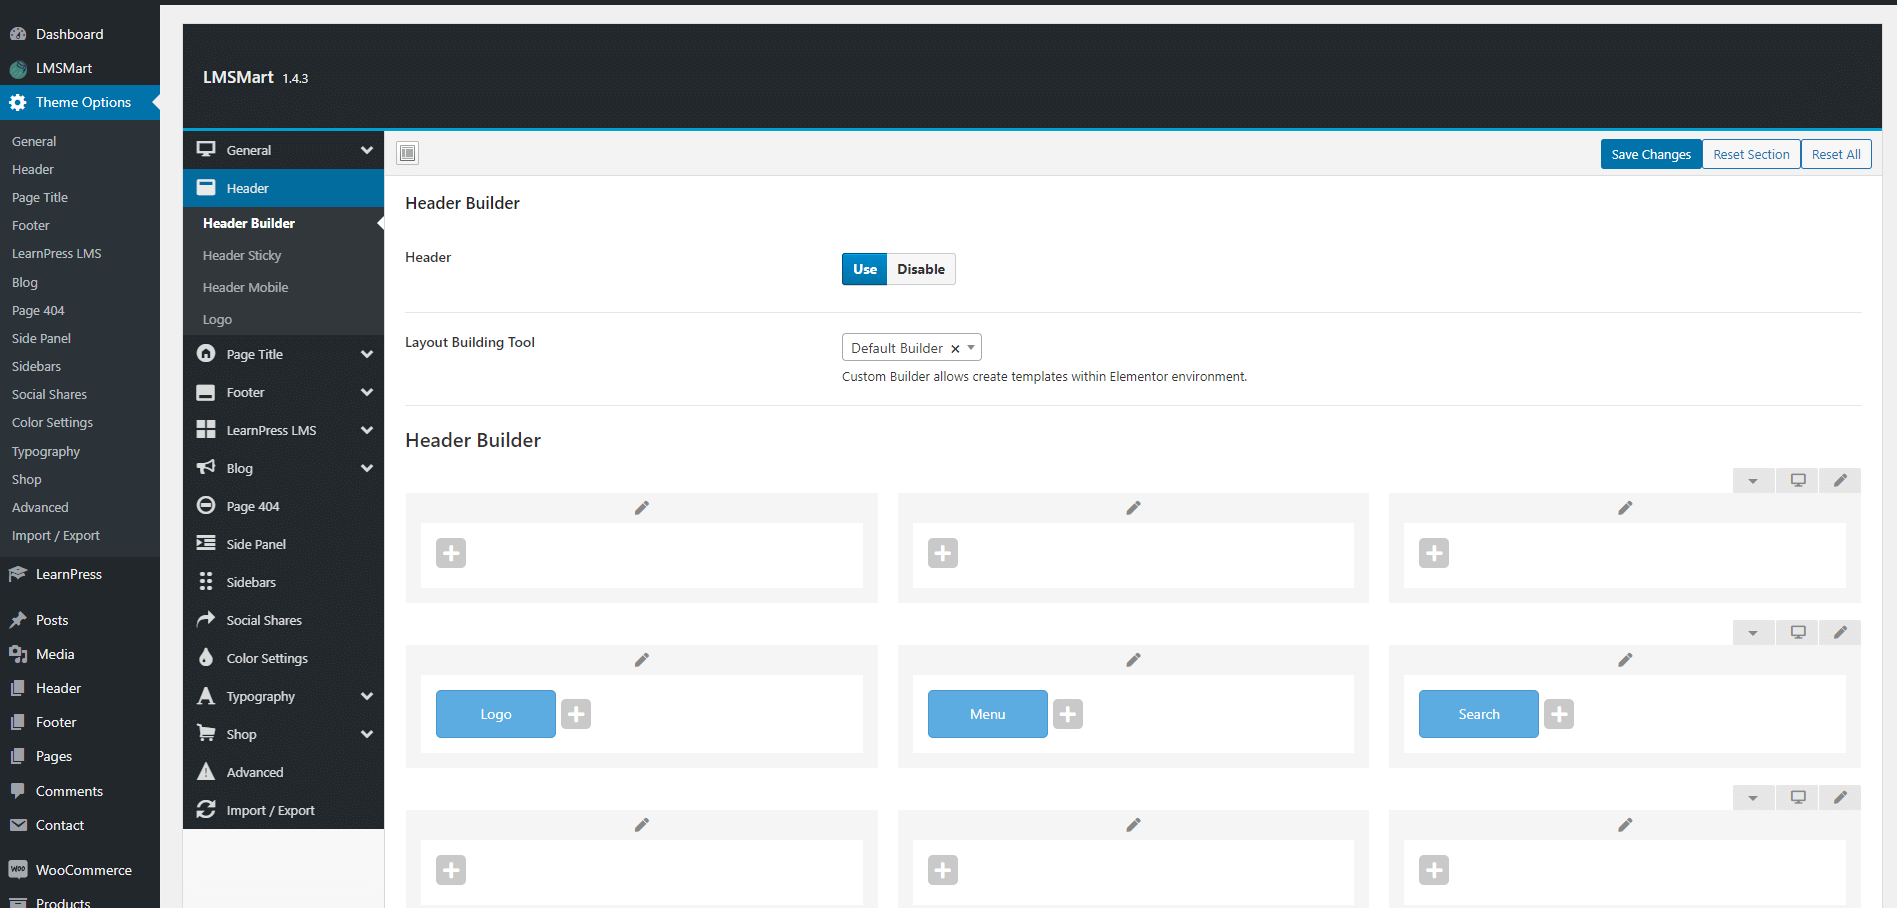
Header Option
To Bulid your site header & footer using elementor and set up logo of your site follow the video below.
Header Builder
Using Header Builder you can build header. After selecting Custom Builder you can see the Header what was created by elementor. After that select the header. Follow the screenshots below.
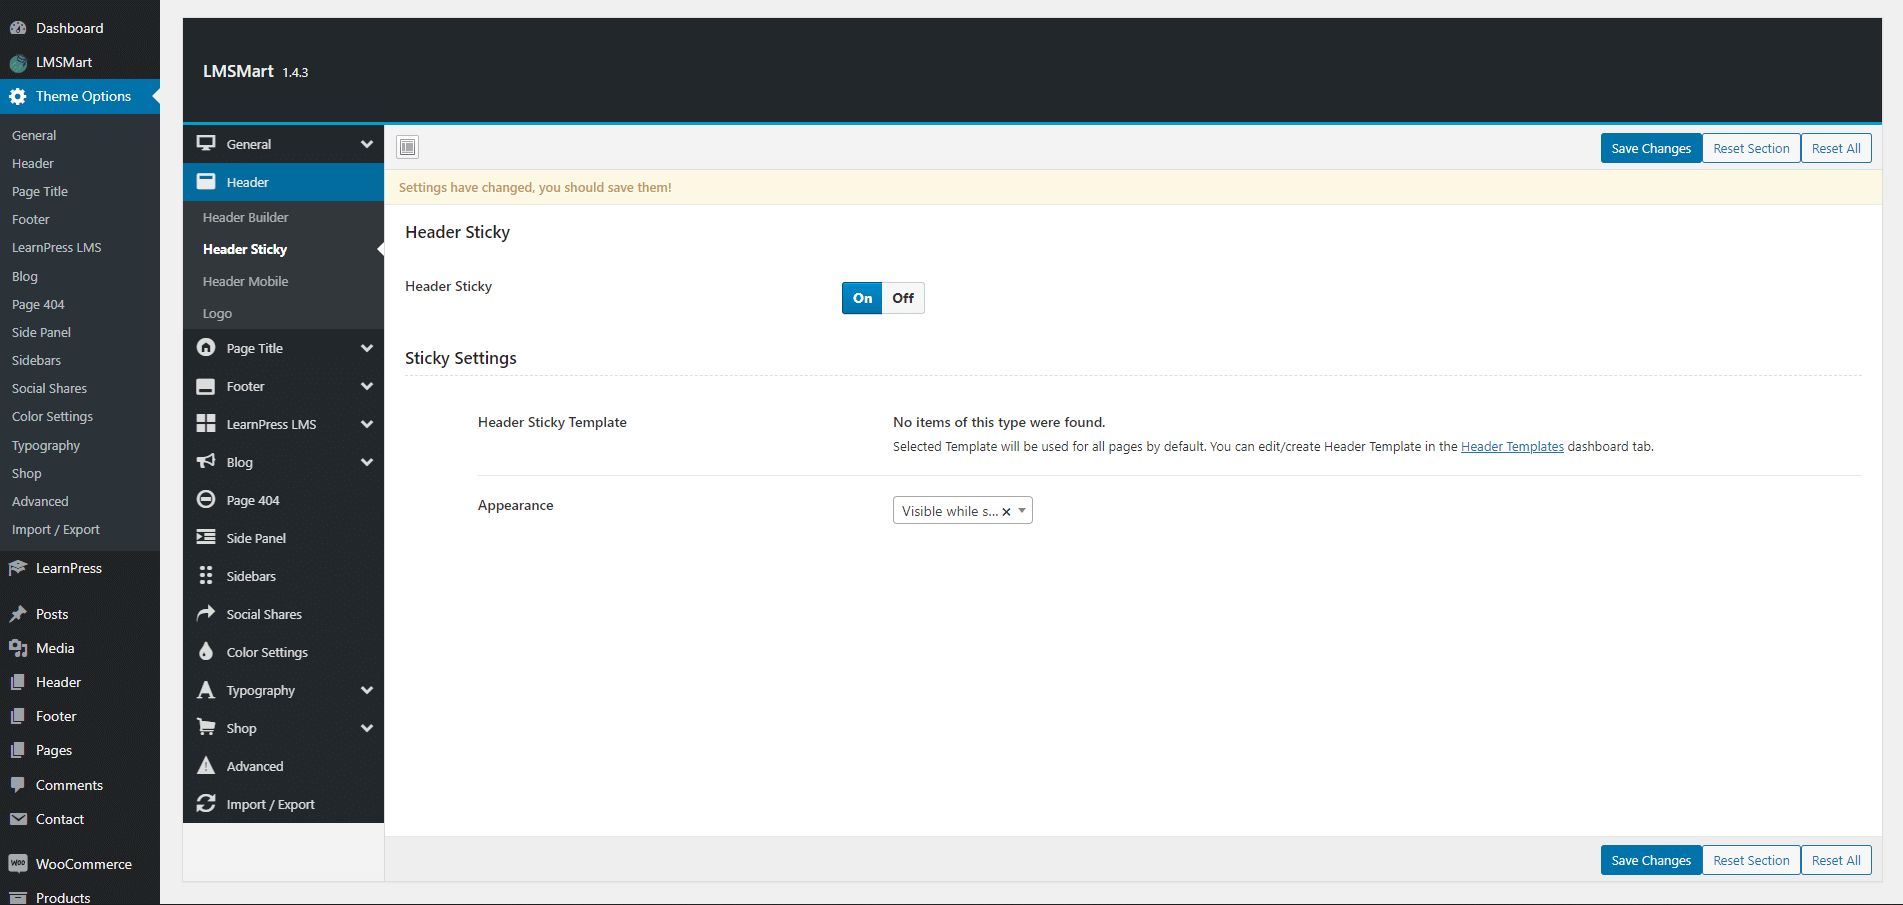
Header Sticky
In this option you can add sticky style for the header. If you turn on this option the header will stick on the top of the page. There are 2 different option on the appearance section. Selecting first one the header will always visible. And selecting 2nd one the header will visible while scrolling up. See the screenshots below
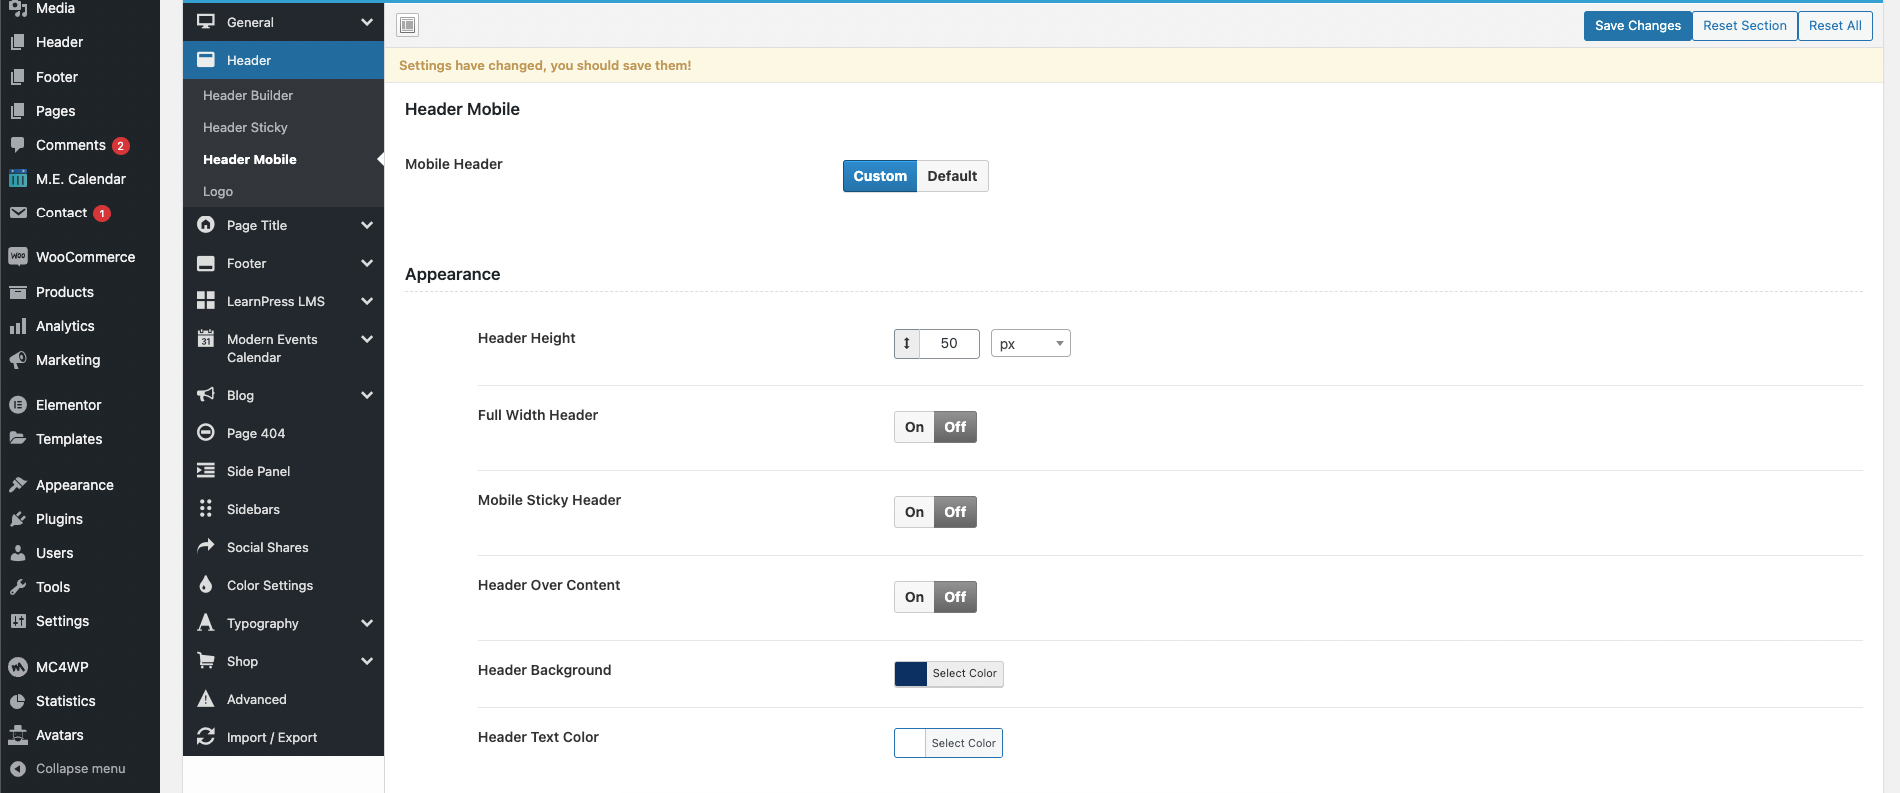
Mobile Header
In this option you can add sticky style for the header. If you turn on this option the header will stick on the top of the page. There are 2 different option on the appearance section. Selecting first one the header will always visible. And selecting 2nd one the header will visible while scrolling up. See the screenshots below
Logo
You can select your site logo from here.
![]()
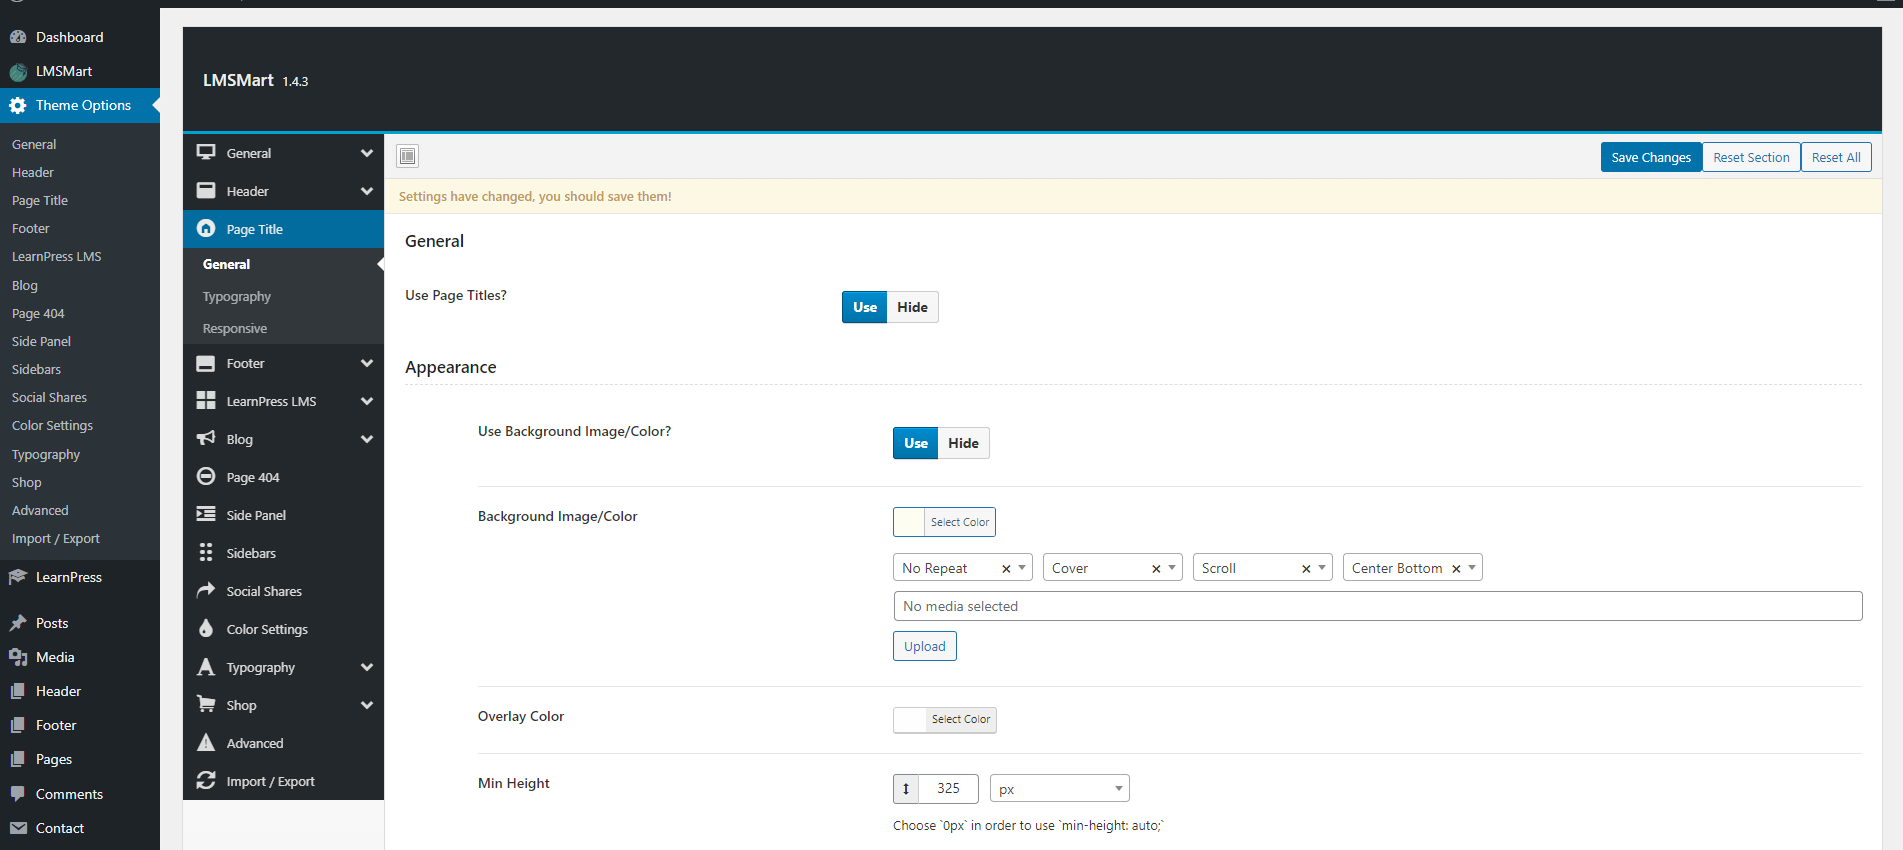
Page Title
General
Using this settings you can build your page title for every page. It's a global settings. But if you wanted to build or select page title for any individual page you can also do that and it is described in next section below.
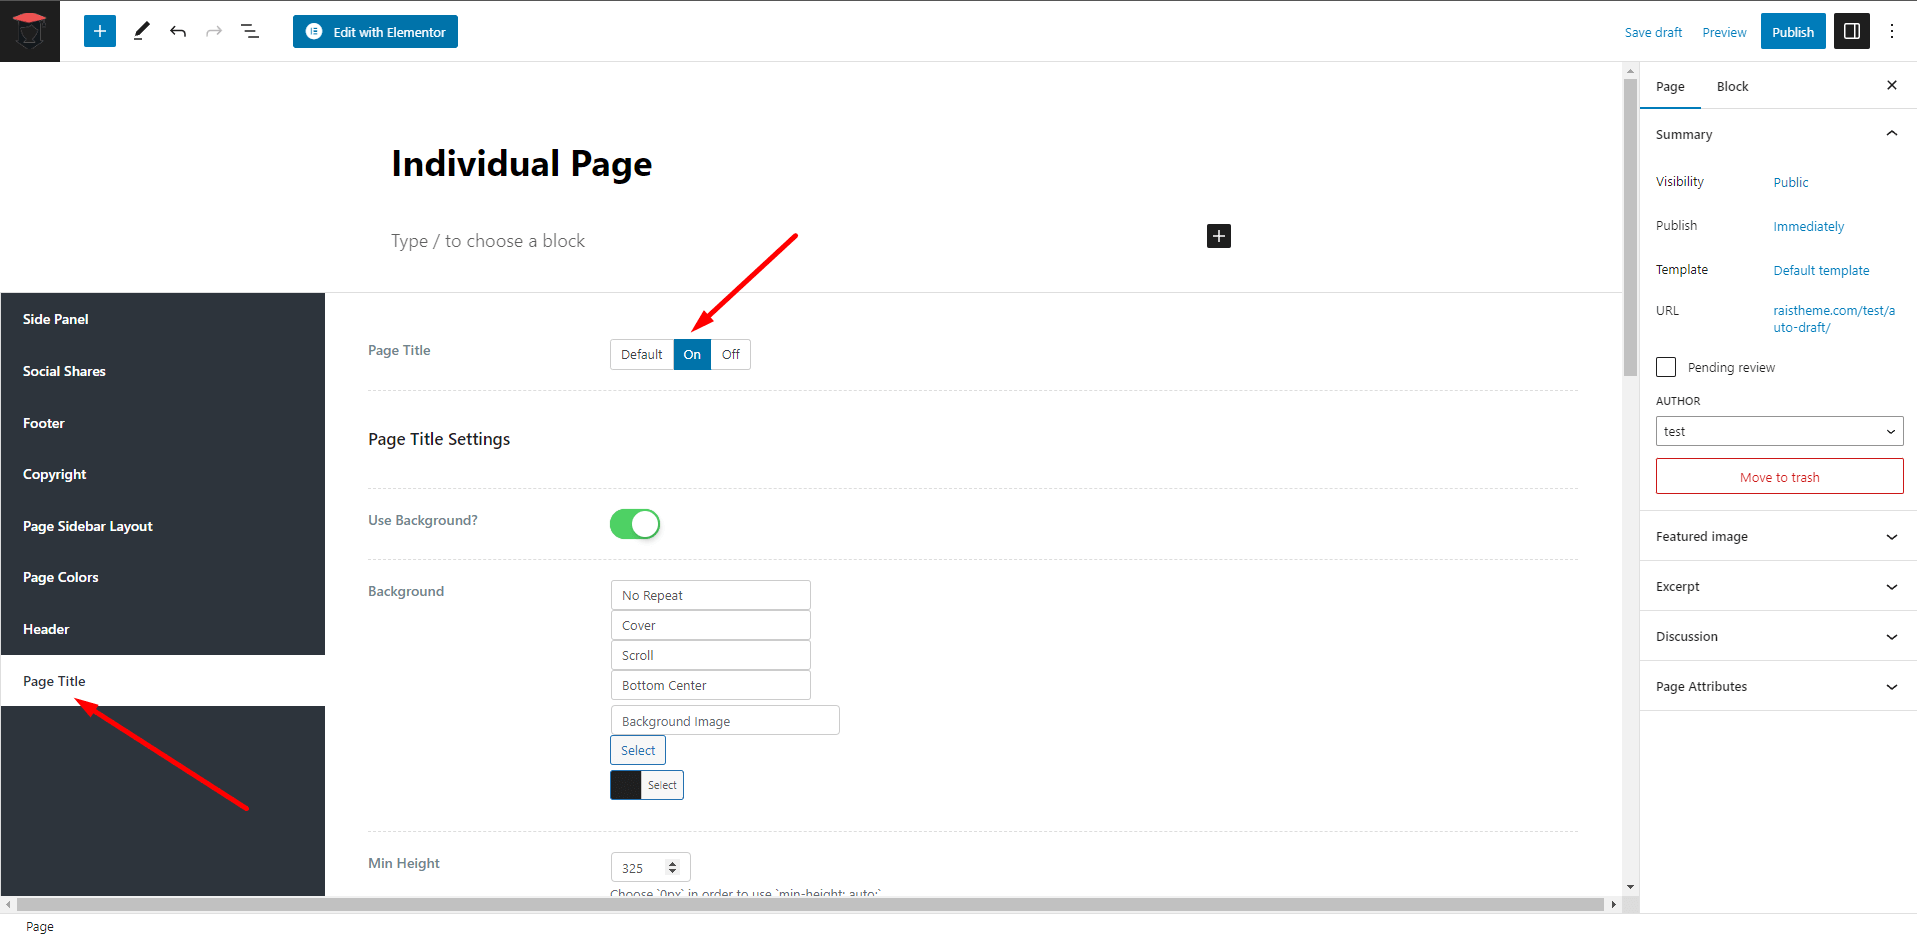
Individual Page Title
If you wanted to select or build page title for individual page you can do that by turning on page tilte from that page editor. See the screenshots below.
Typography
You can edit page title typography from here.
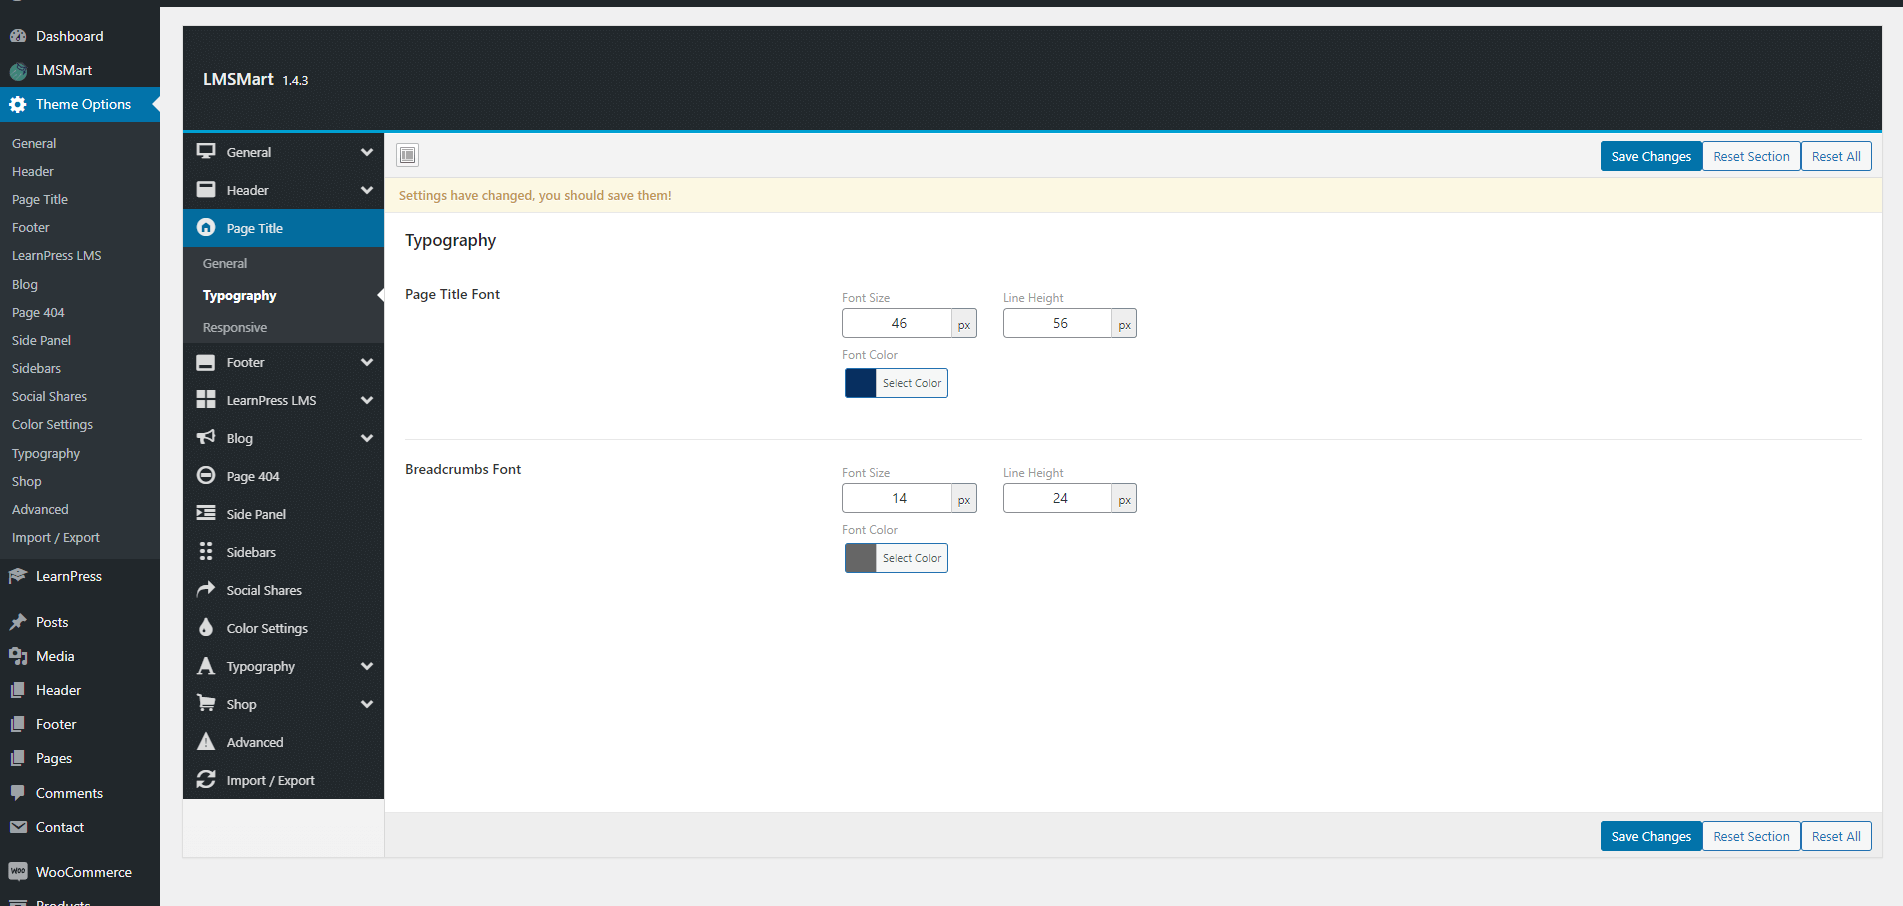
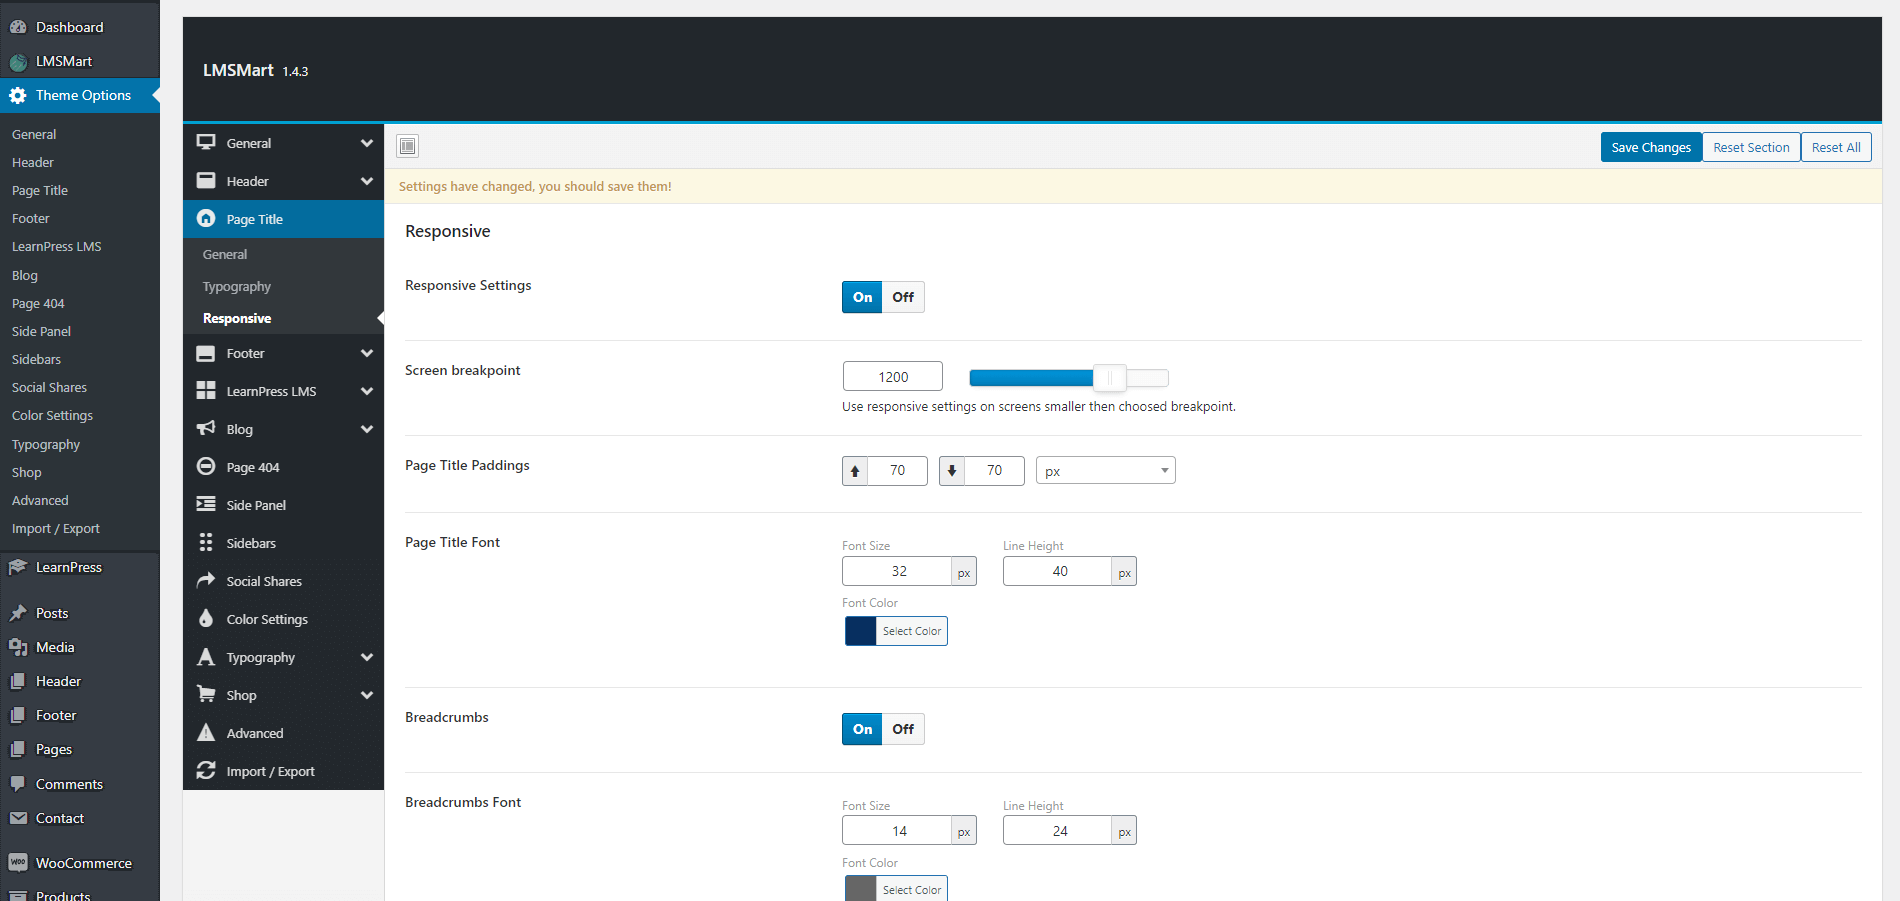
Responsive
Make page title responsive from here.
Footer
To build your site footer using elementor and set up footer logo of your site follow the video below.
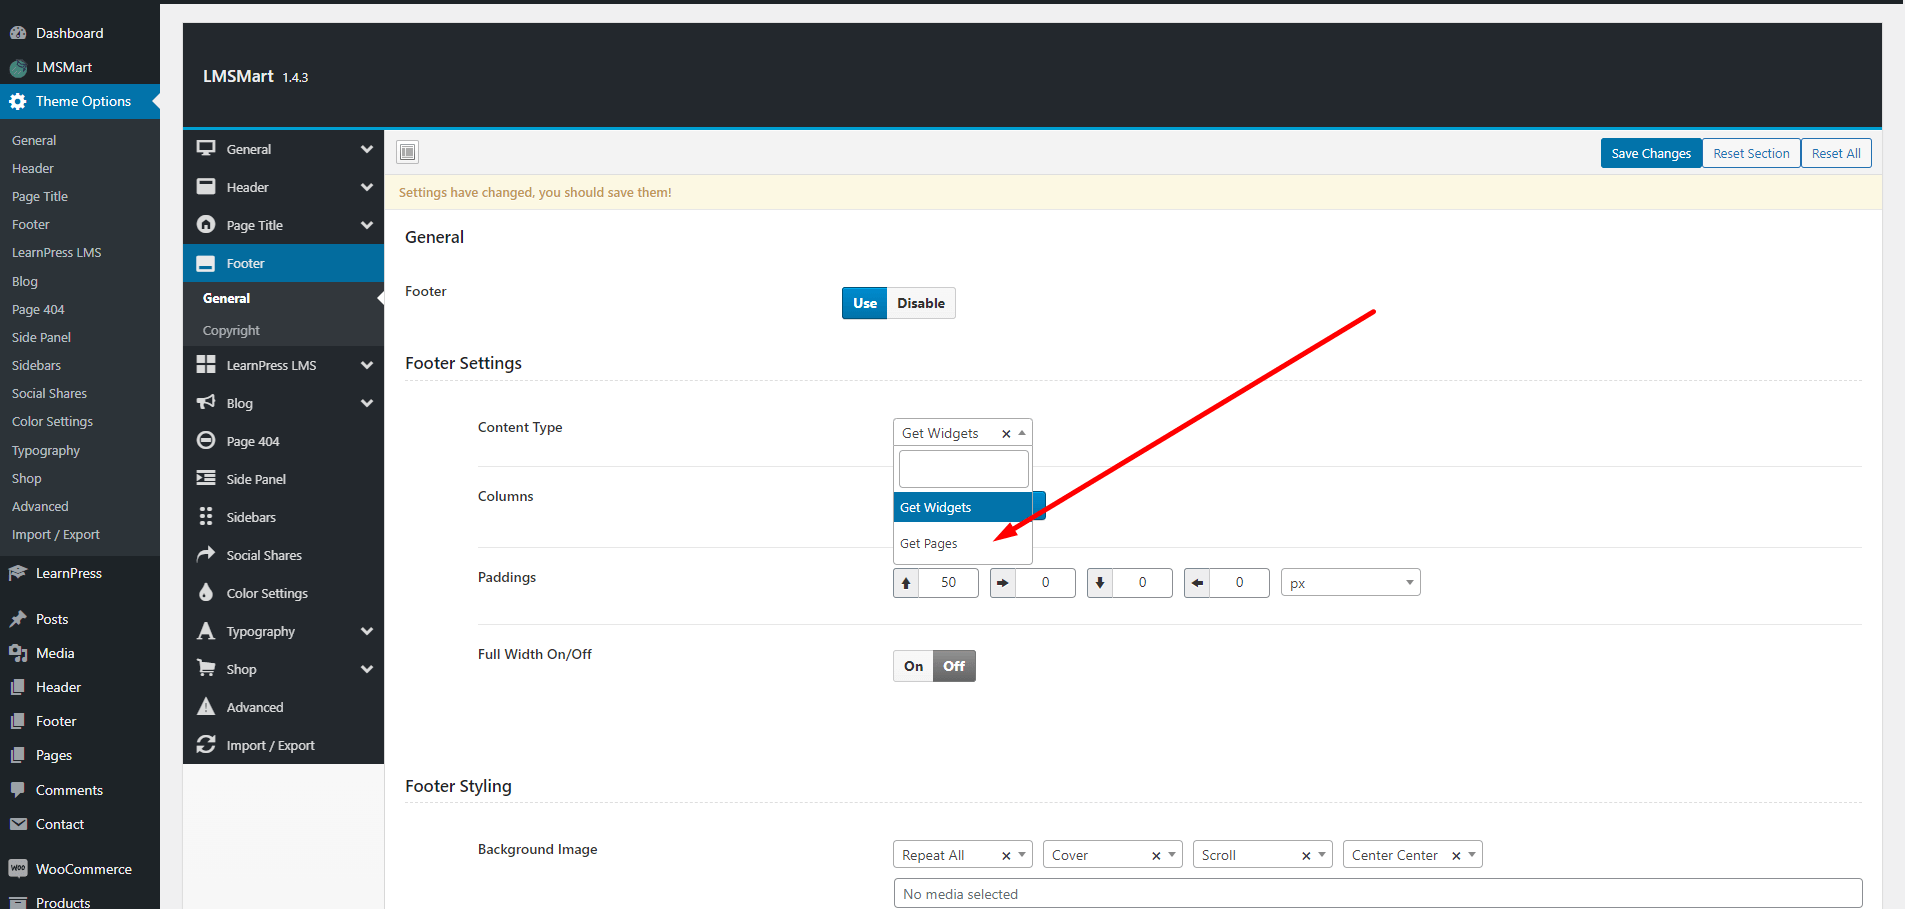
General
You can build or select your footer from here. This settings will select footer for all pages. If you build your footer using custom builder follow the screenshots below.
Copyright
Using this settings you can build your Copyright section.

Blog
Archive
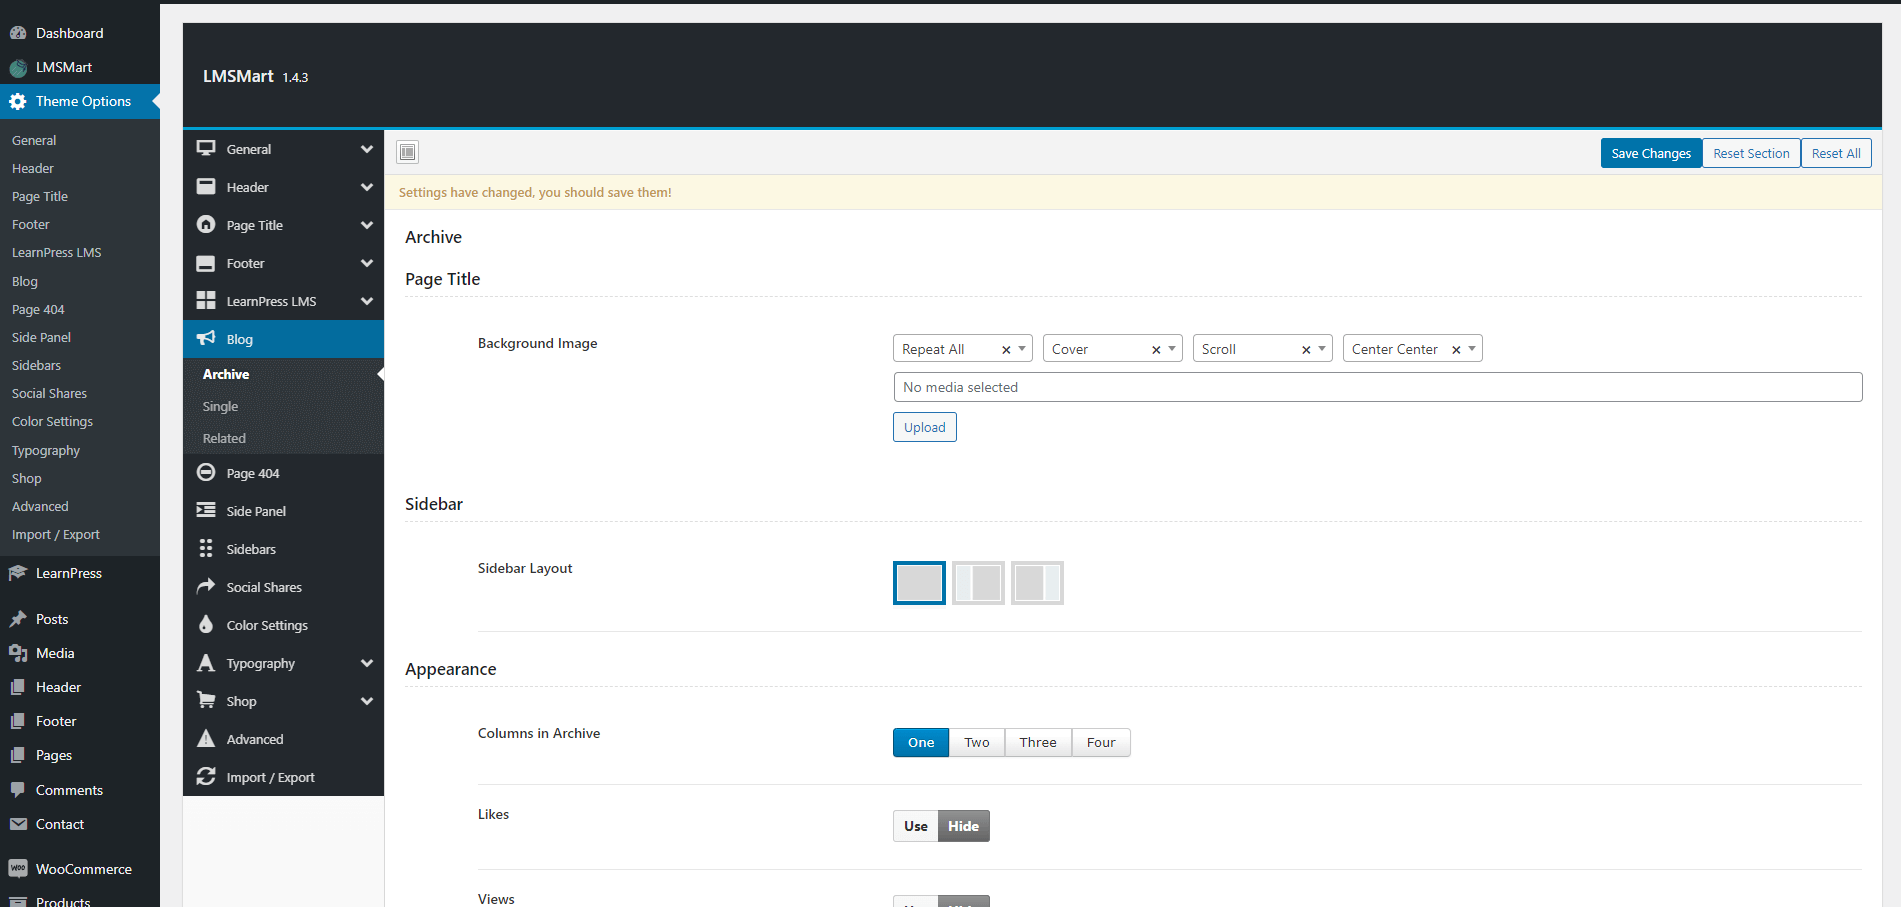
You can Create or Edit the blog archive page from here. You'll find useful options here. You can hide or show many meta characters like Date, Author name etc from appearance section
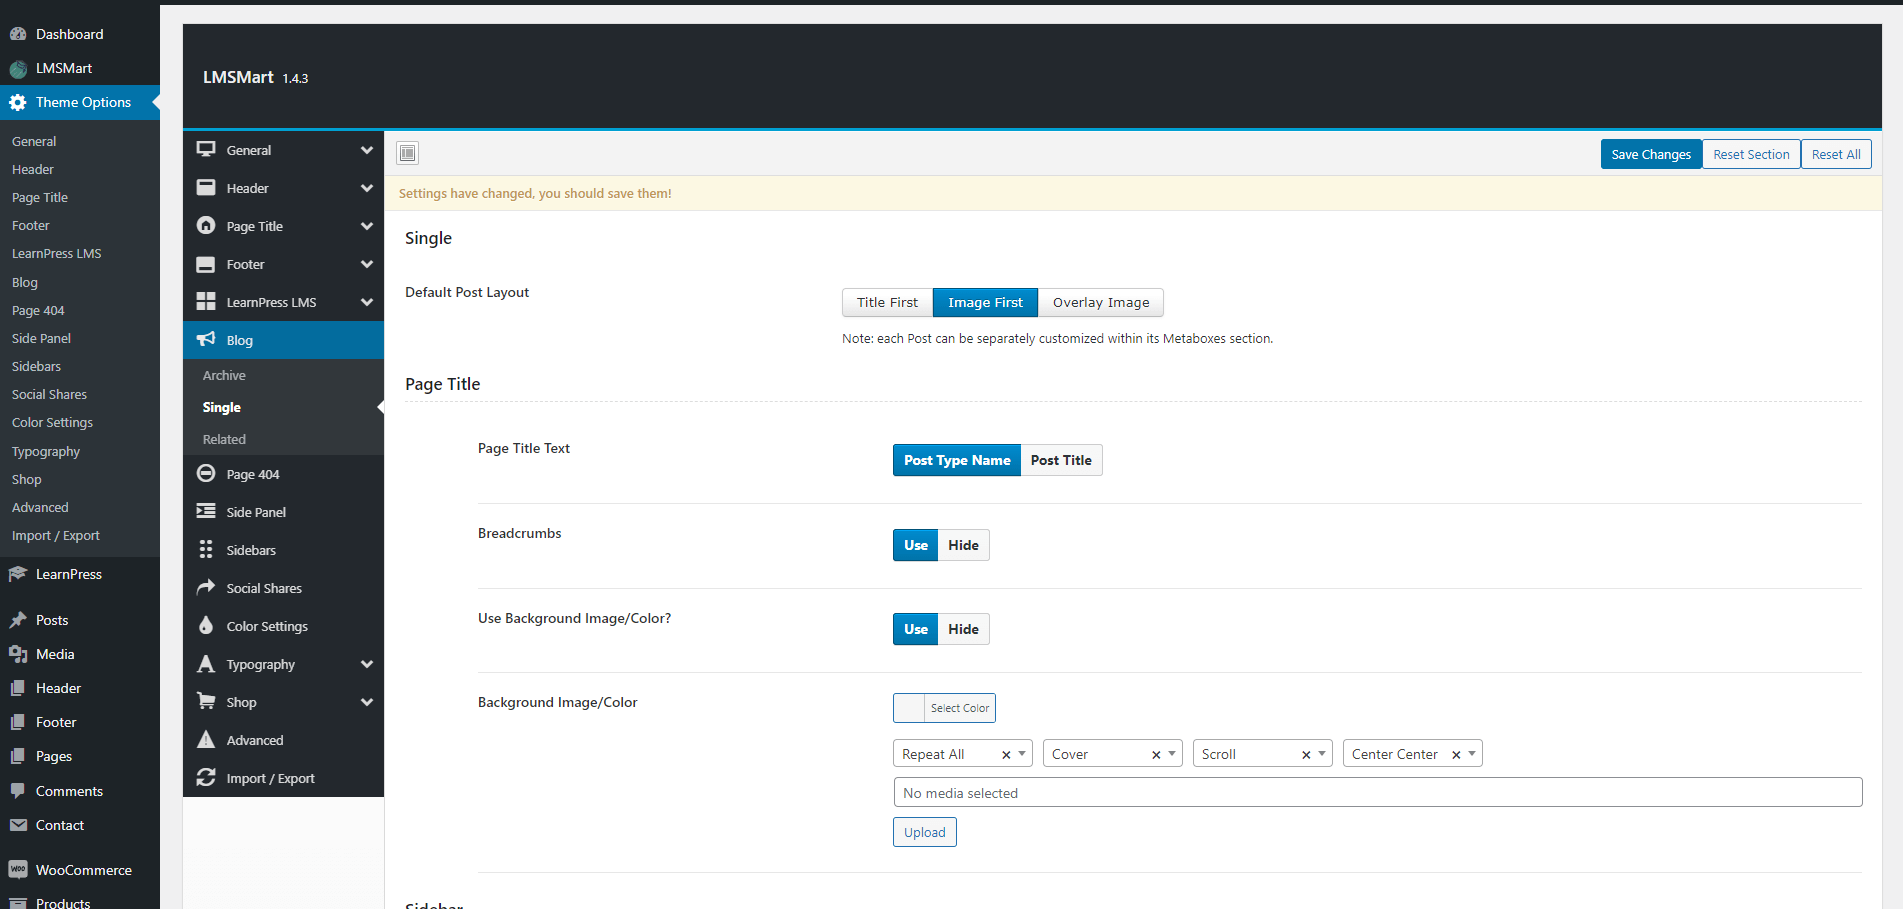
Single
You can edit blog single layout from here.
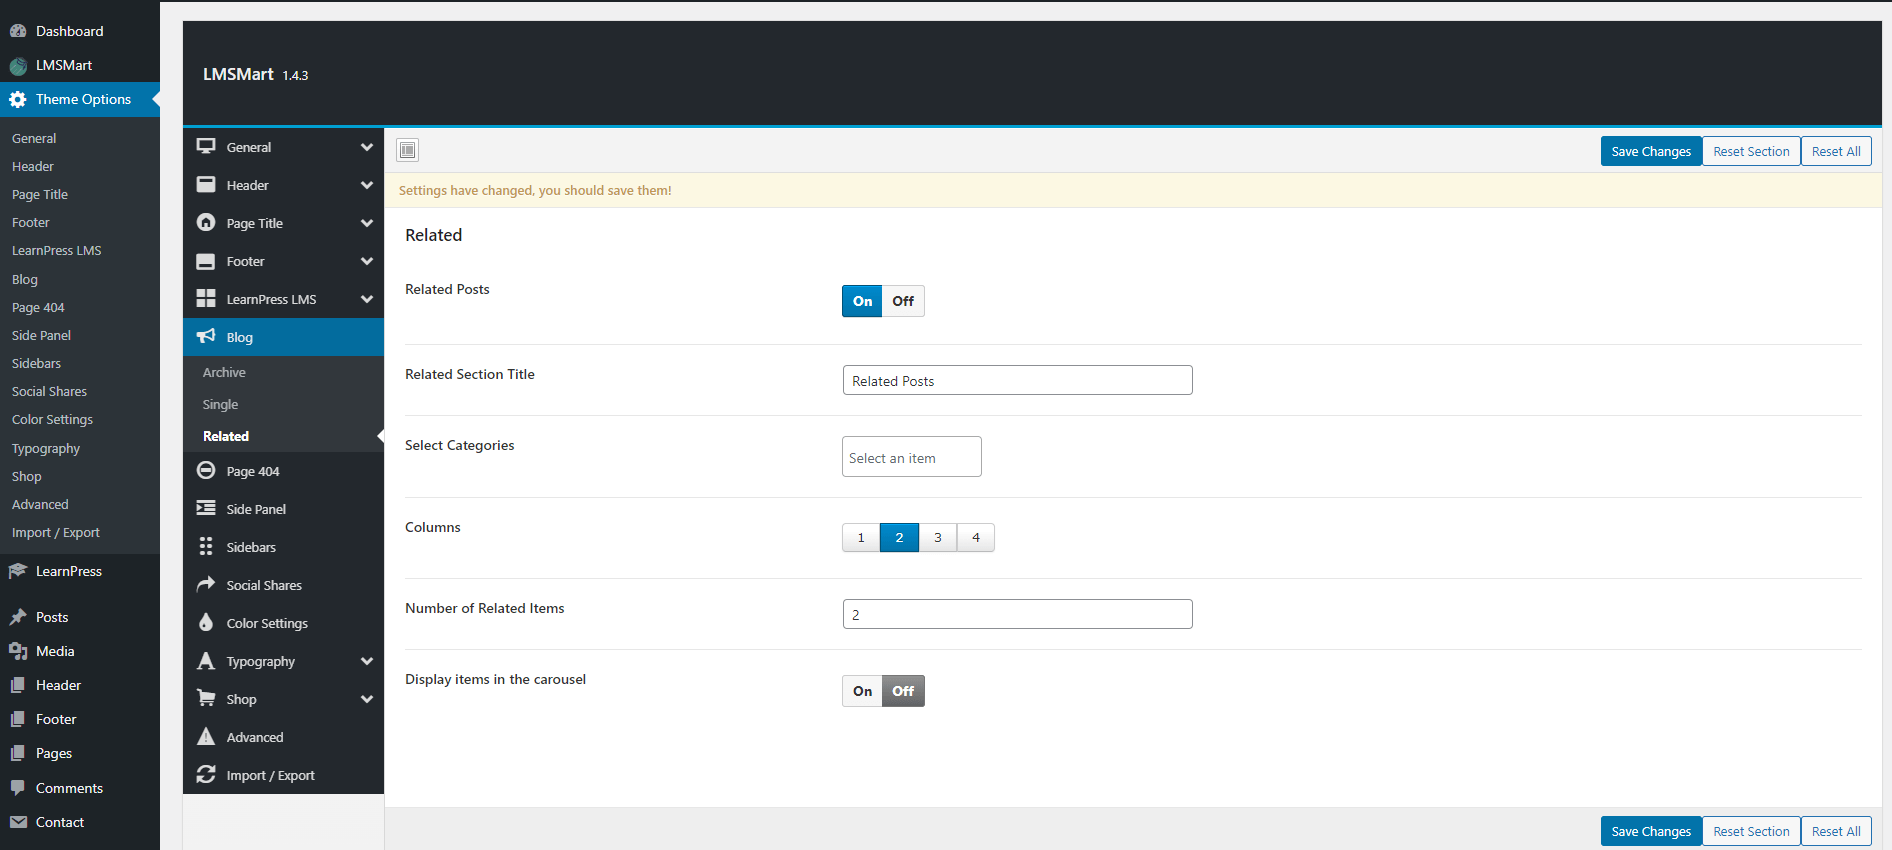
Related
You can edit blog single page related blog posts settings from here.
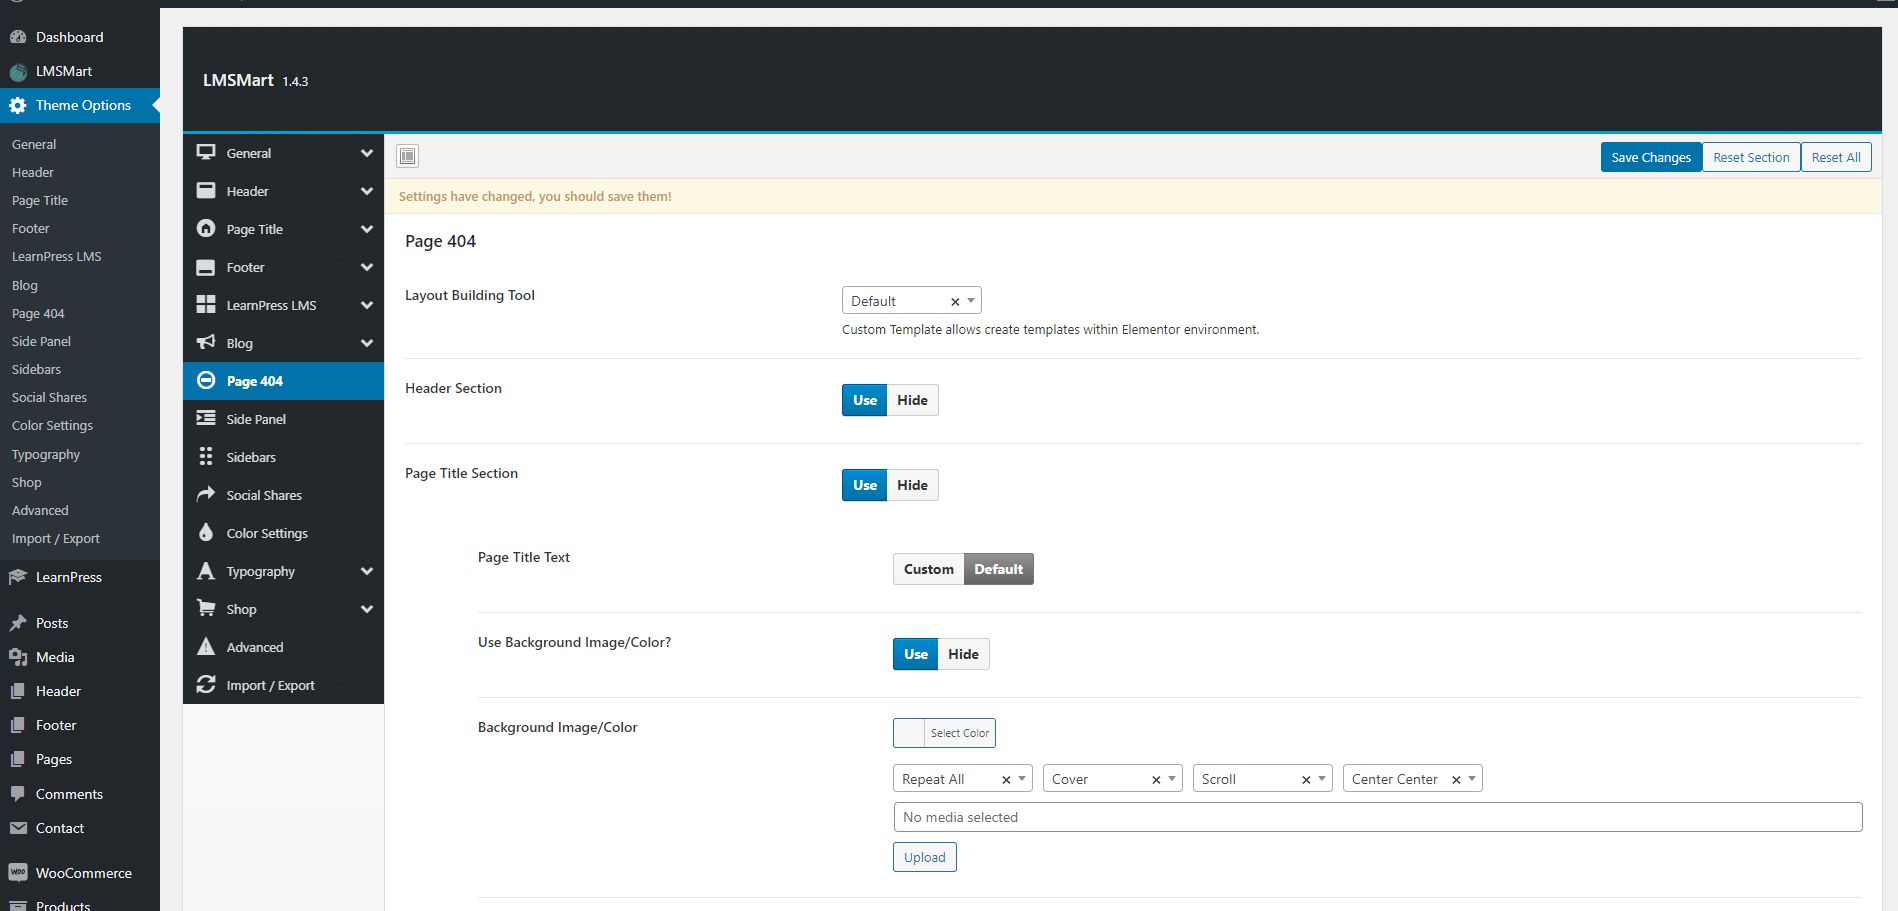
Page 404
You can edit 404 Not found page layout settings from here.
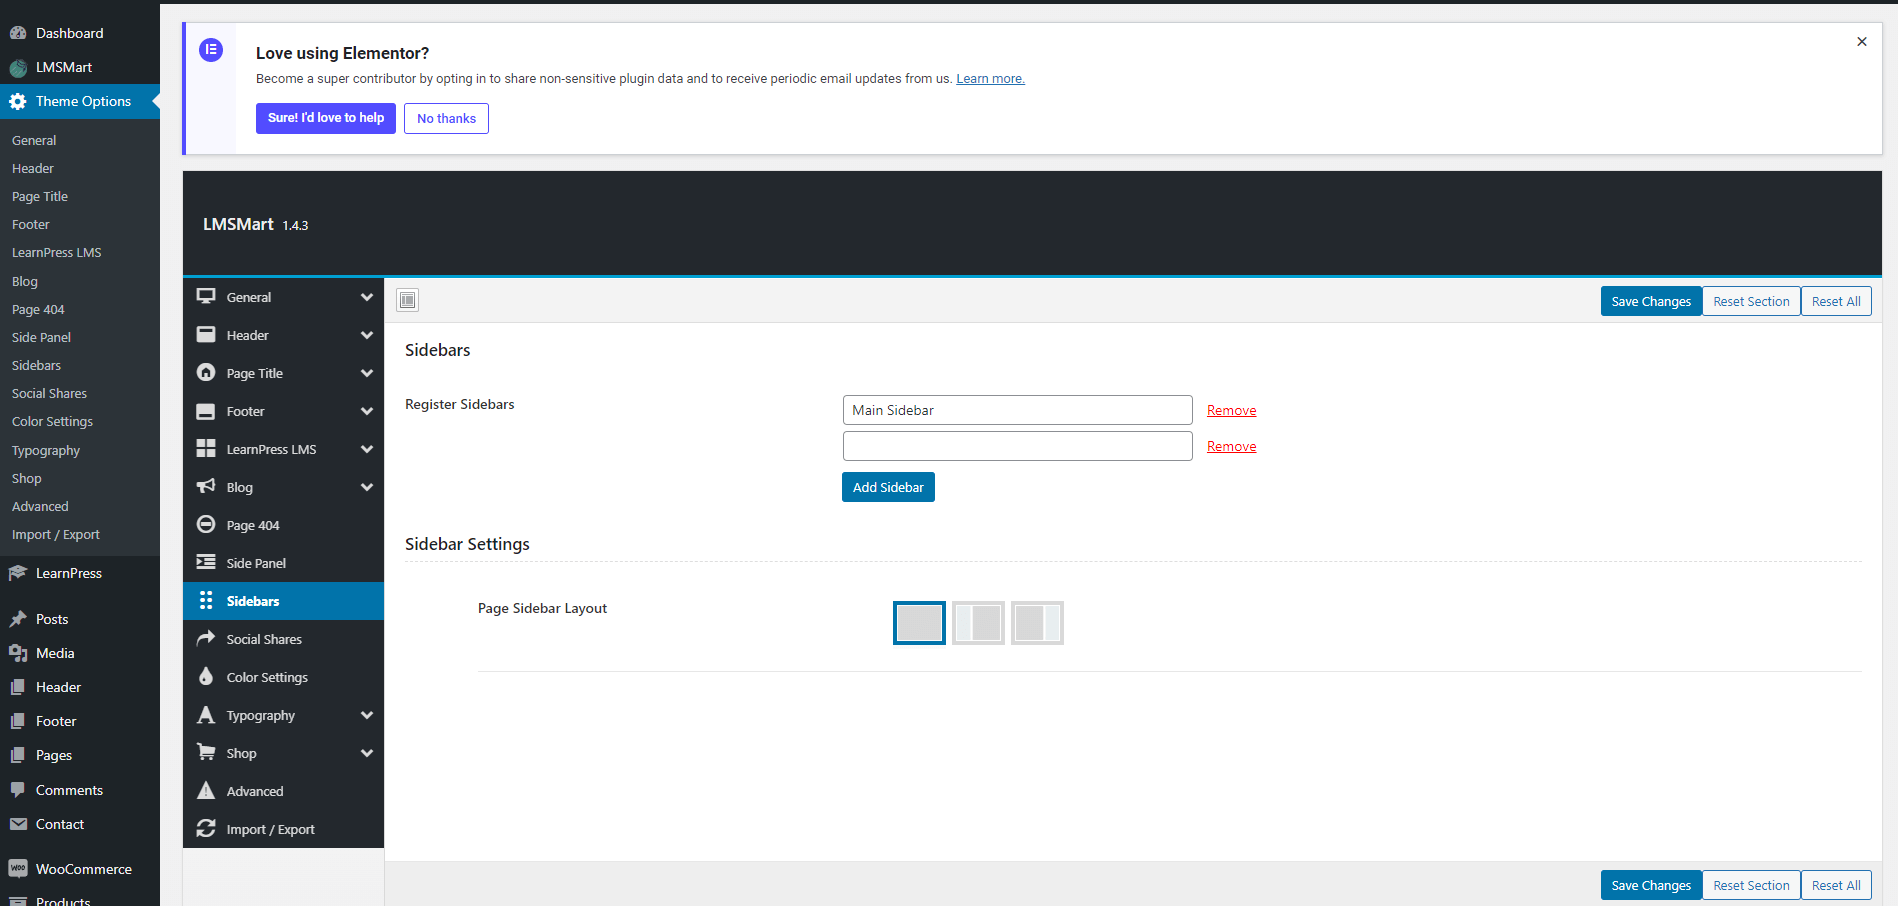
Sidebar
You can get global sidebar and sidebar layout settings from here.
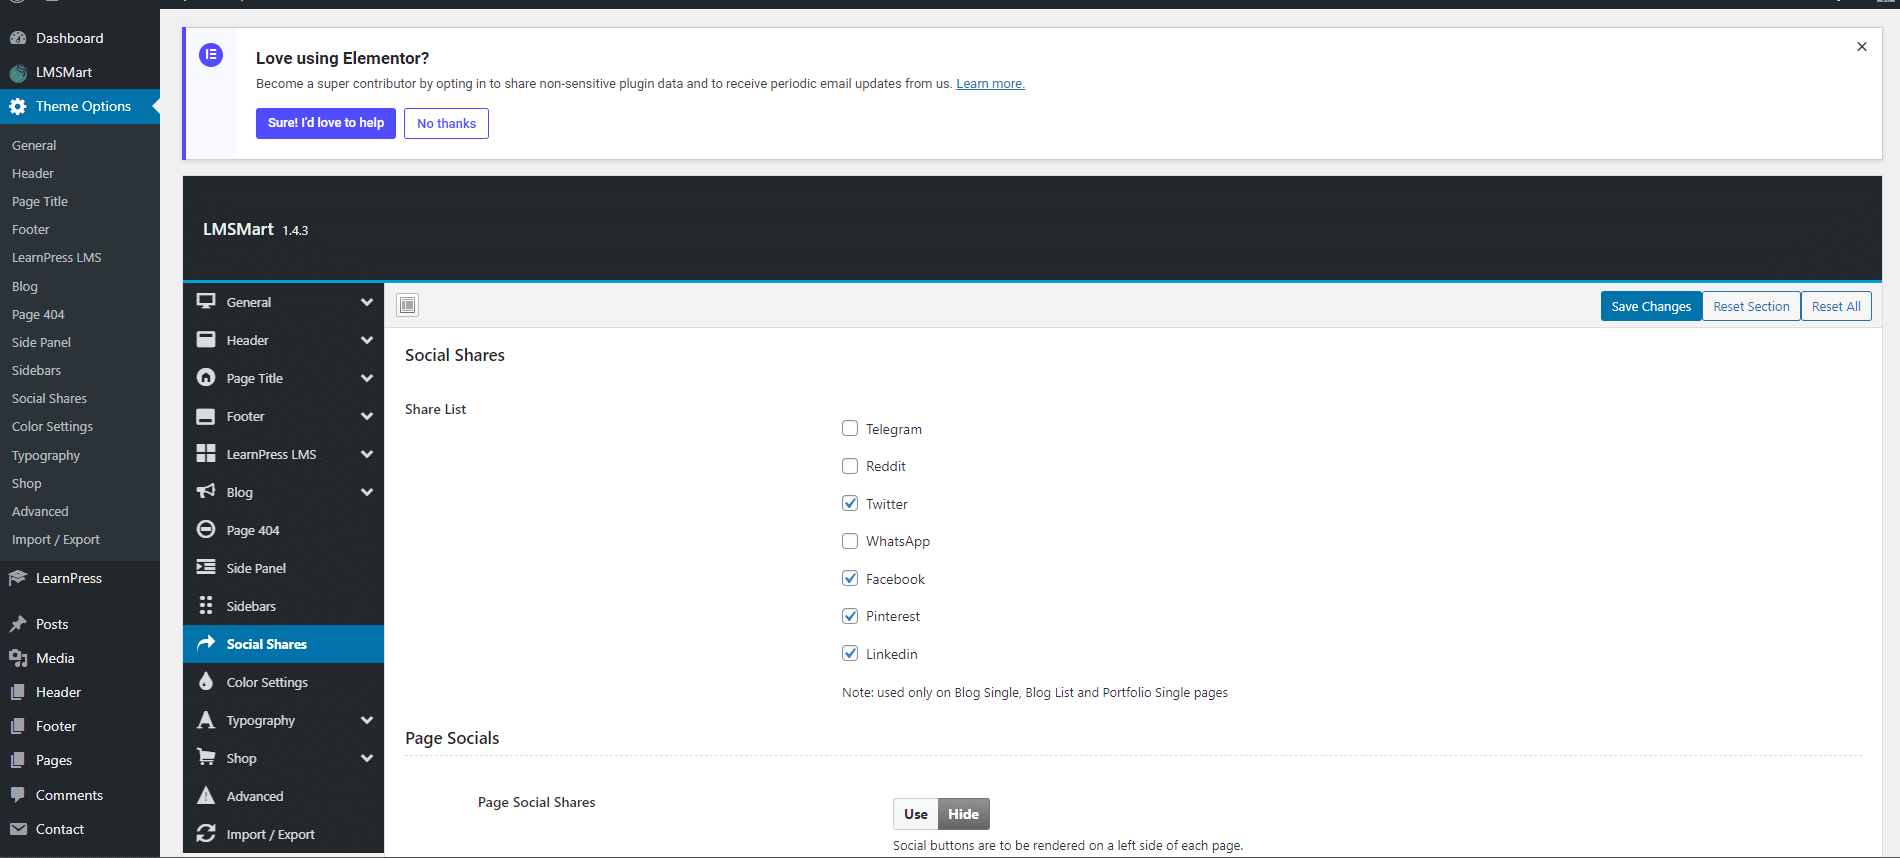
Social Shares
You can add social icon links from here.
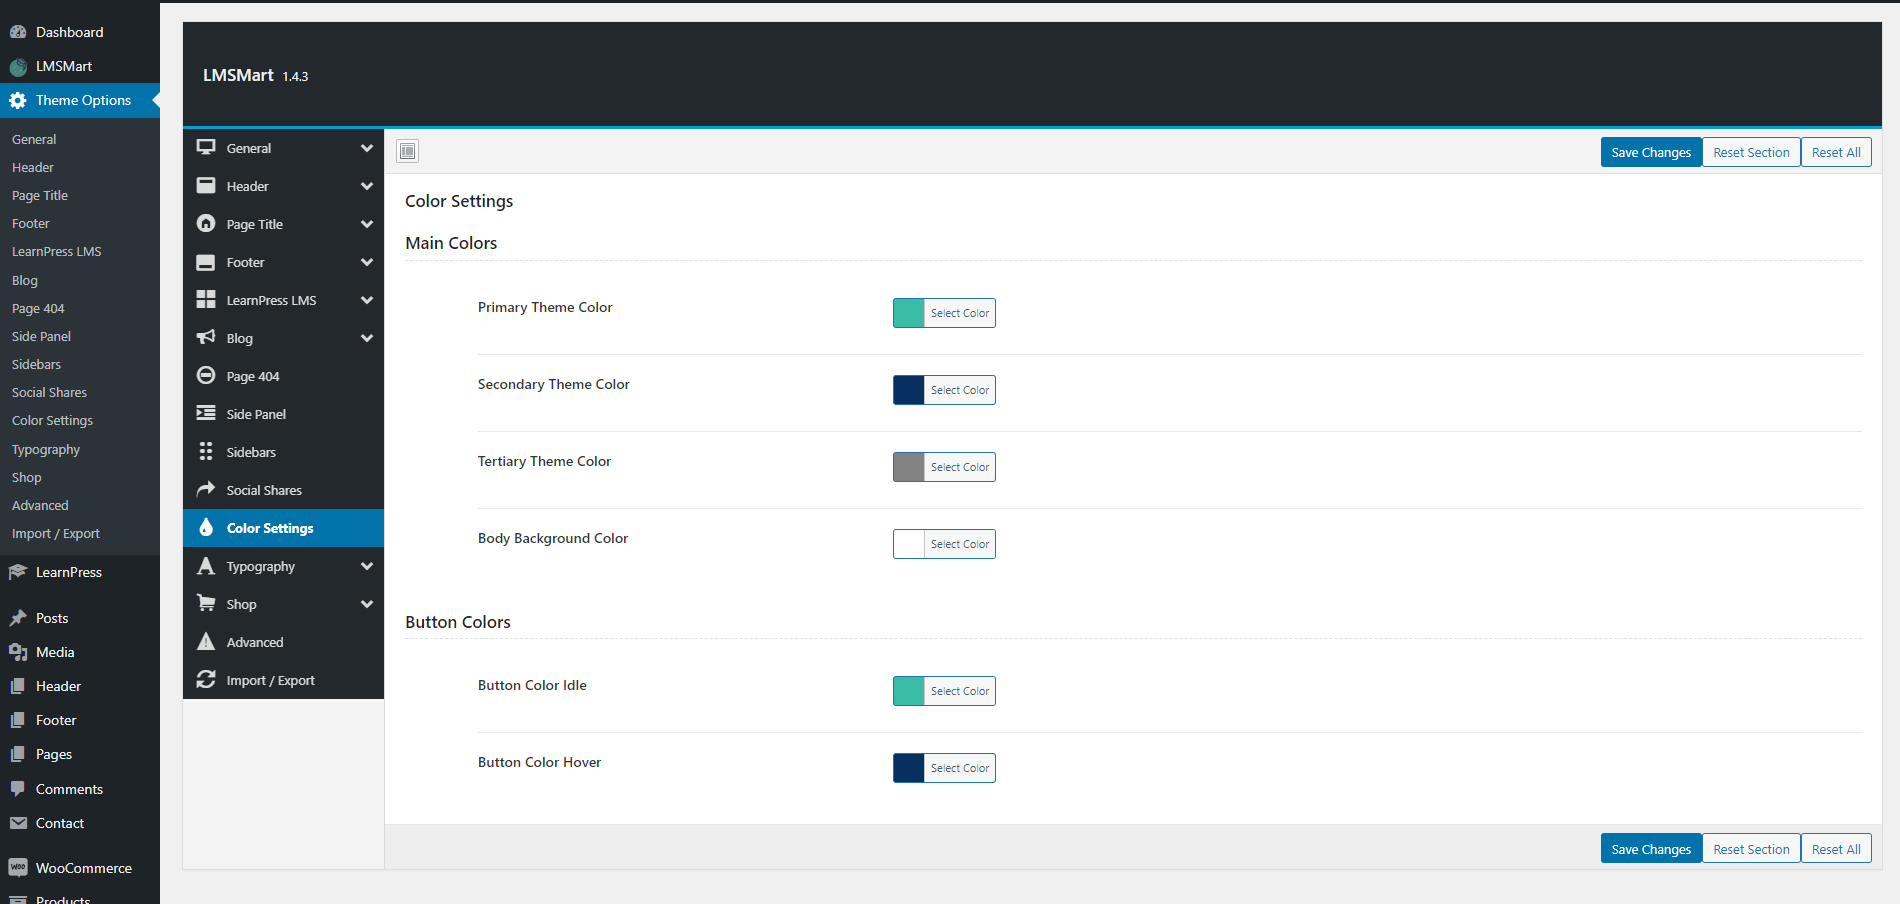
Colors Settings
You can select global theme colors from here. You can change primary color, secondary color, text color, button color etc.
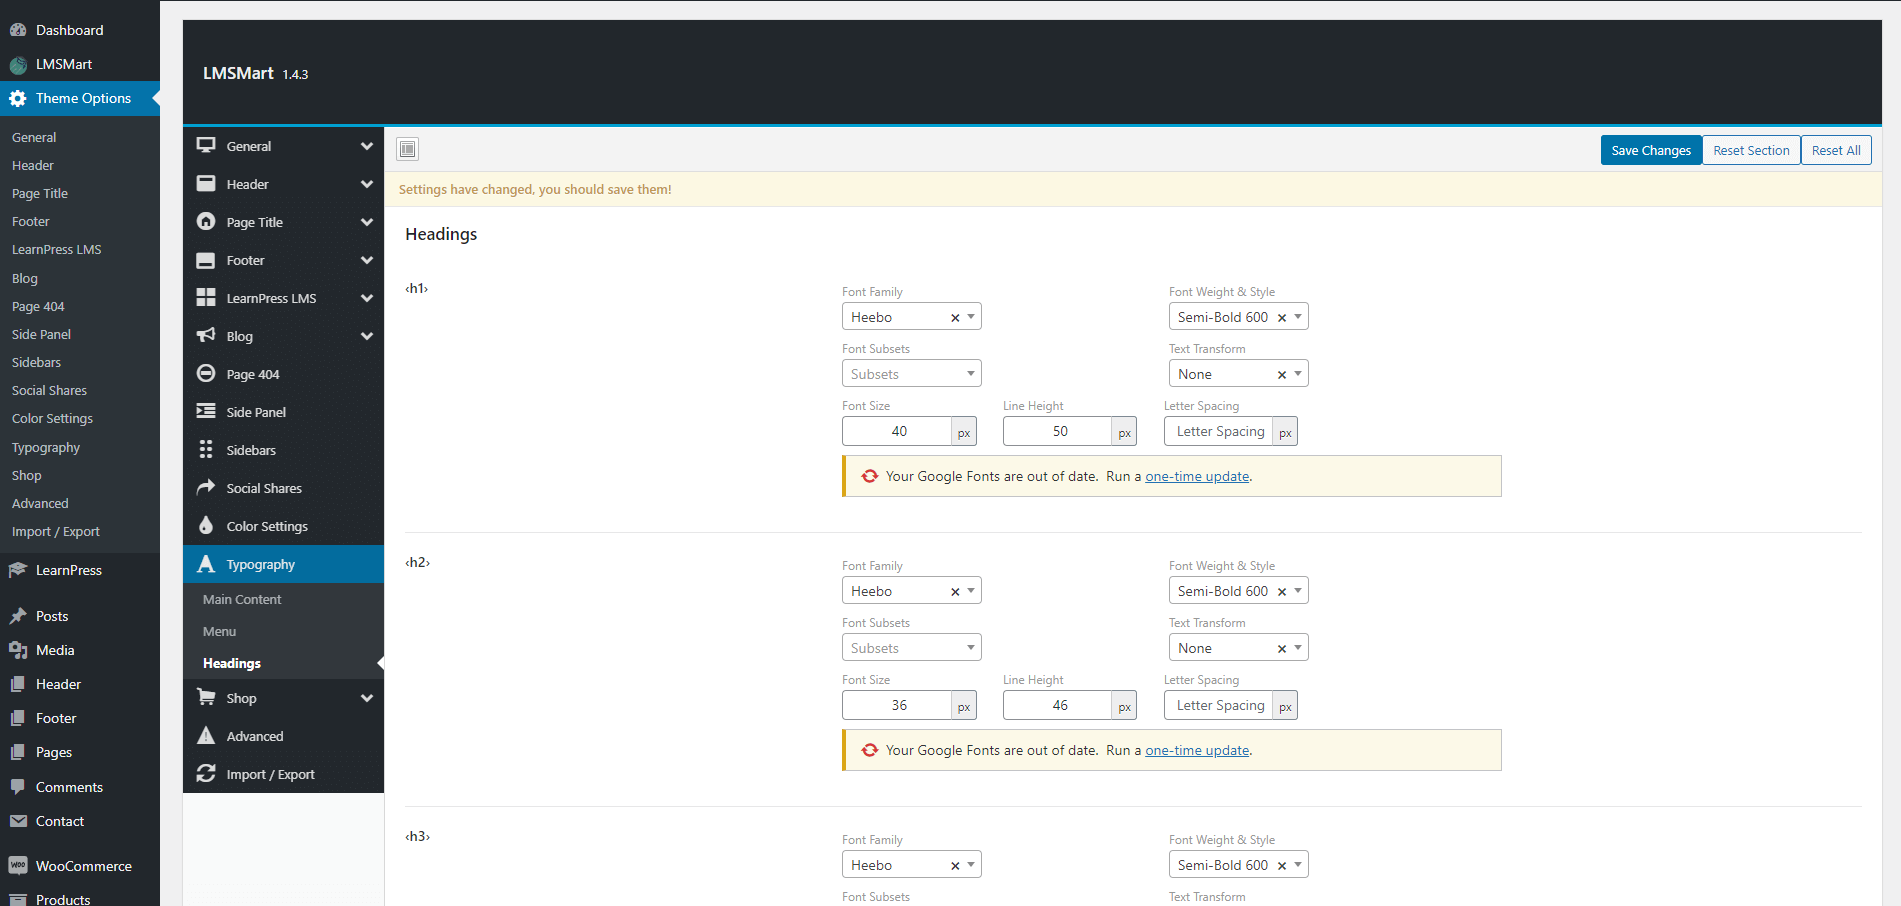
Typography
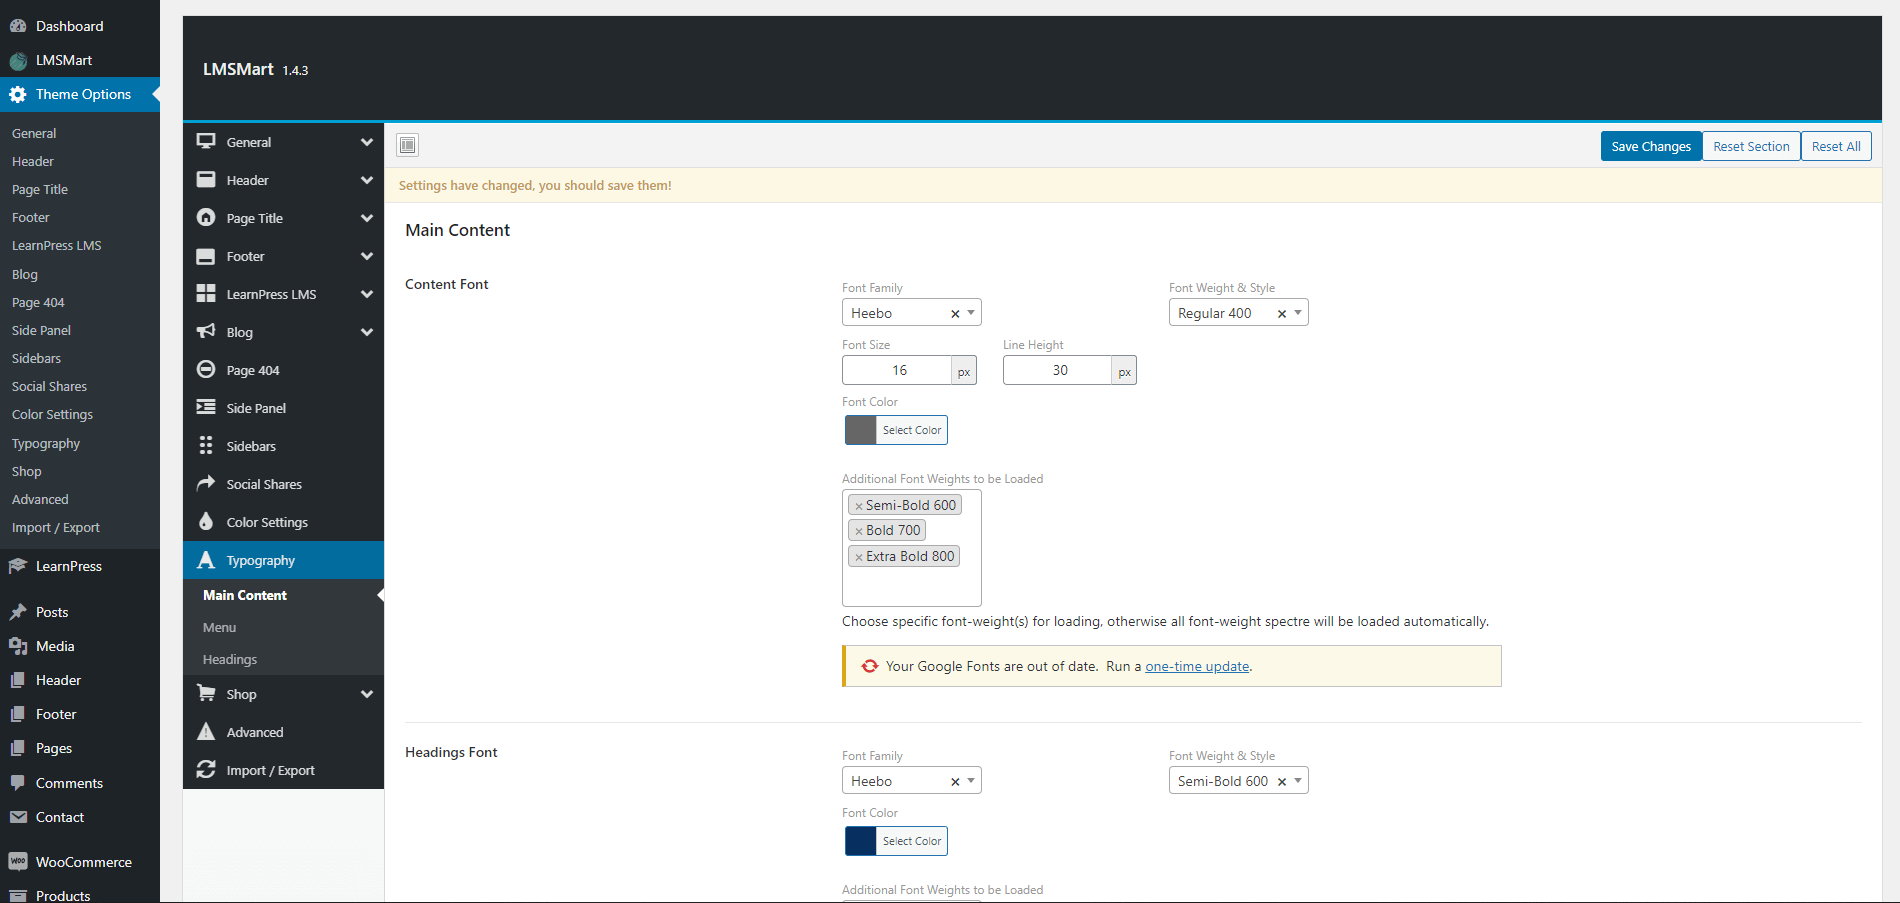
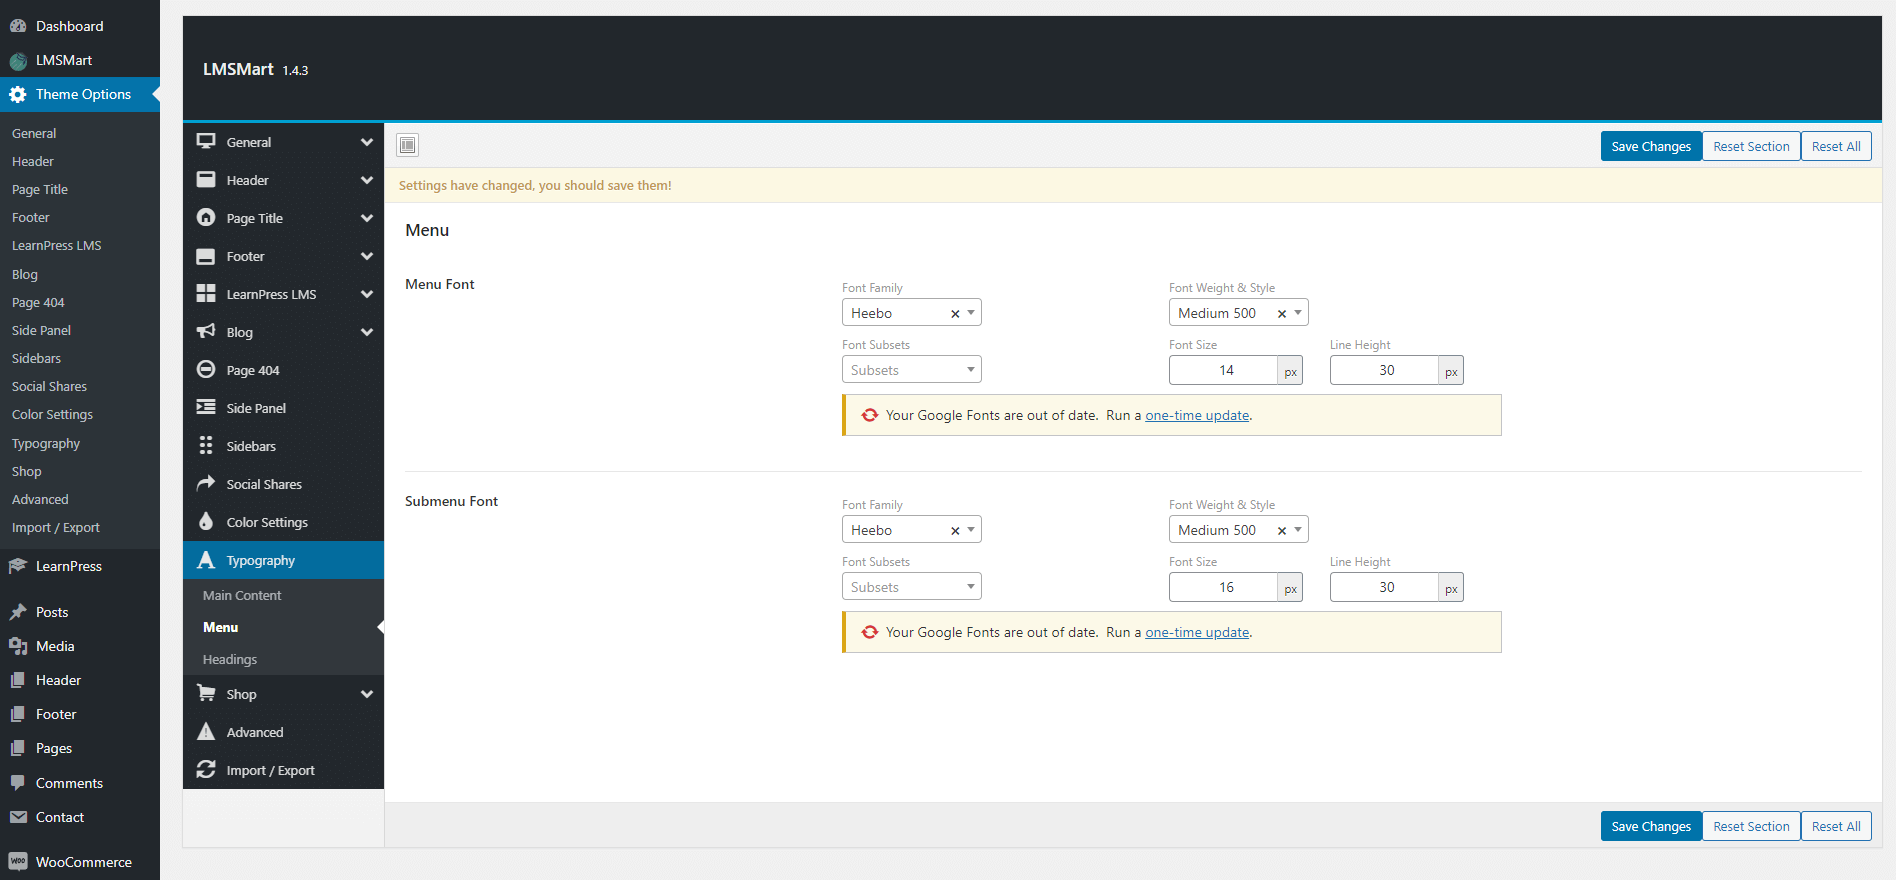
Using this option you can change Font, color, Font weight, Font Size etc for every page. It's a global settings
Main Content
In this section of typography you can change Font family, Font size, text color, heading font, body font of every page. See the screenshots below.
Menu
In this section you can set the typography of menu and submenu items.
Heading
In the section you can change all kind of heading typography on you site.
LMS Option
LMS option could be different and it based on which LMS supported demo you've imported. Our theme supports 3 different LMS plugin. For example if you've imported LearnPress Demo LearnPress plugins will installed and you can see LearnPress options.
LearnPress
Courses and Lessons
Using these settings you can create, edit or add a new course or lesson. follow the video below.
Quizzes
In this setting you can see the list of all quizzes in the Course. You can Edit, Delete, Add an new quize from here. Follow the video below.
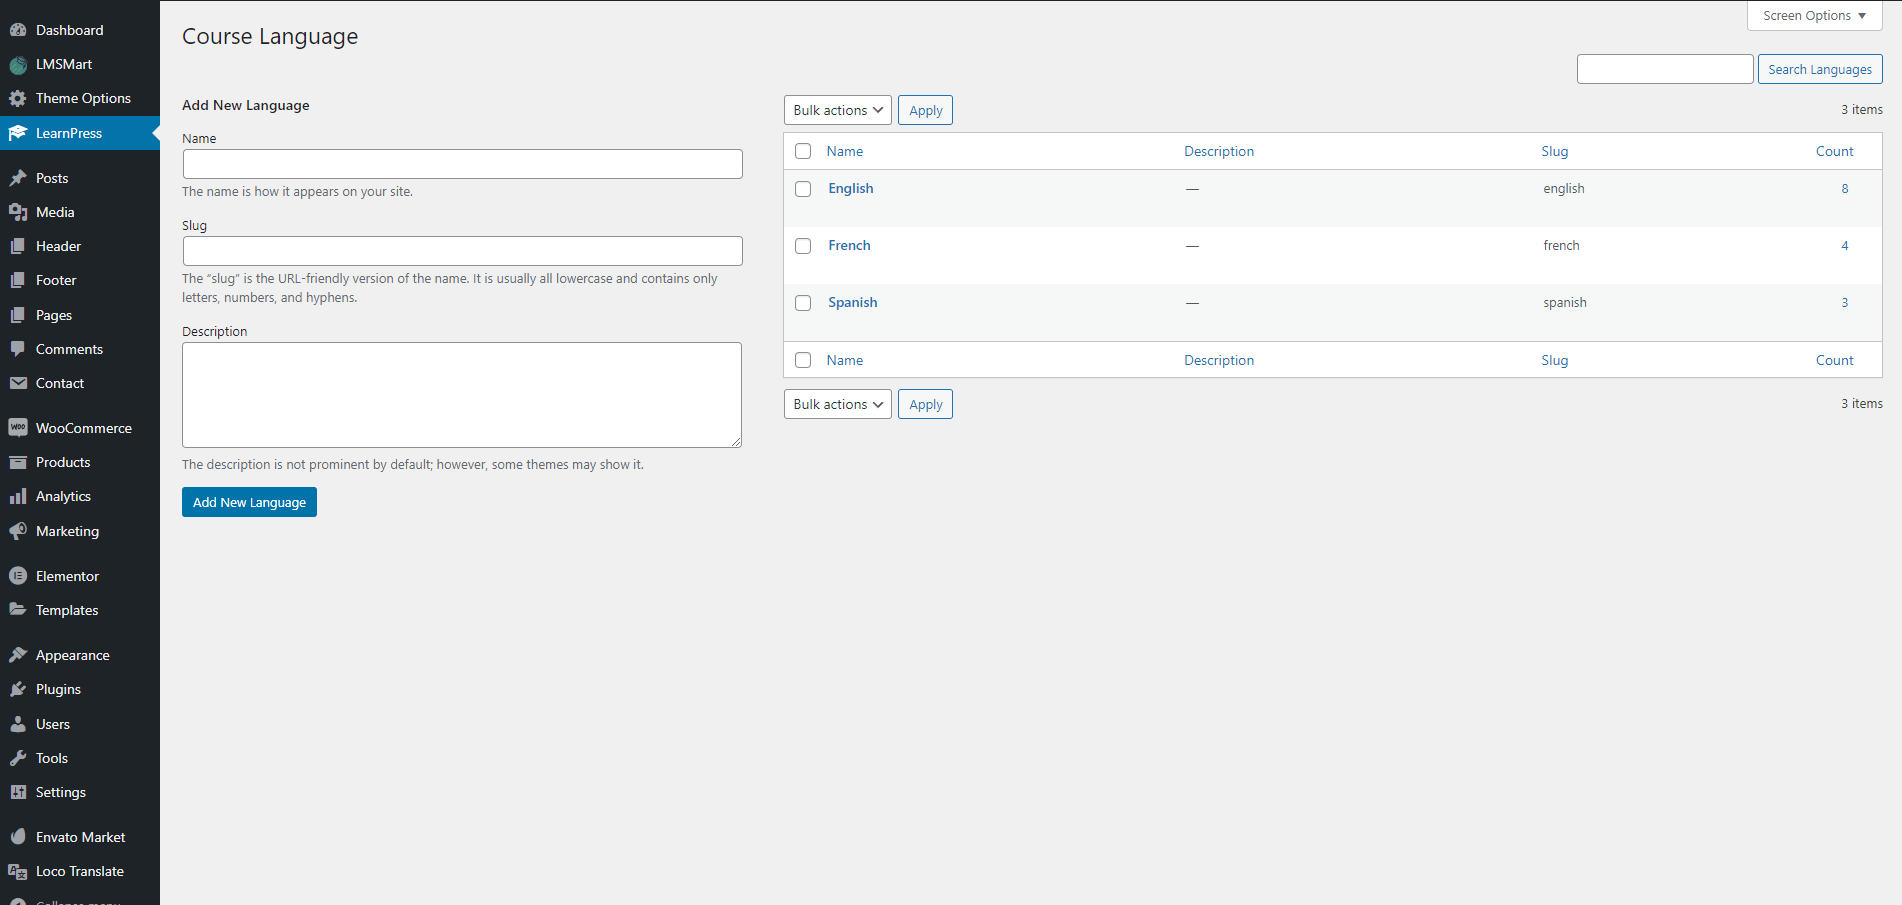
Languages
From this setting you can see the course language lists. You can also add new language from here.
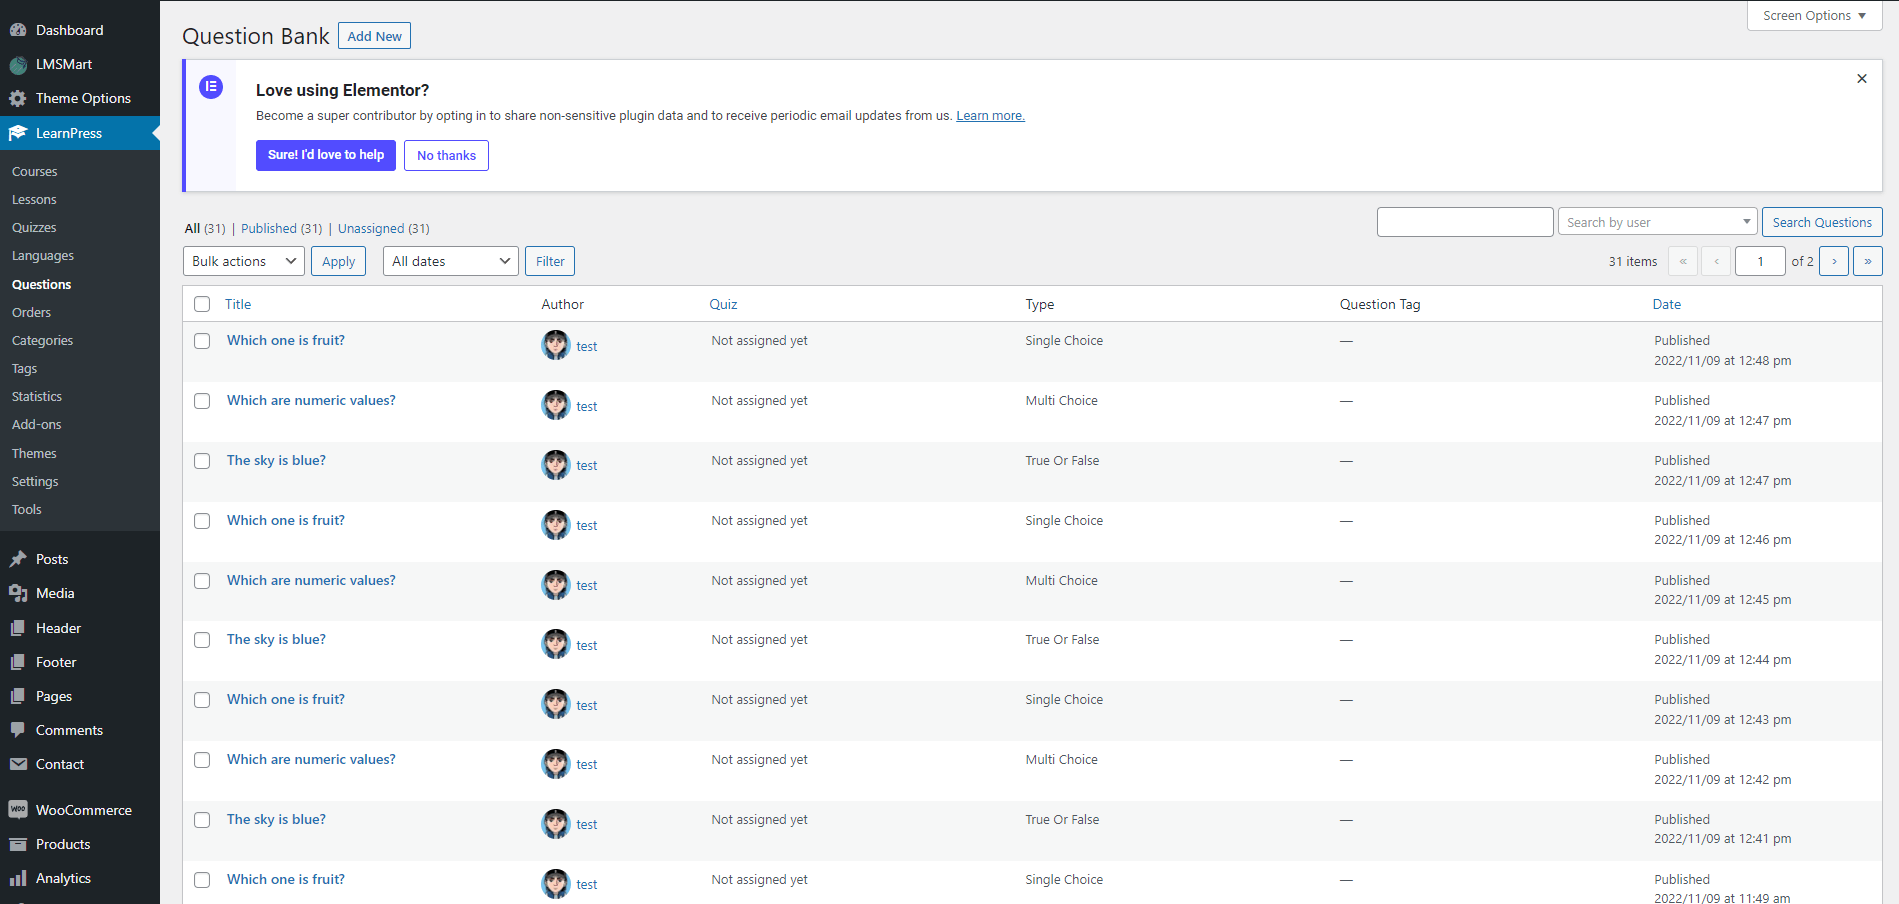
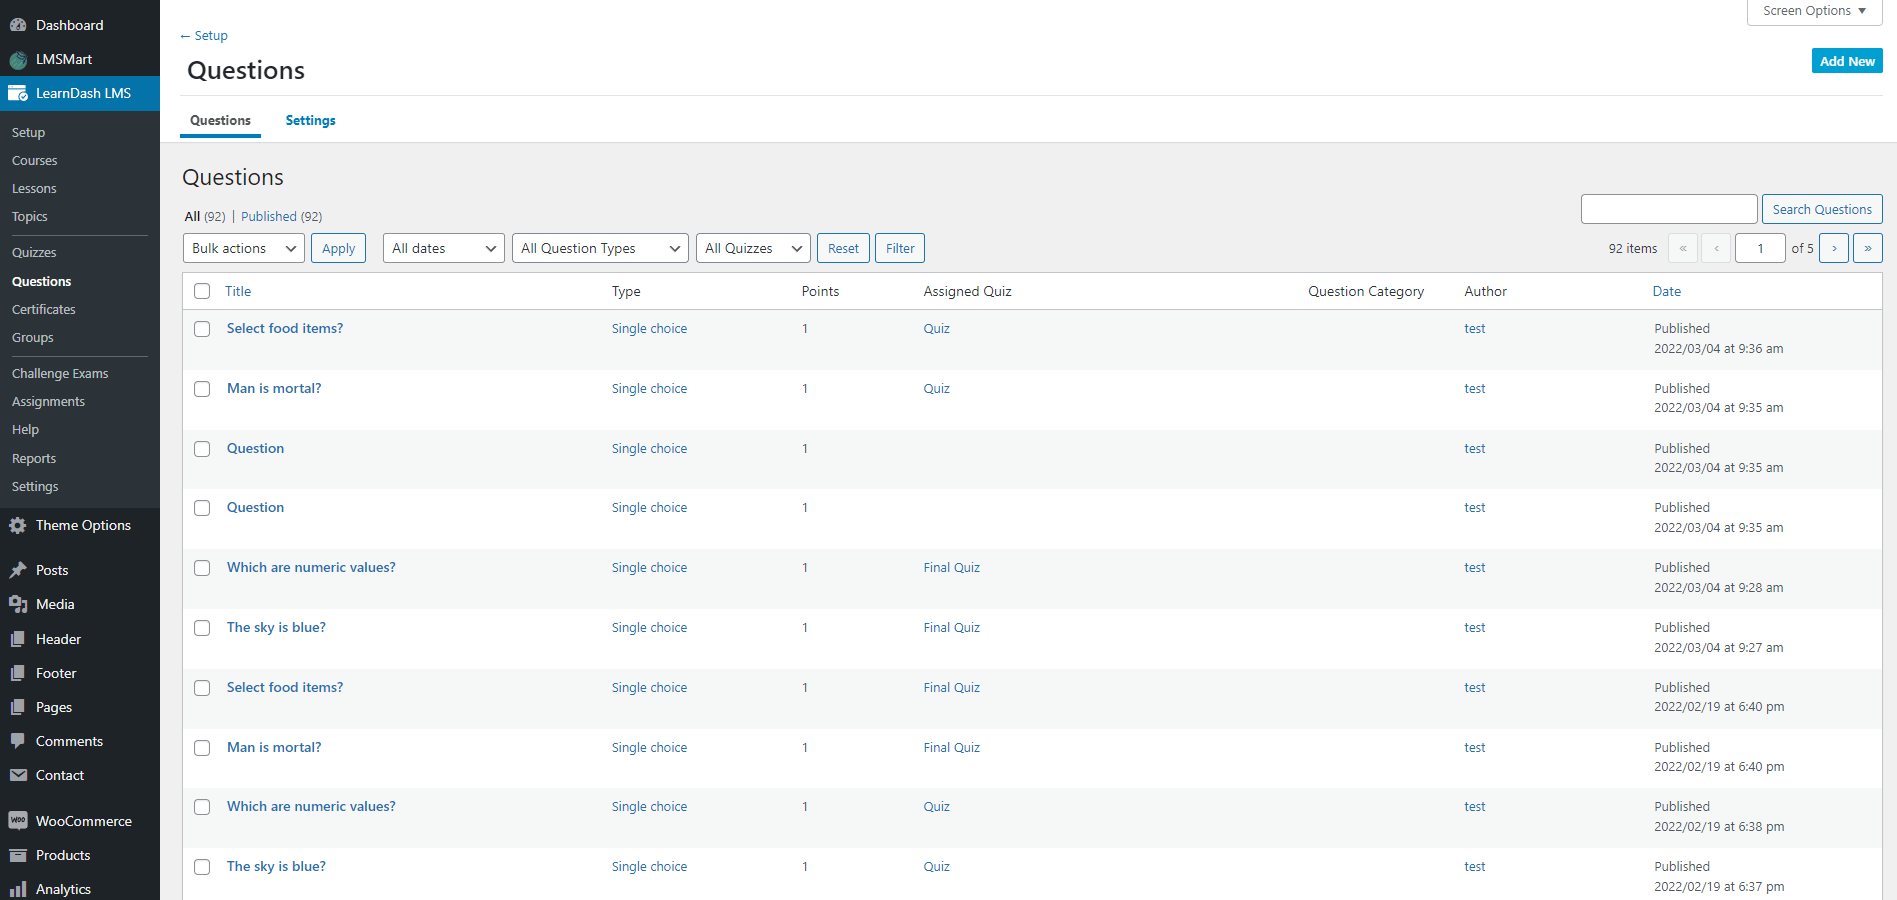
Questions
In this setting you can see the list of all Questions in the Course. You can edit, delete, add an new questions from here. You can find out which questions is assigned with which course.
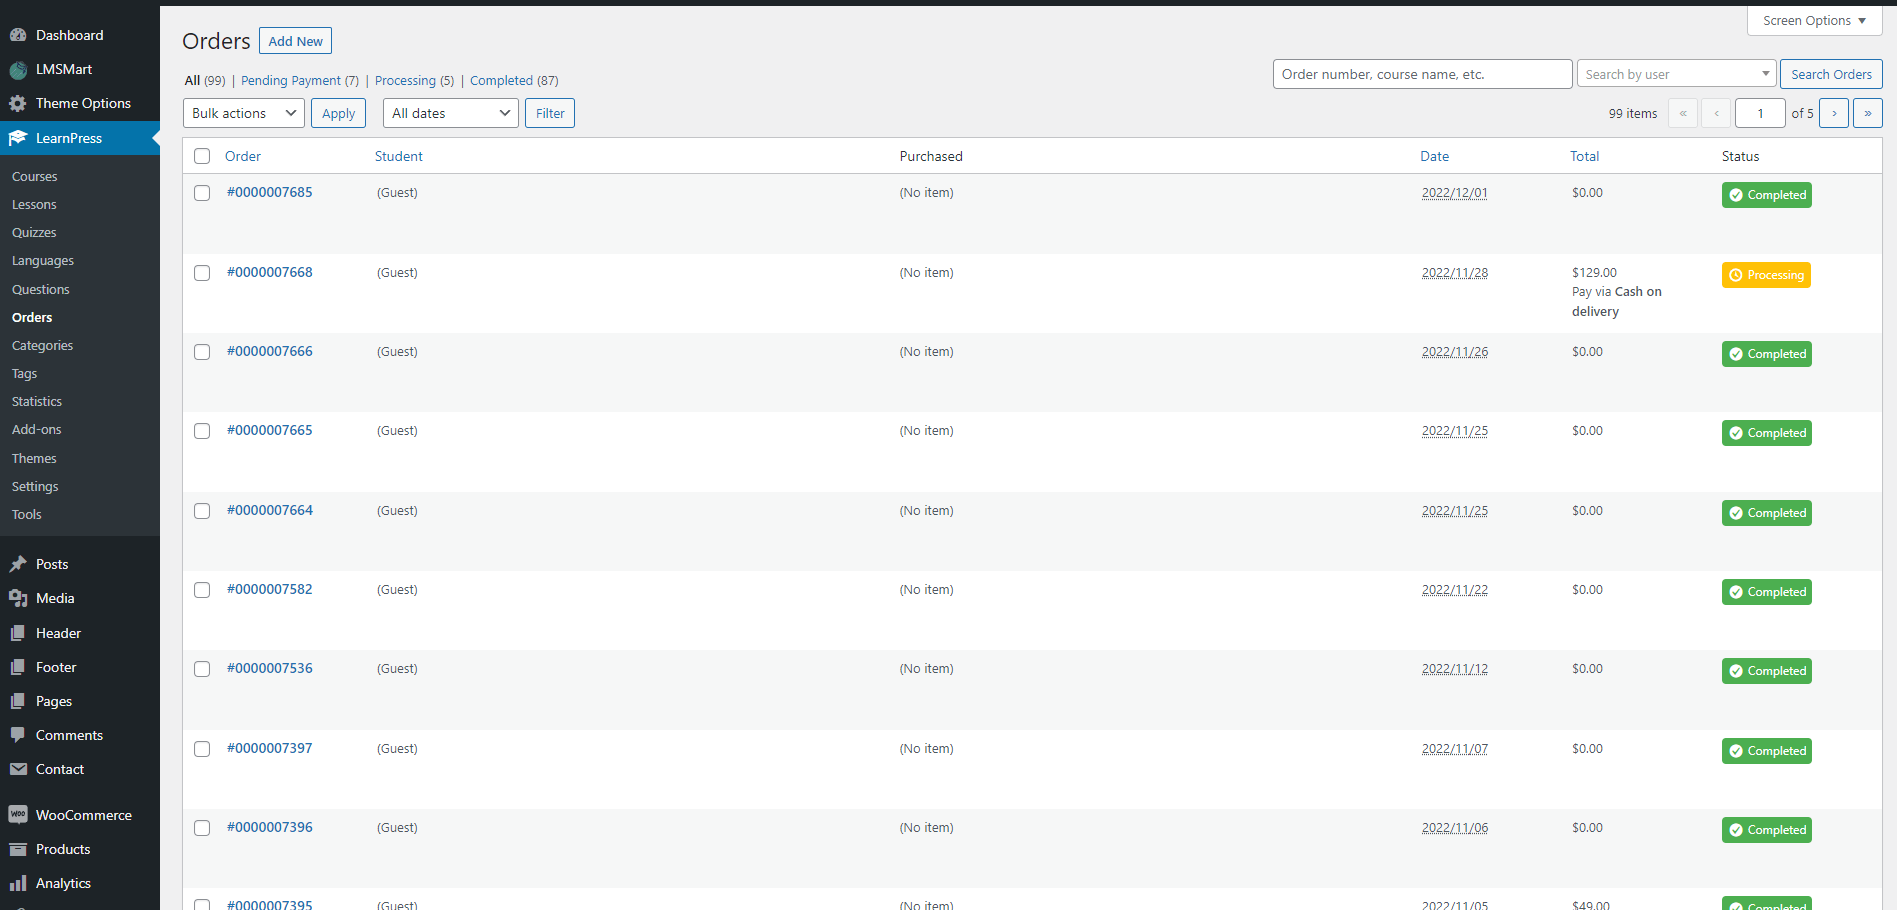
Orders
From here you can see how many order you have. You can see that how many courses has been sold out from your site. And who is the buyer. And you can see the order status if they are completed or processing.
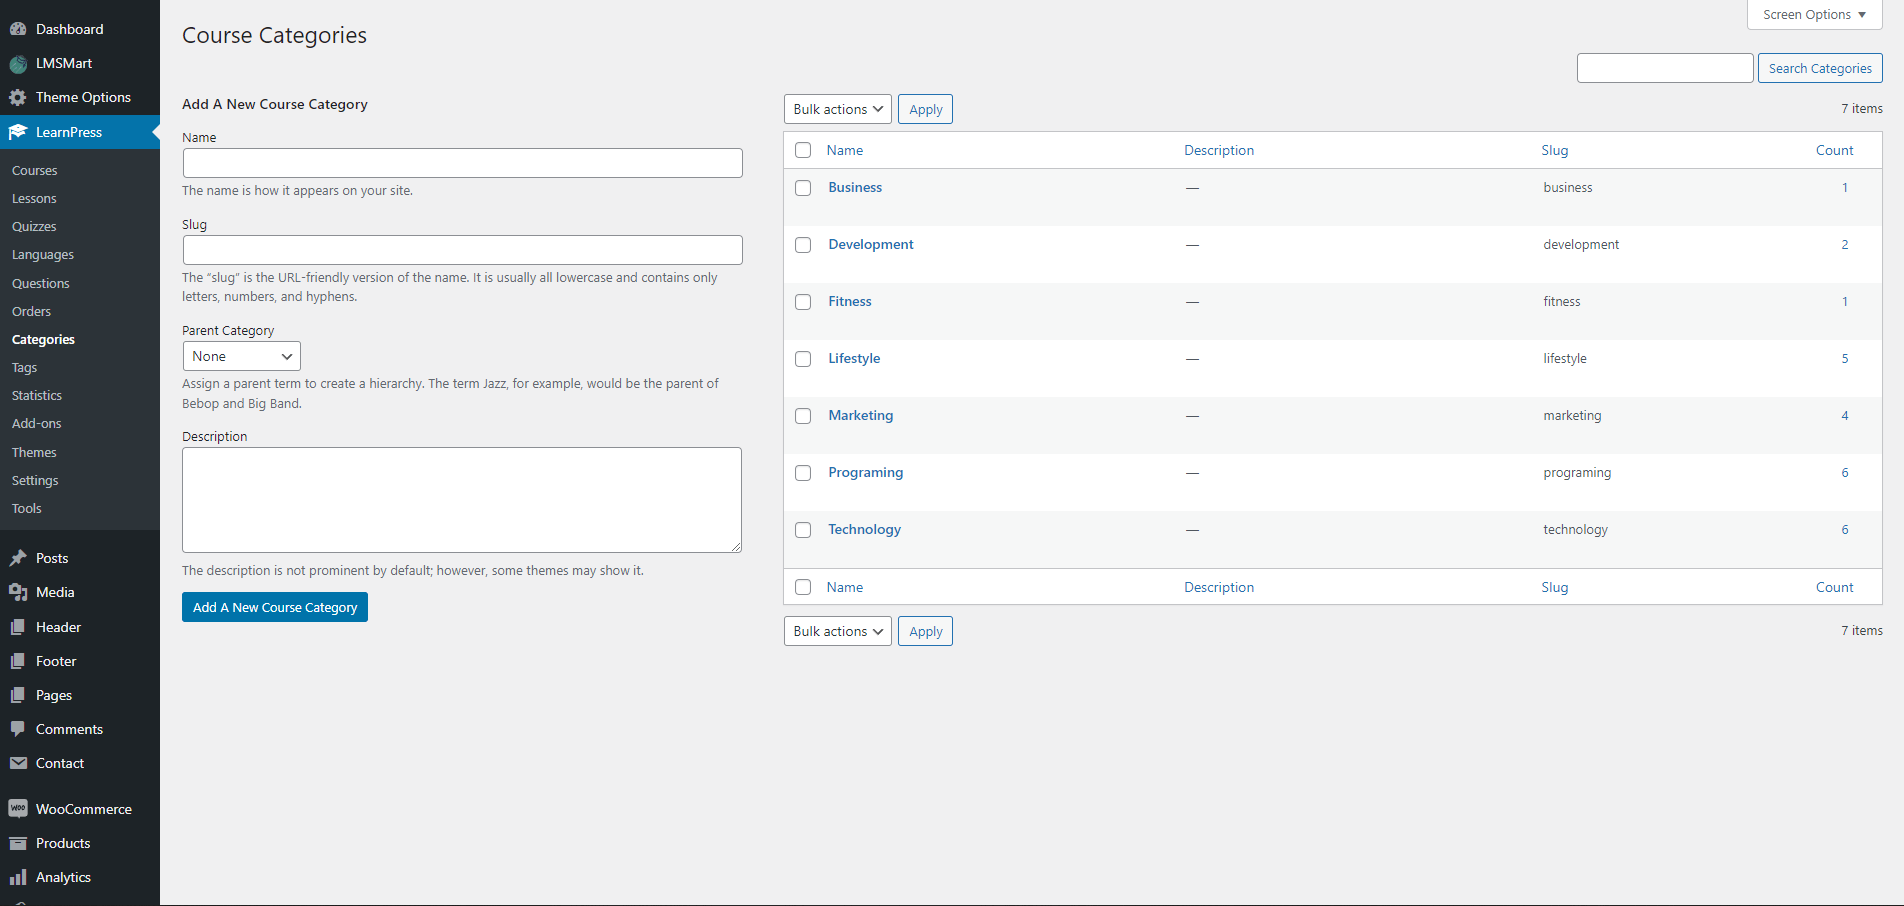
Categories
In this section you can see the course categories list. You can add new categories or edit existing categories from here.
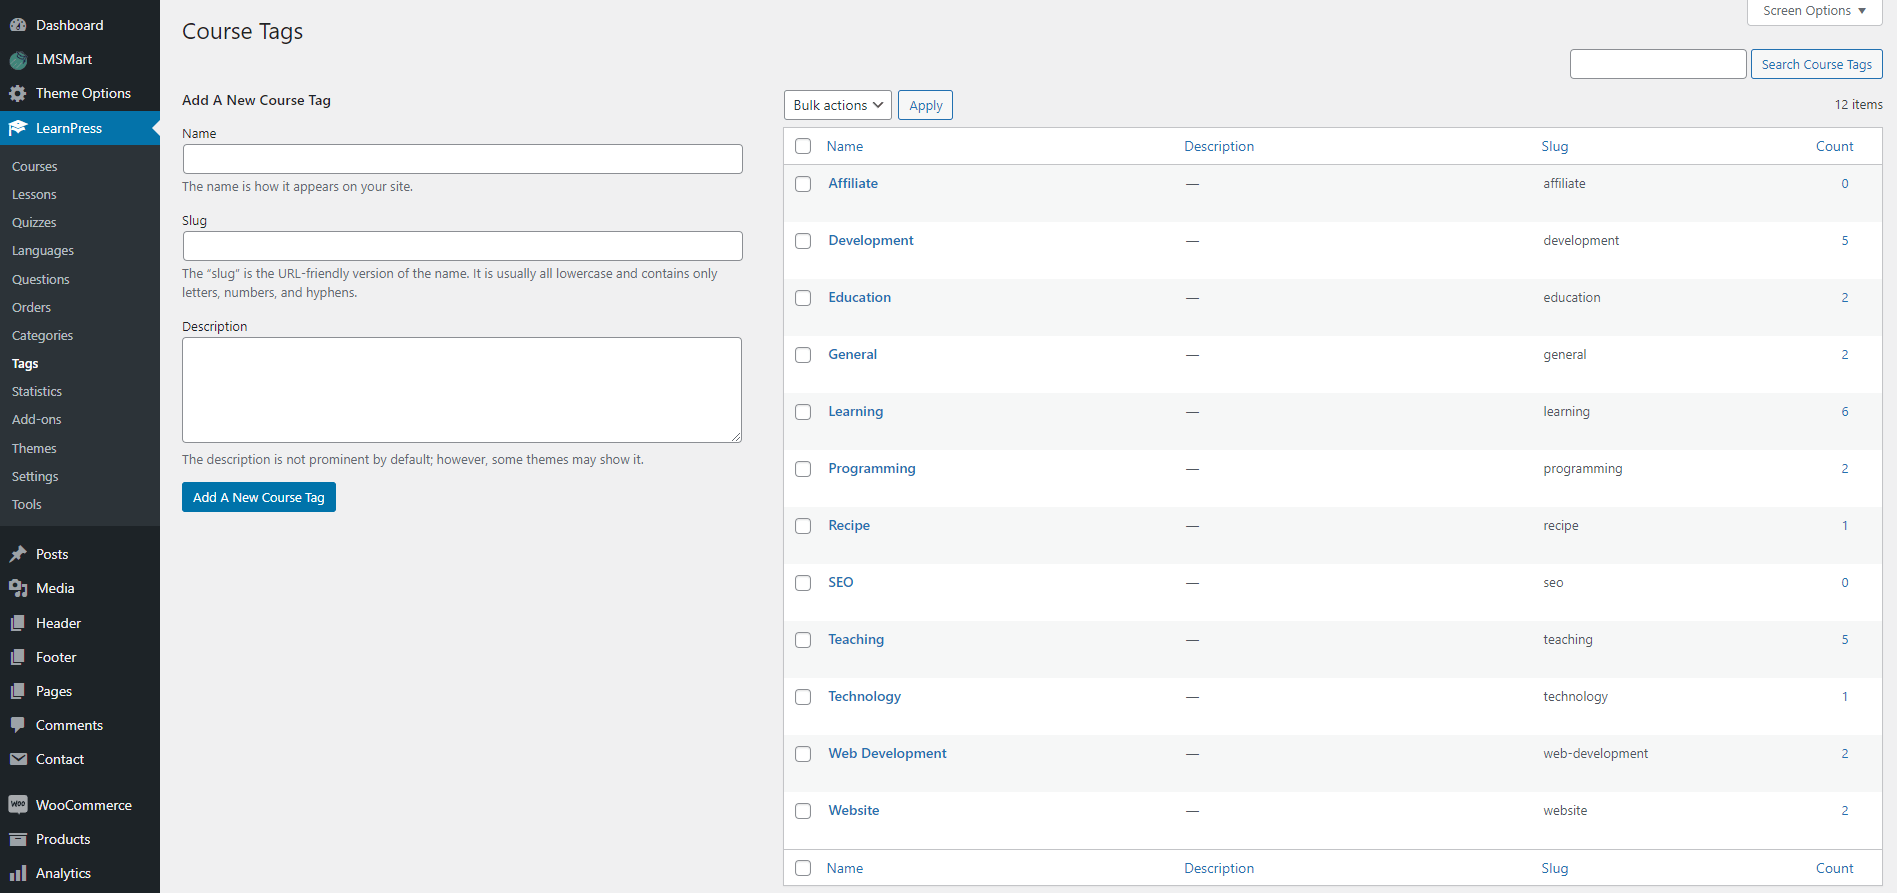
Tags
In this section you can see the course tags list. You can add new tags or edit existing tags from here.
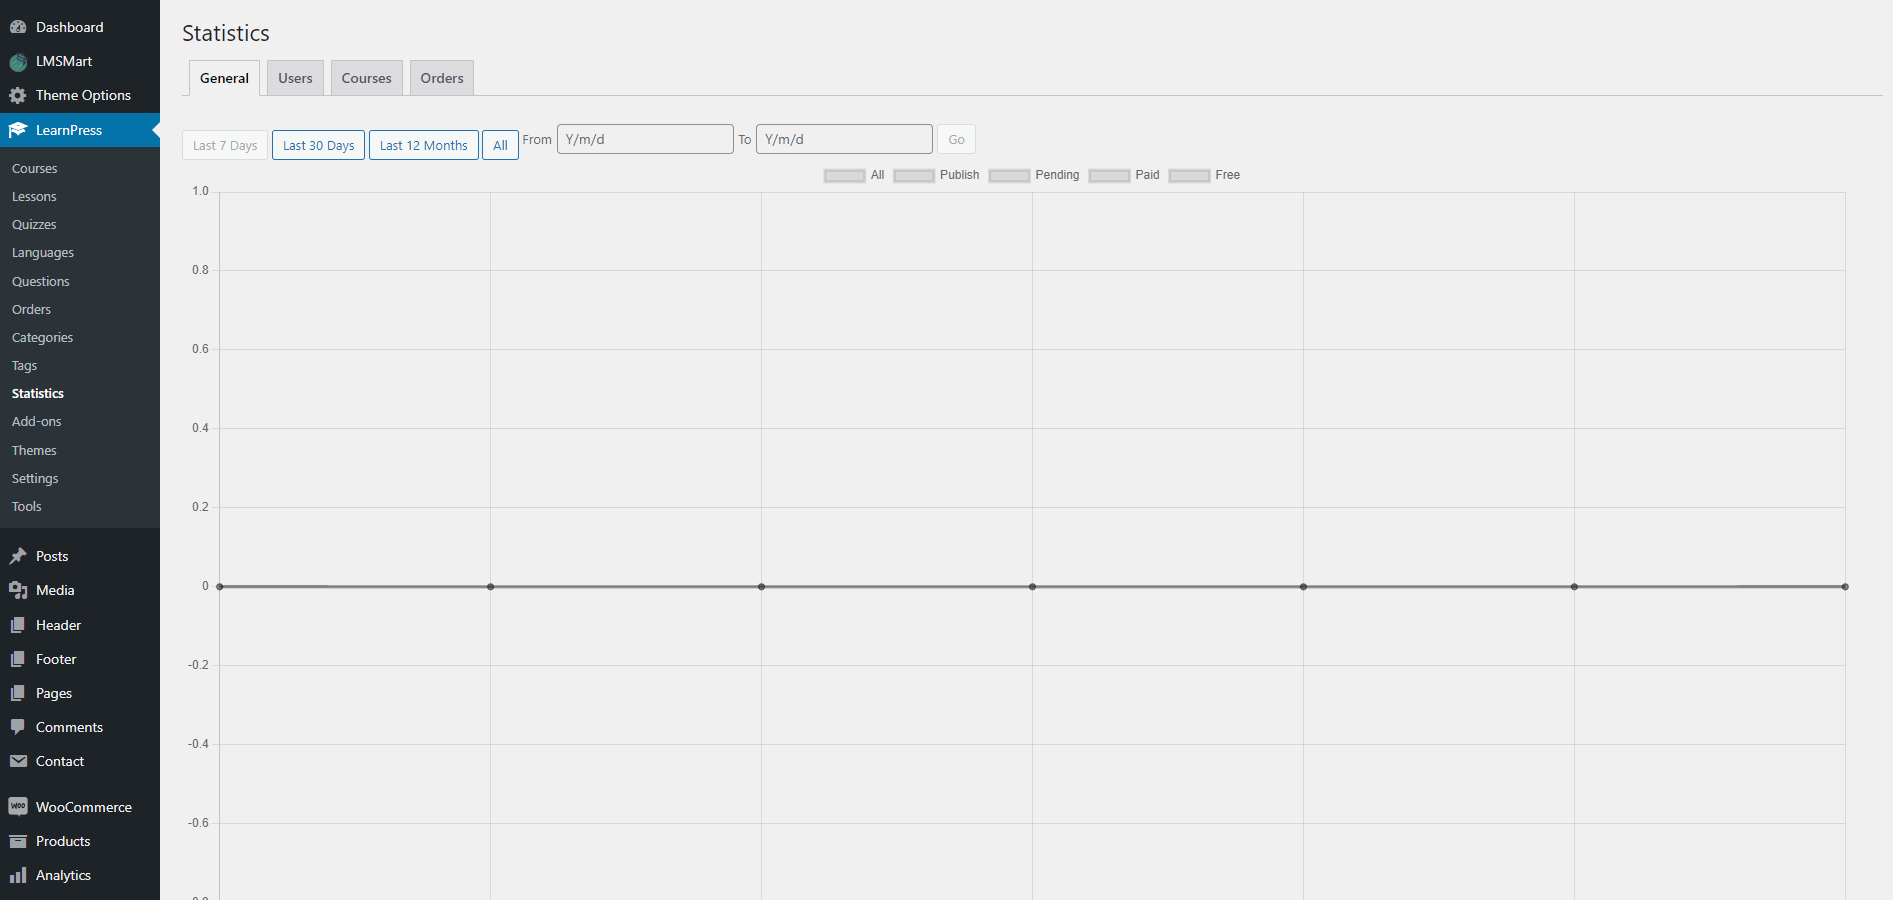
Statistics
From here you can see the statistics of your site. You can see how many people has visited on your site and you can also see course statistics, order statistics etc.
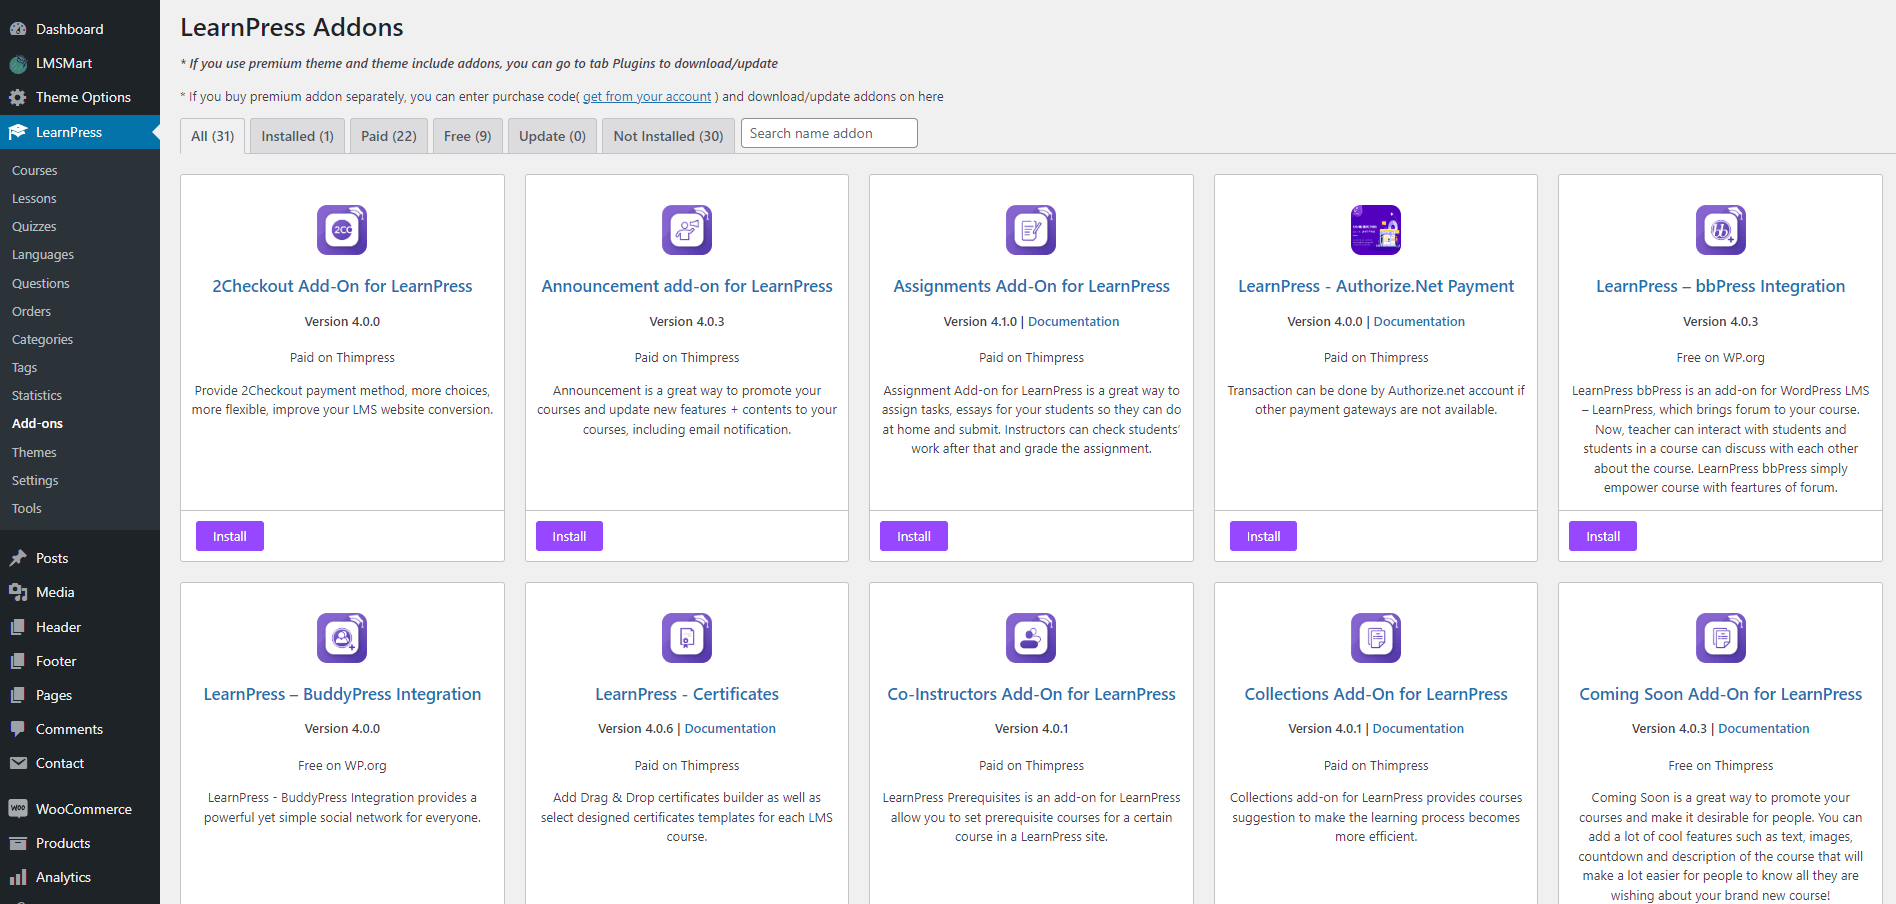
Add-ons
From here you can install add-ons such as assignment add-ons etc. There are few add-ons that are for free. And most of them are paid for LearnPress LMS plugin
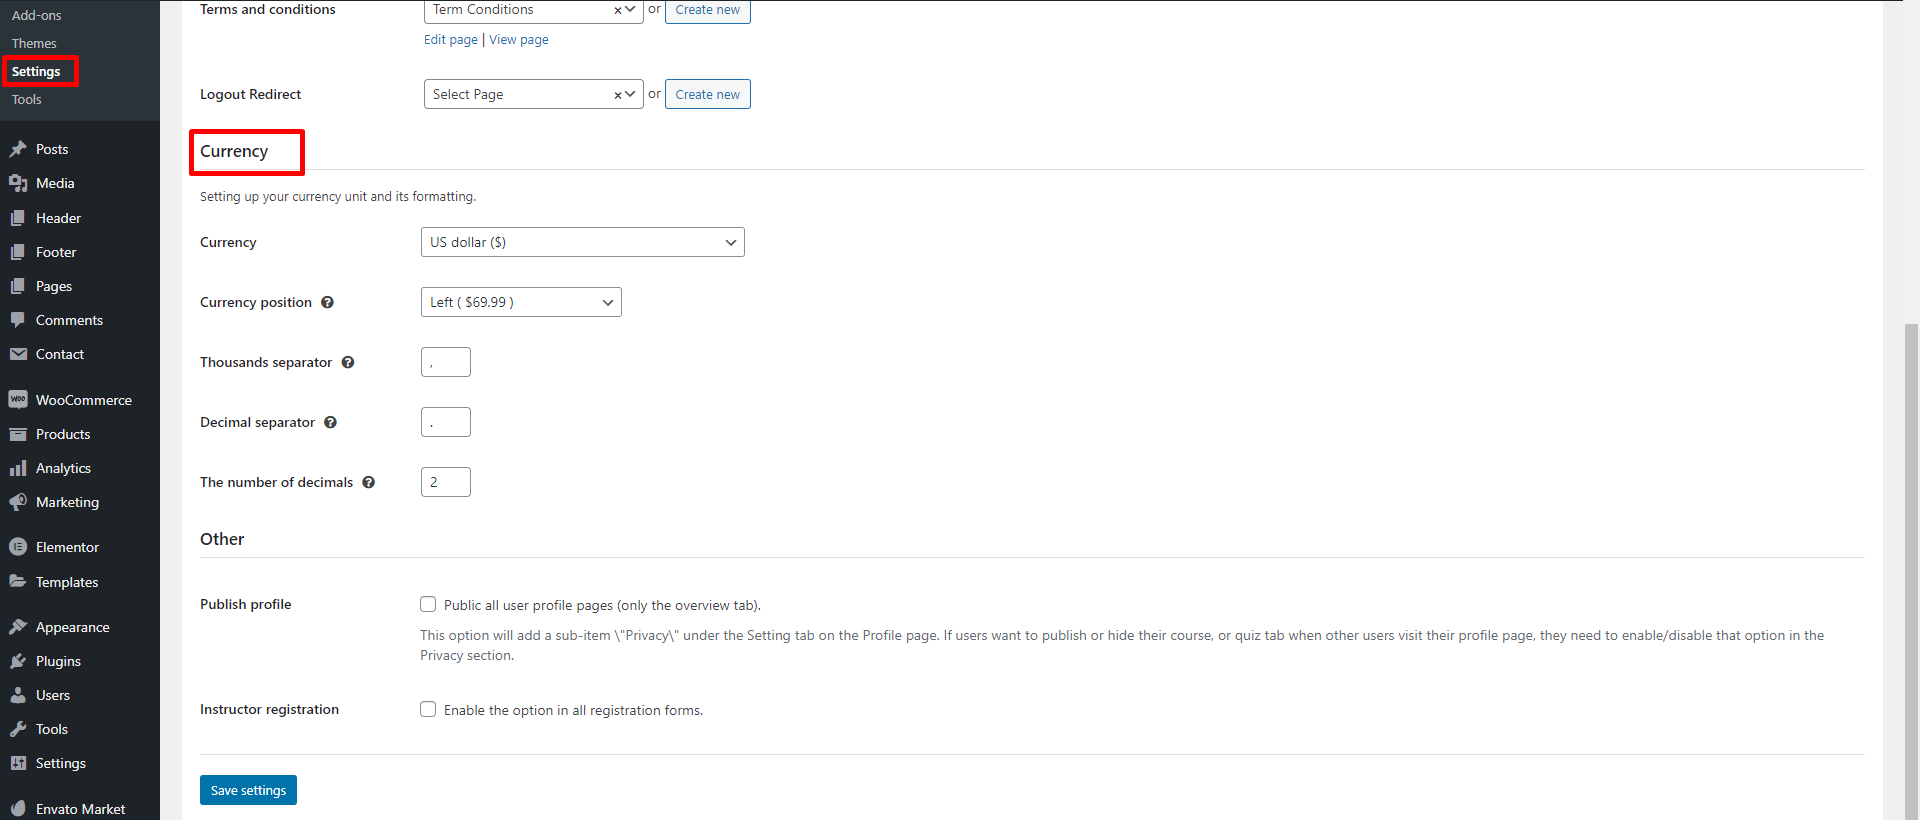
Settings
In the general settings of the LMS you can set the pages like the checkout page, profile page, terms and condition page and many more from the page setup. See the screenshots below
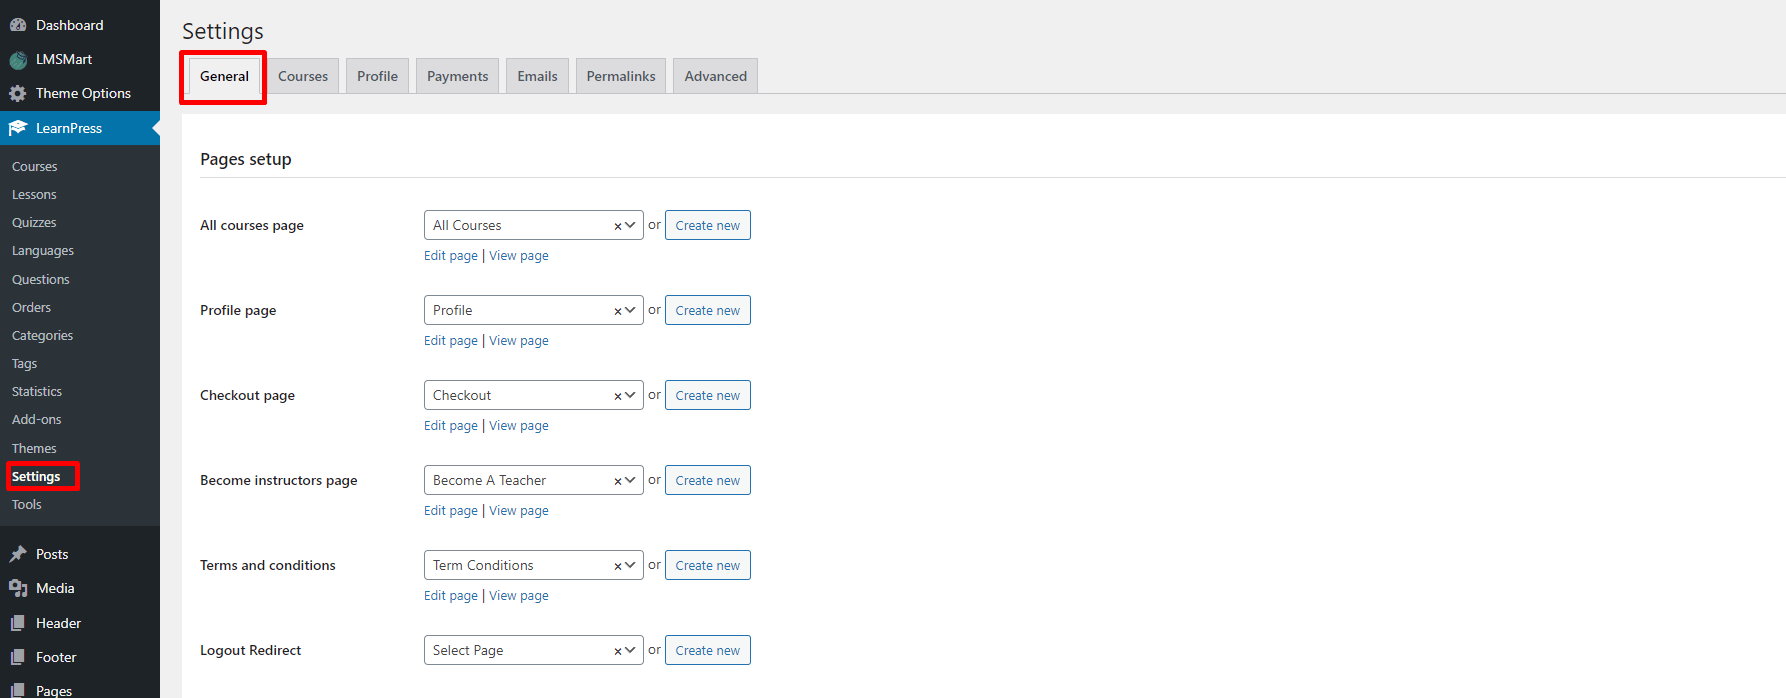
You can also find currency settings in general section. You can select your currency, currency position, thousands separator, decimal separator and The number of decimals from here. See the screenshots below
If you wanted to know about more settings of LearnDash LMS follow the video below.
LearnDash
Courses
In this setting you can show the list all courses of your education website. From here you can edit courses, delete courses, add new courses etc. You can edit course's name slag etc.
Lessons & Topics
In this setting you can see the list of all lessons or topics in the course. You can edit, delete, add an new lesson/topics from here. You can also see which lesson/topic is assigned with which course.
Quizzes
In this setting you can see the list of all quizzes in the course. You can Edit, Delete, Add an new quizze from here. You can find out which quizze is assigned with which course. See the video below.
Adding Quize
Learn how to add quizes to your course in the video below.
Quizze Settings
Here is some other quizze settings in the video below.
Questions
In this setting you can see the list of all Questions in the Course. you can edit, delete, Add an new questions from here. You can find out which questions is assigned with which course.
Certificates
You can create course certificates from here.
Groups
This section will explore how to manage students, as well as explain the concept of groups (memberships), and how you can leverage them to better manage, track and communicate with your users. Follow the video.
Challenge Exam
In this section you can set up challenge or exam for the students. Follow the video.
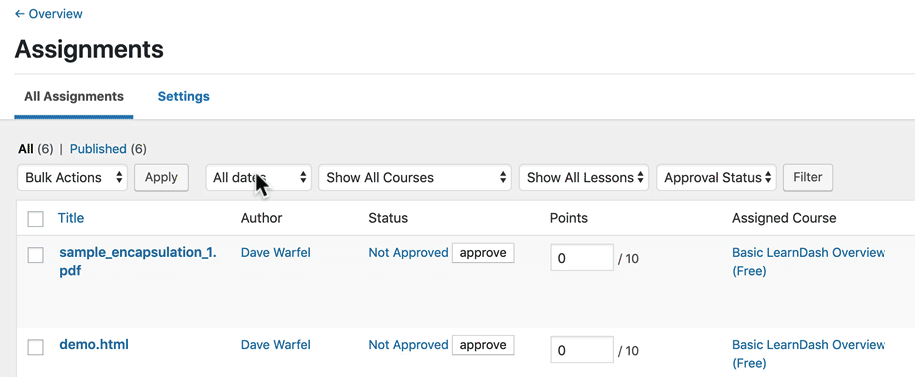
Assignments
Using this settings you can check submitted assignments of all students.
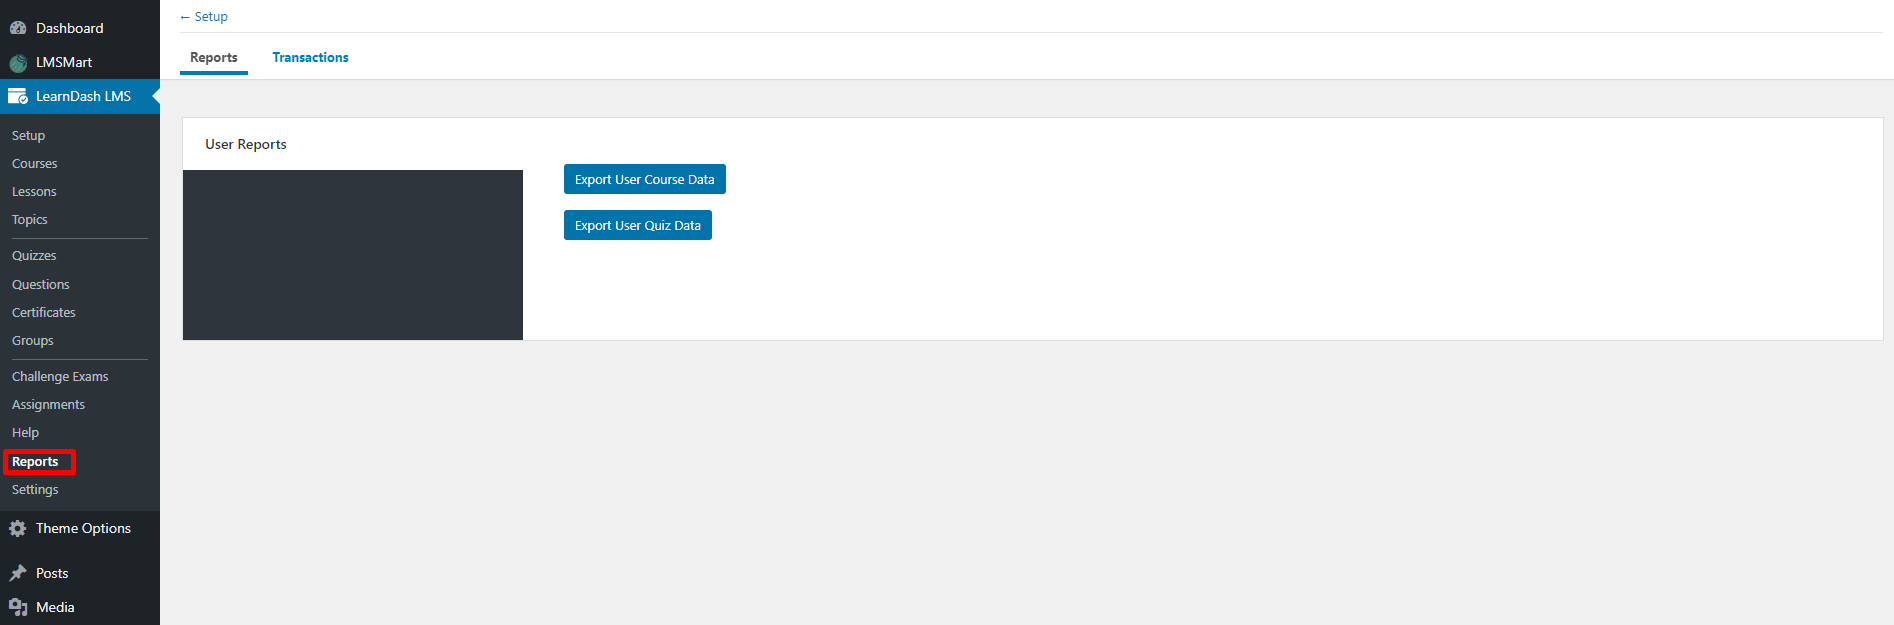
Reports
From here you can export user's quizze and course data.
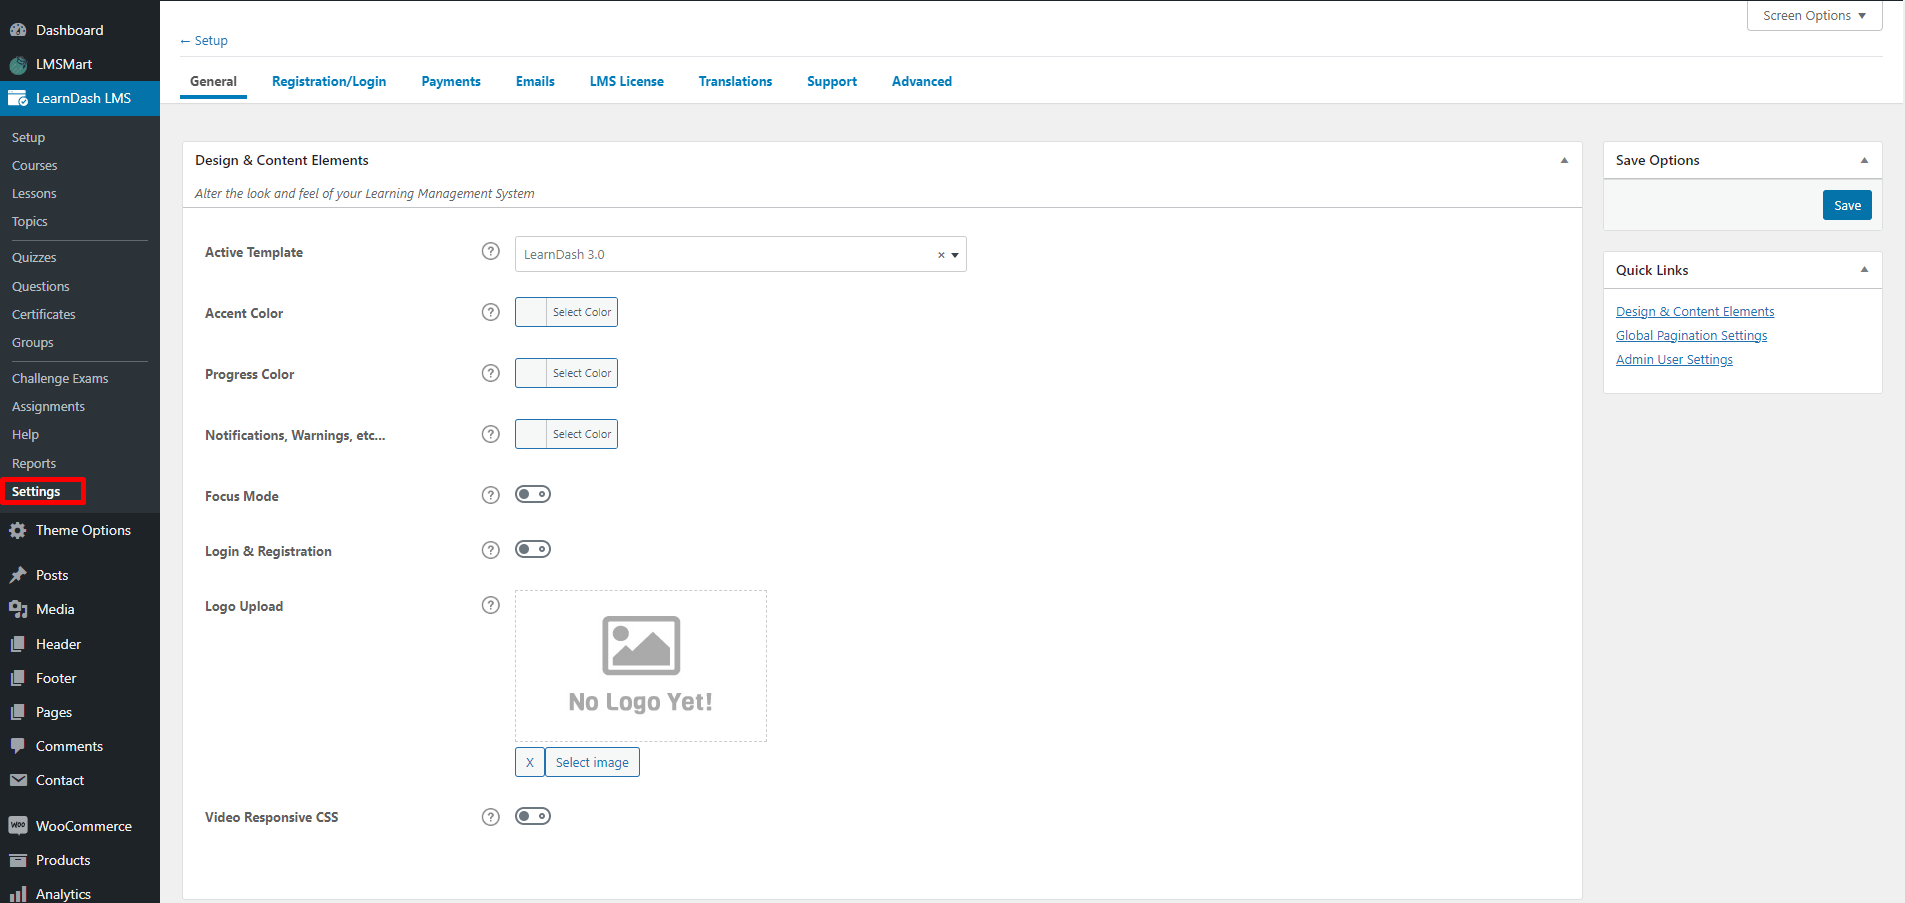
Settings
In the settings section you can see lots of other settings like following the screenshot below.
Currency
You can also find currency settings in general section. You can select your currency, currency position, thousands separator, decimal separator and The number of decimals from here. See the screenshots below
Focus Mode
If you want to know about focus mode on LearnDash follow the video below
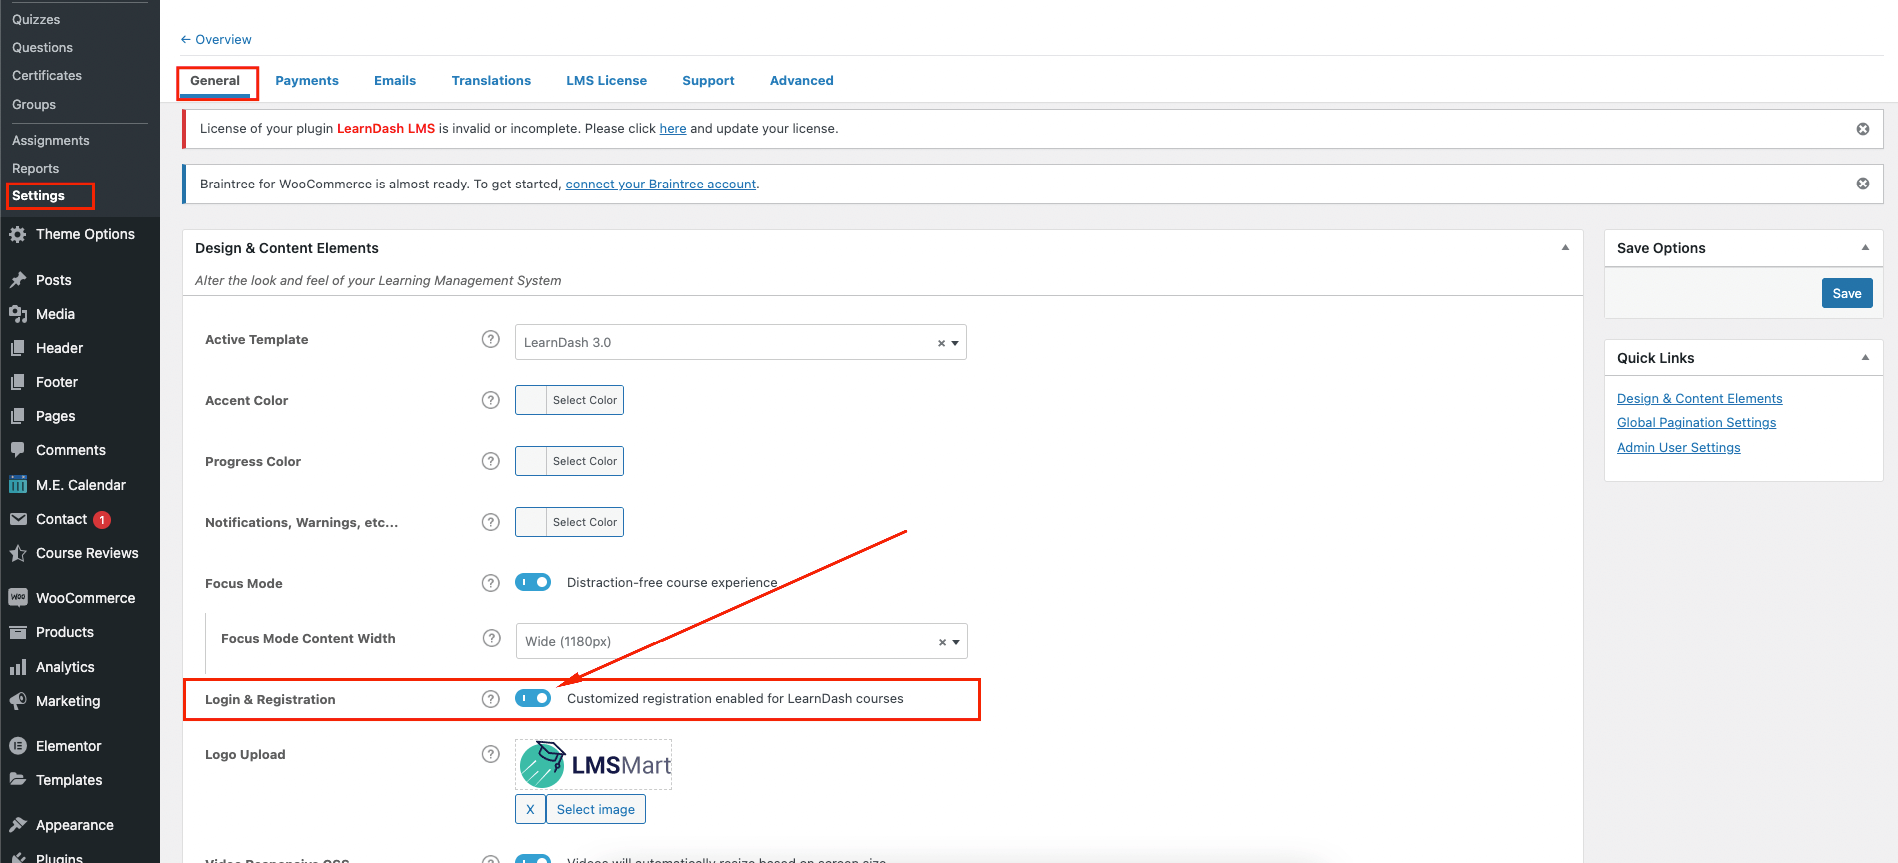
User Registration
Learn How to enable customized user registration for LearnDash courses.
Stripe Payment
In the video below learn how to add stripe payment feature in LearnDash.
Tutor
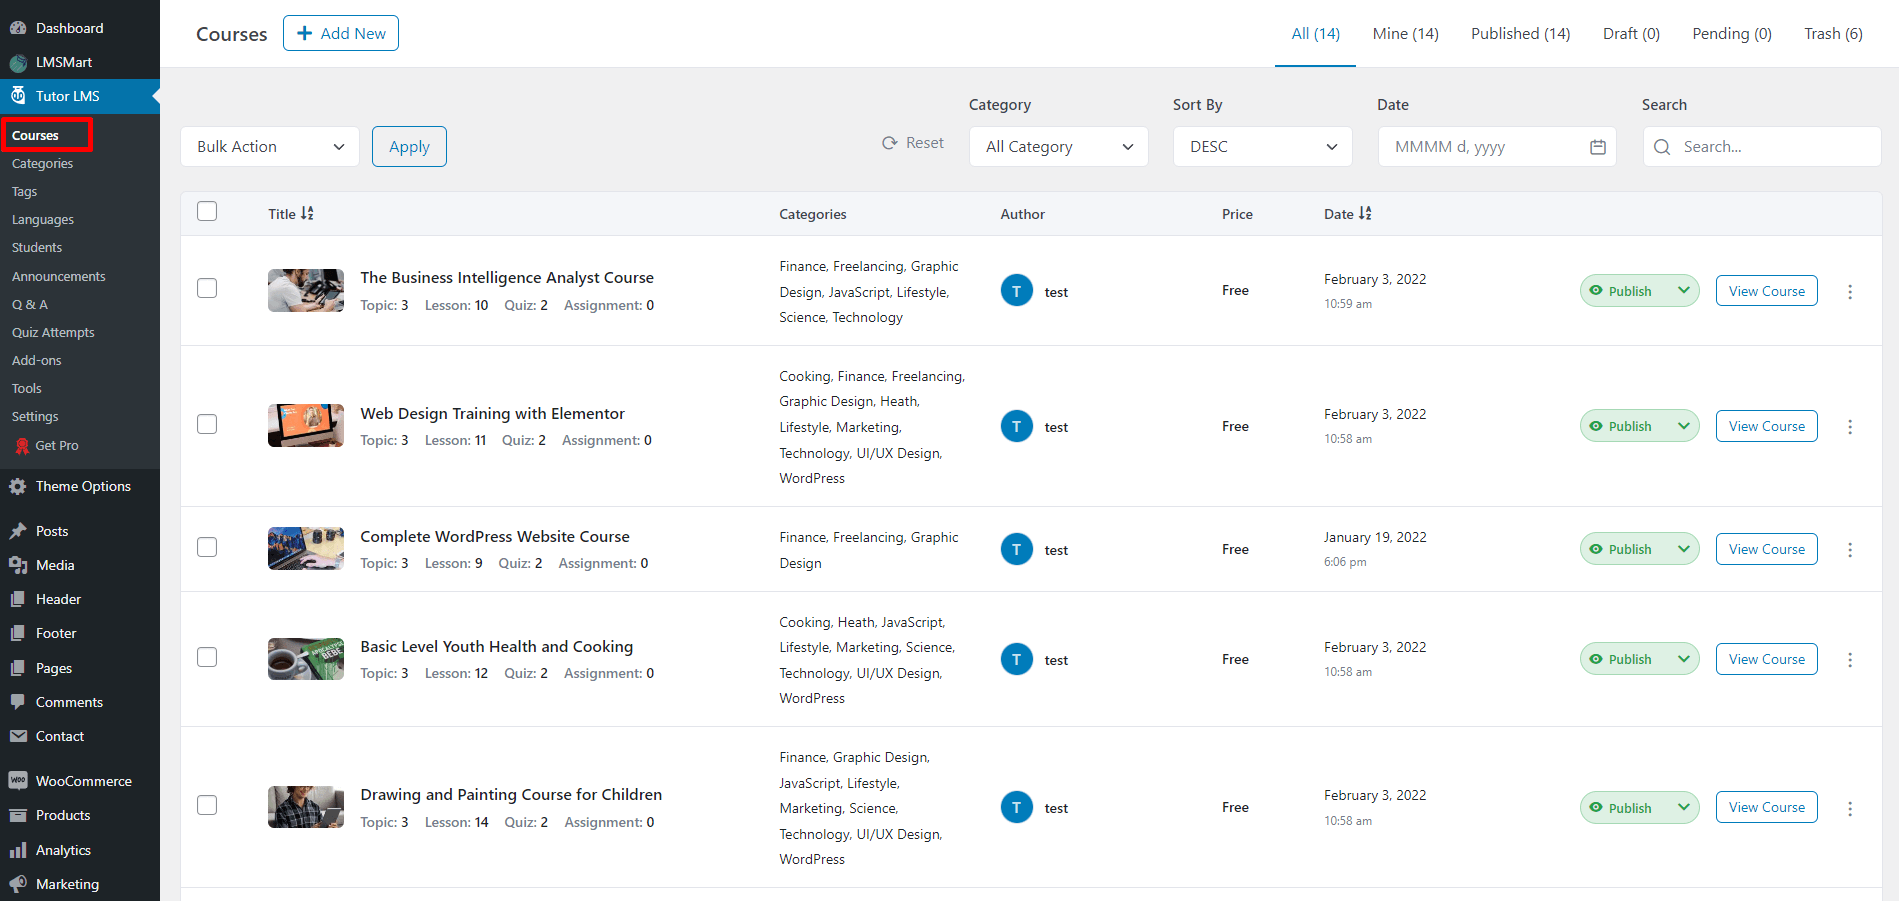
Courses
In this setting you can show the list all courses of your education website. From here you can edit courses, delete courses, add new courses etc. You can edit course's name slag etc.
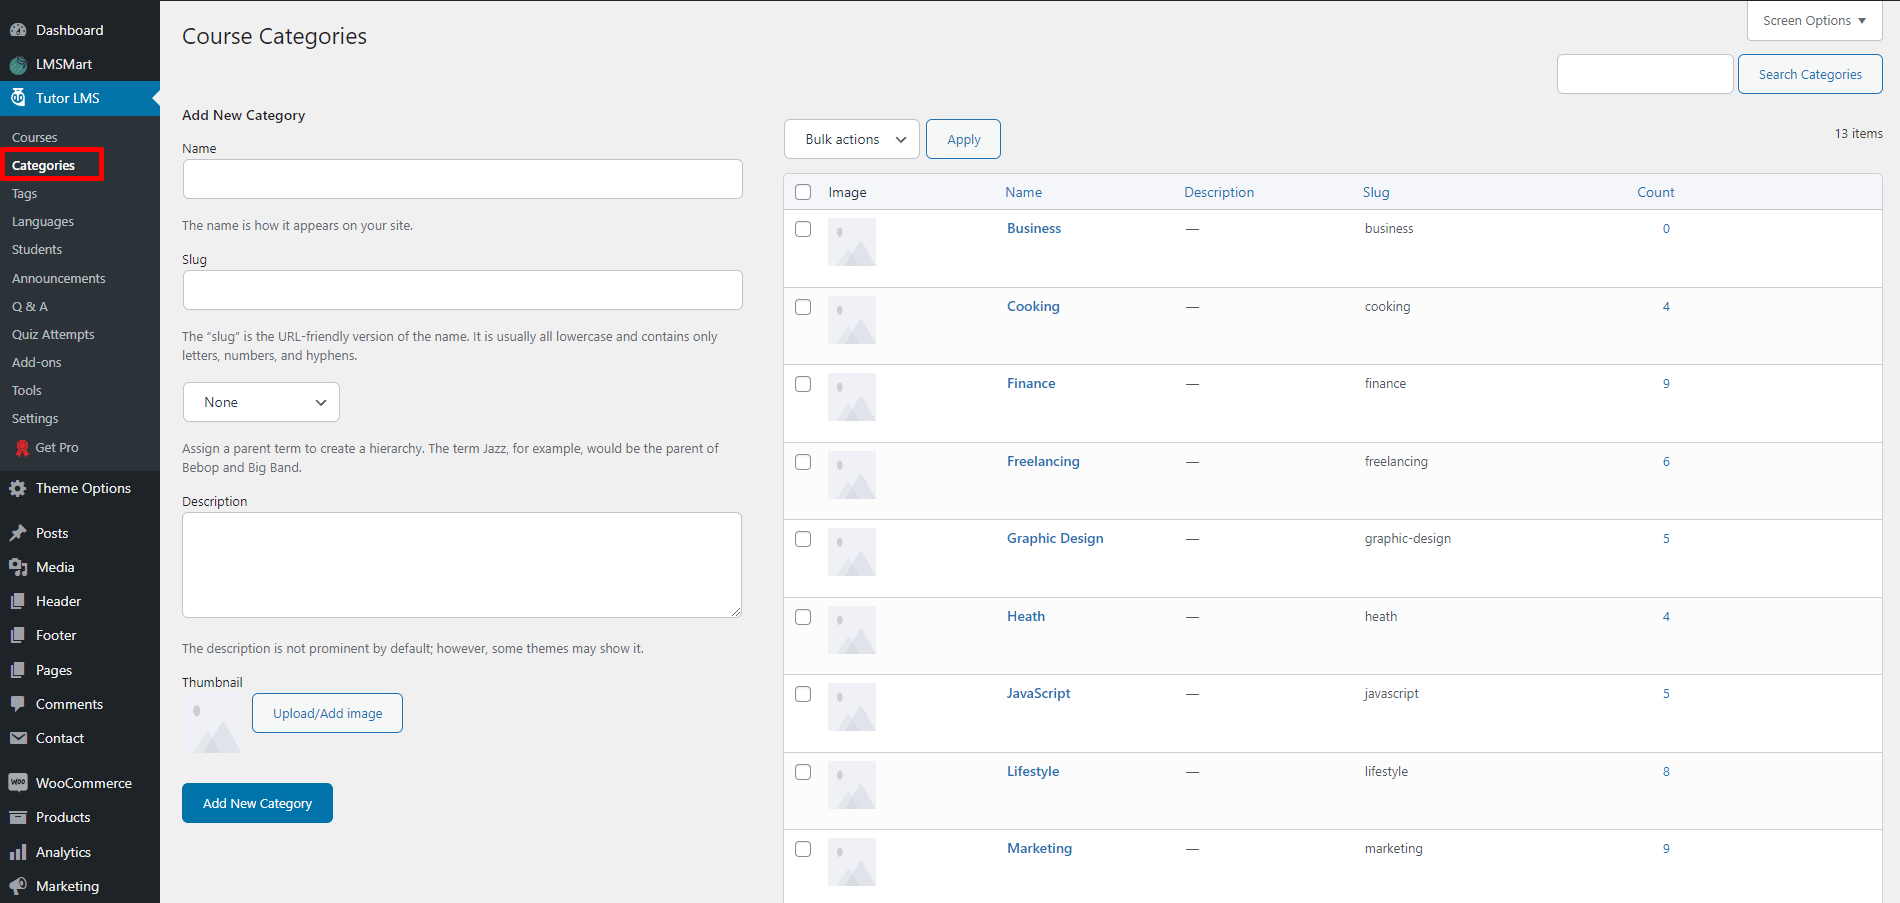
Categories
From here you can see all categories. You can also add, delete, edit categories from here.
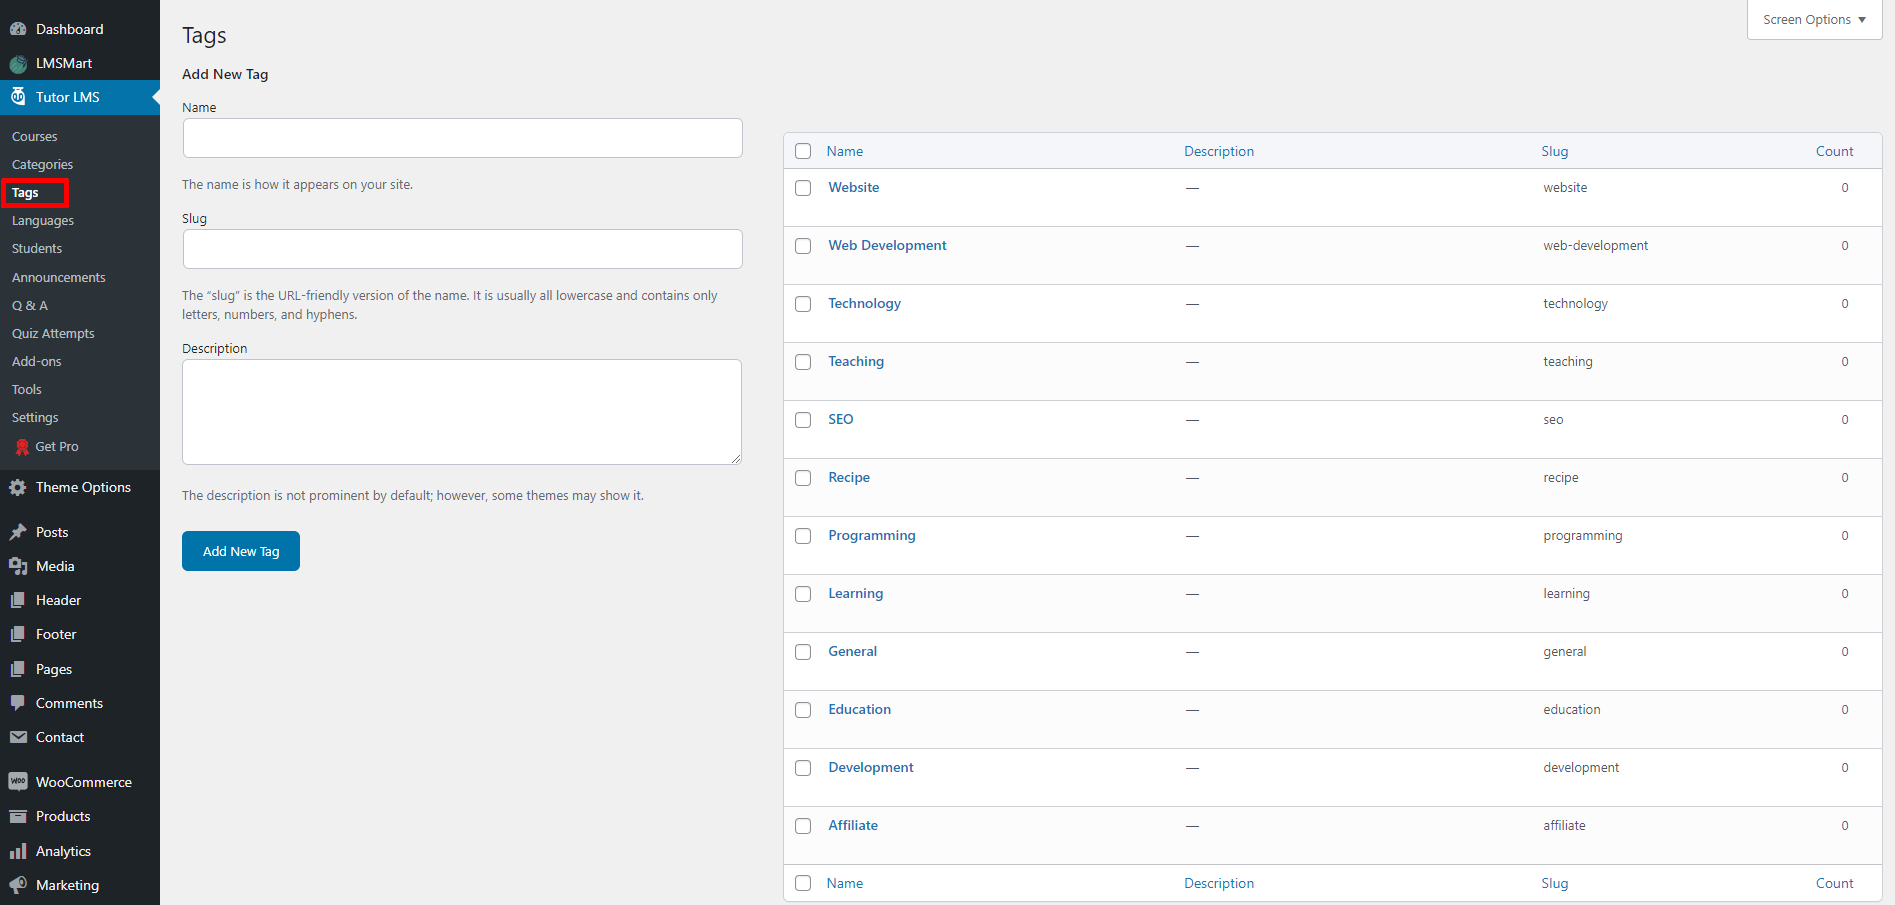
Tags
In this setting you can see the list of all Tags. You can edit, delete, add an new tags from here.
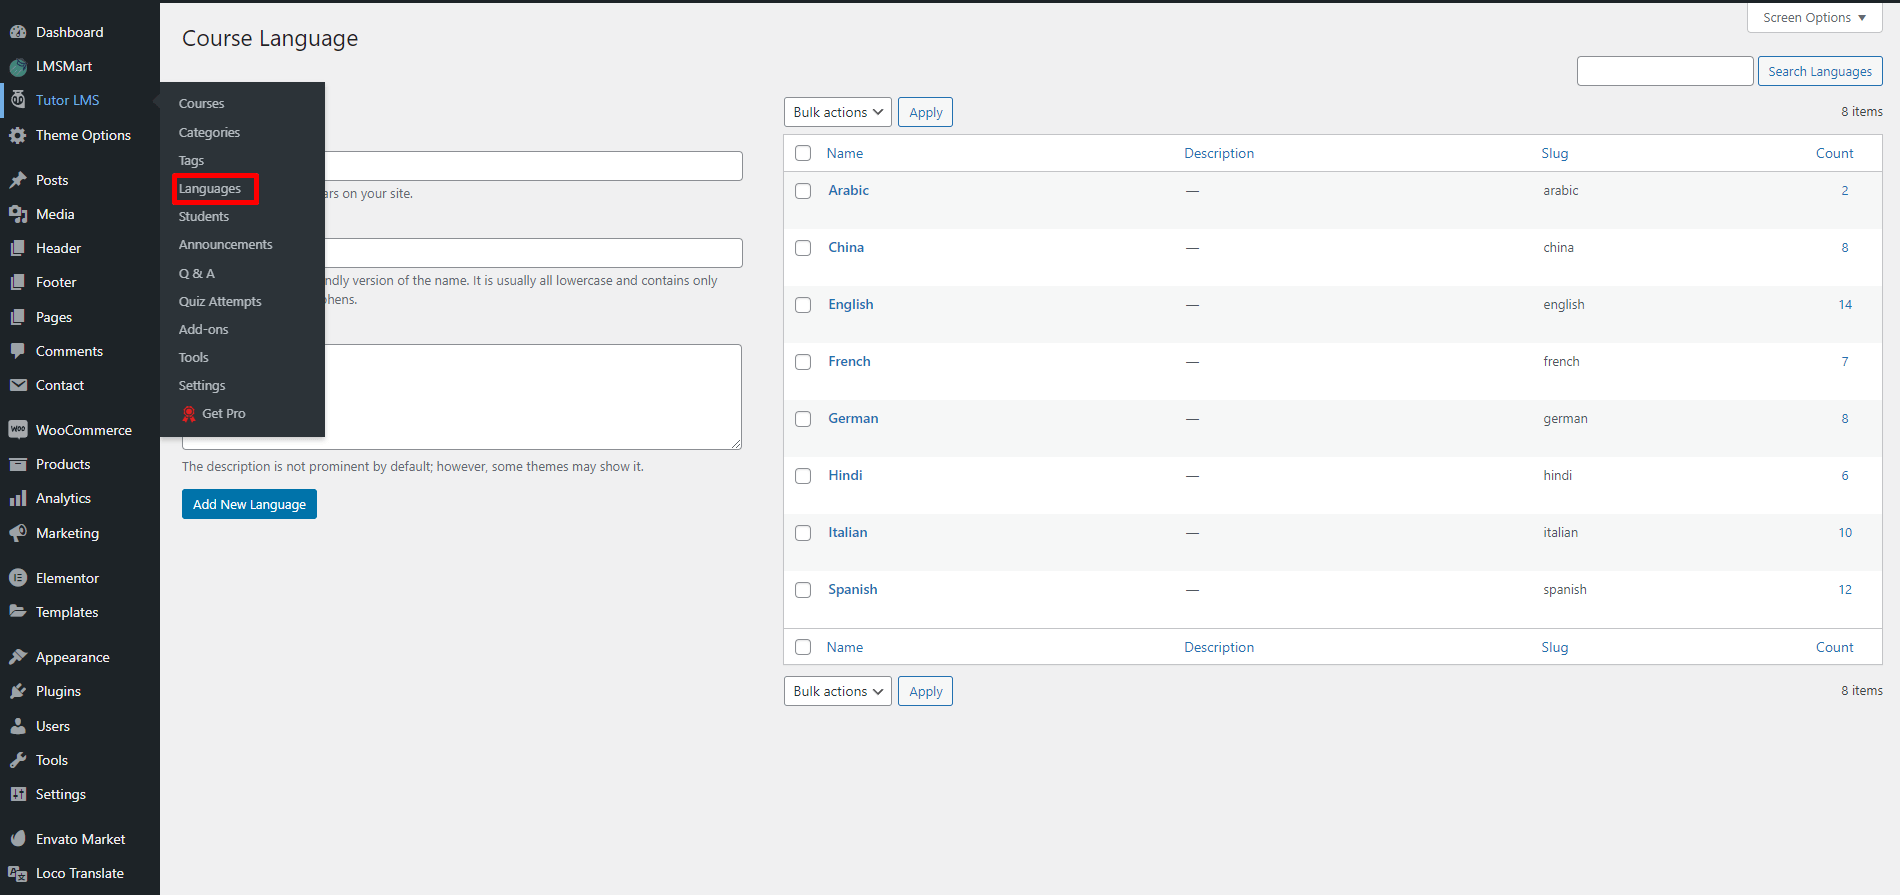
Languages
From this setting you can see the course language lists. You can also add new language from here.
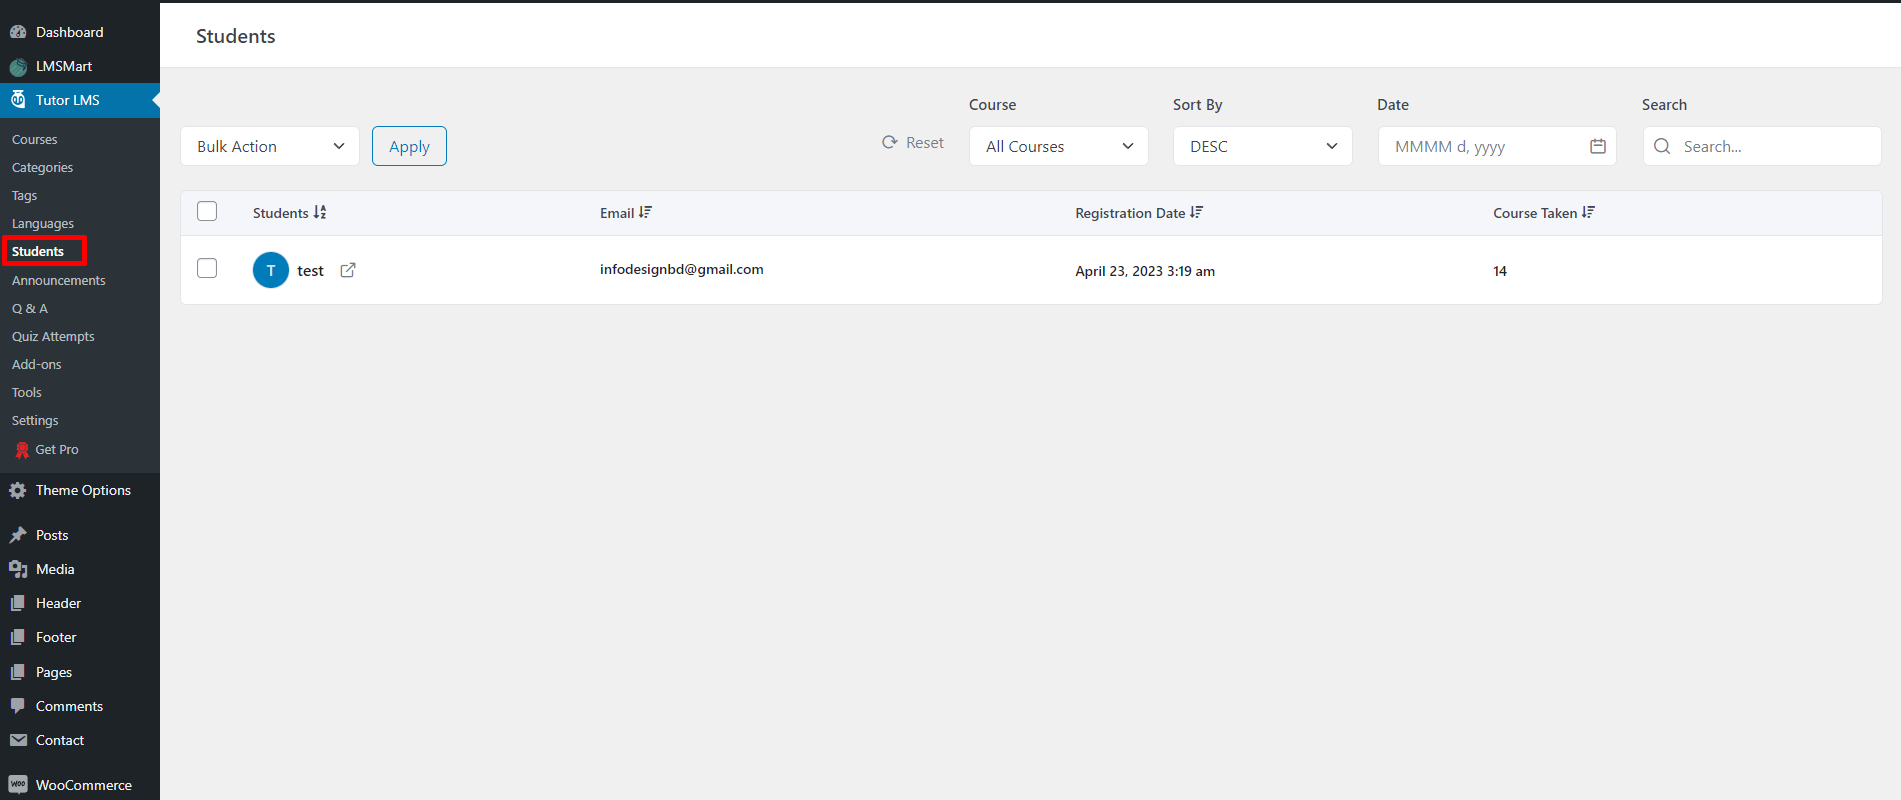
Students
From here you can see that how many students you have, and the student have purchased.
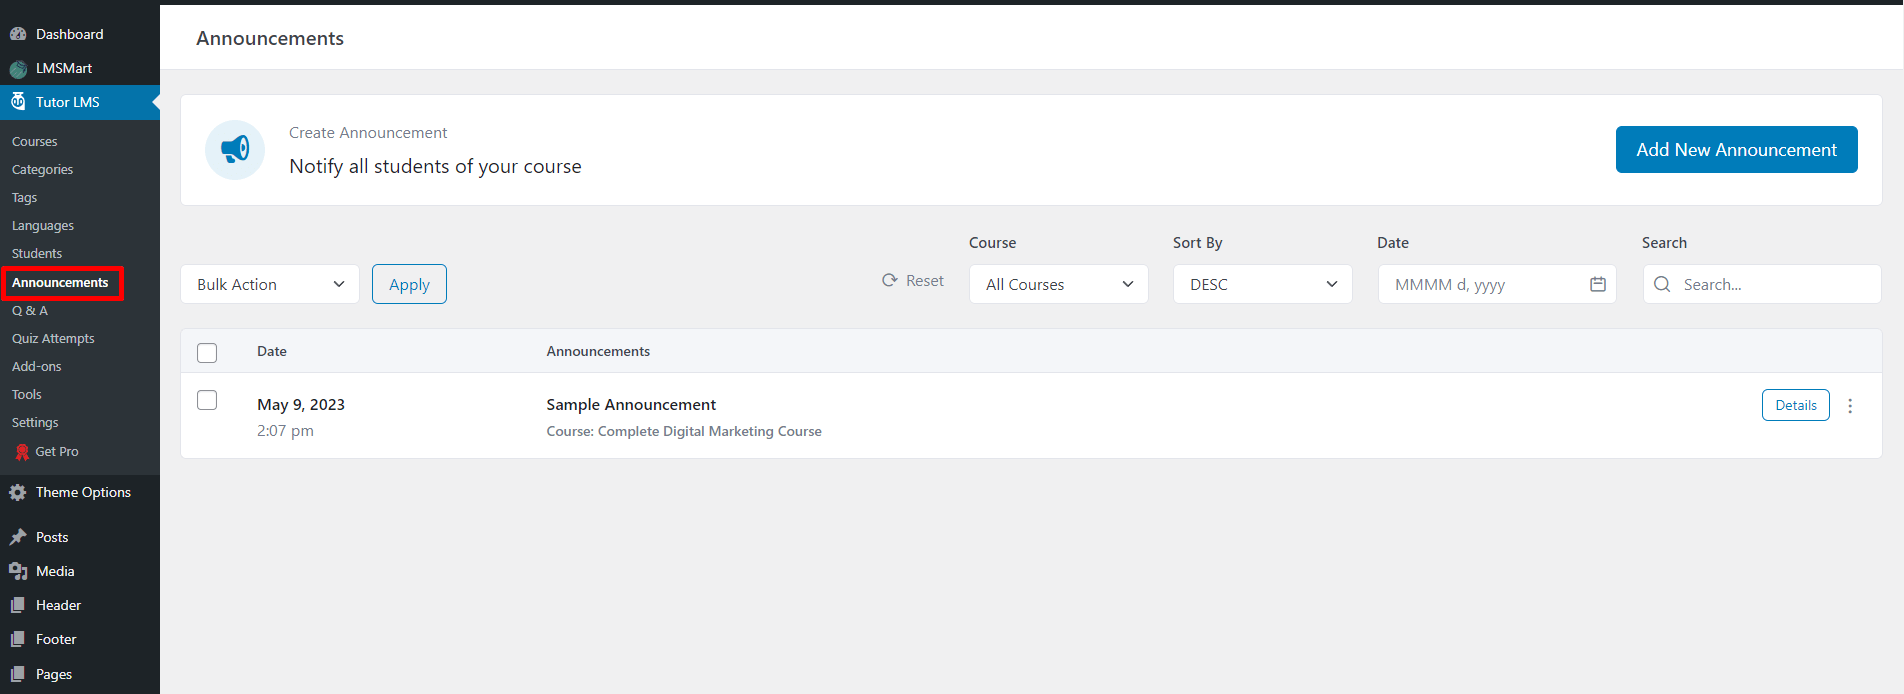
Announcements
Using this settings you can make an announcement for the students. You can edit, delete, or add a new announcement from here.
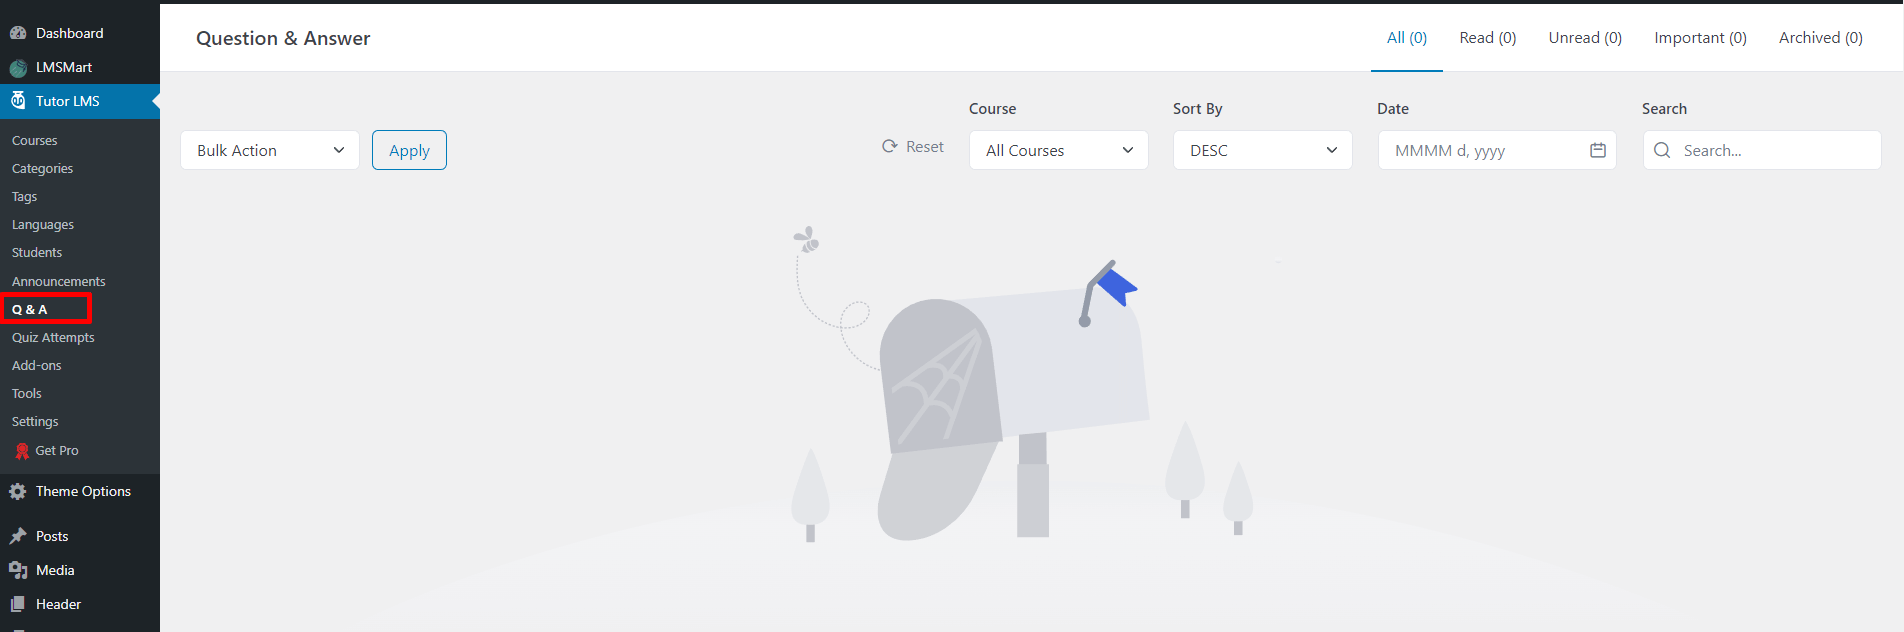
Q & A
Using this Q&A setting you can see how many Q & A sessions has done on your education site.
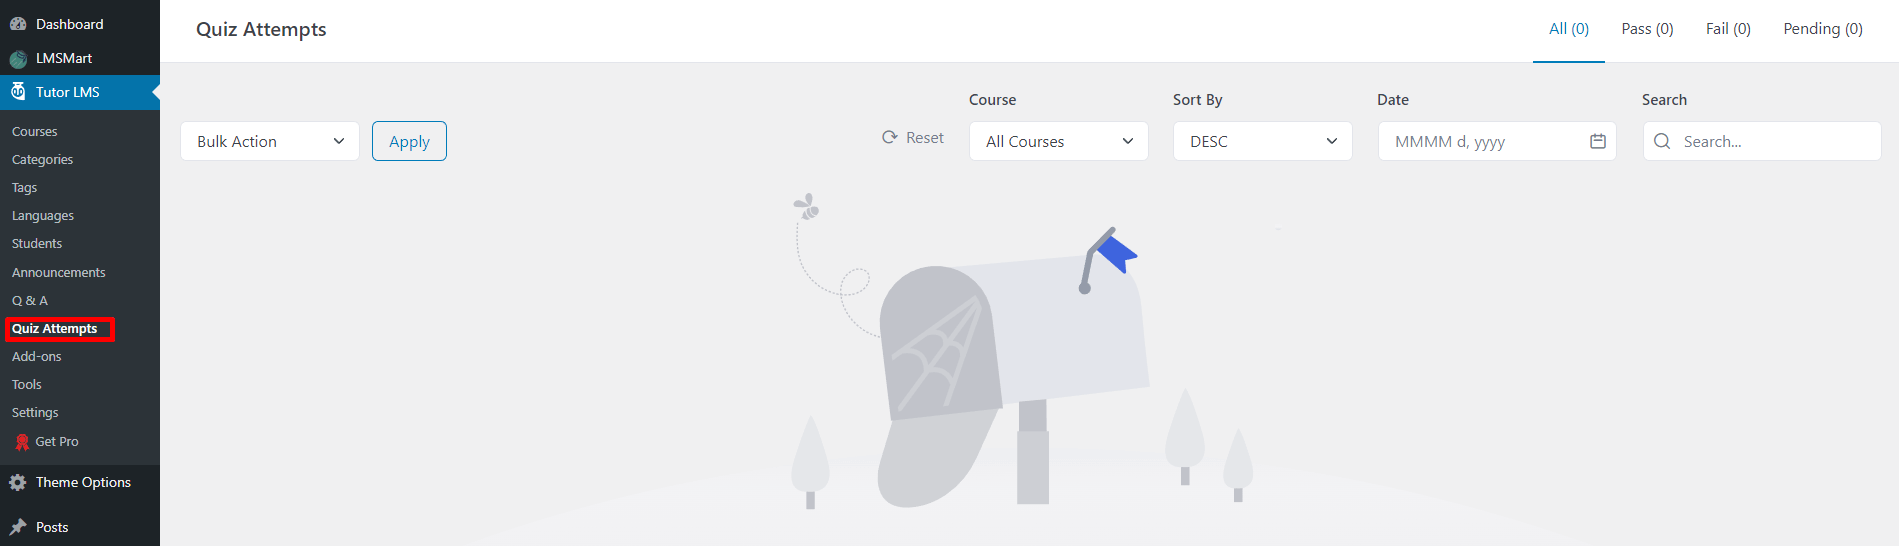
Quiz Attempts
You can see how many Quiz attempts were happened on your education site.
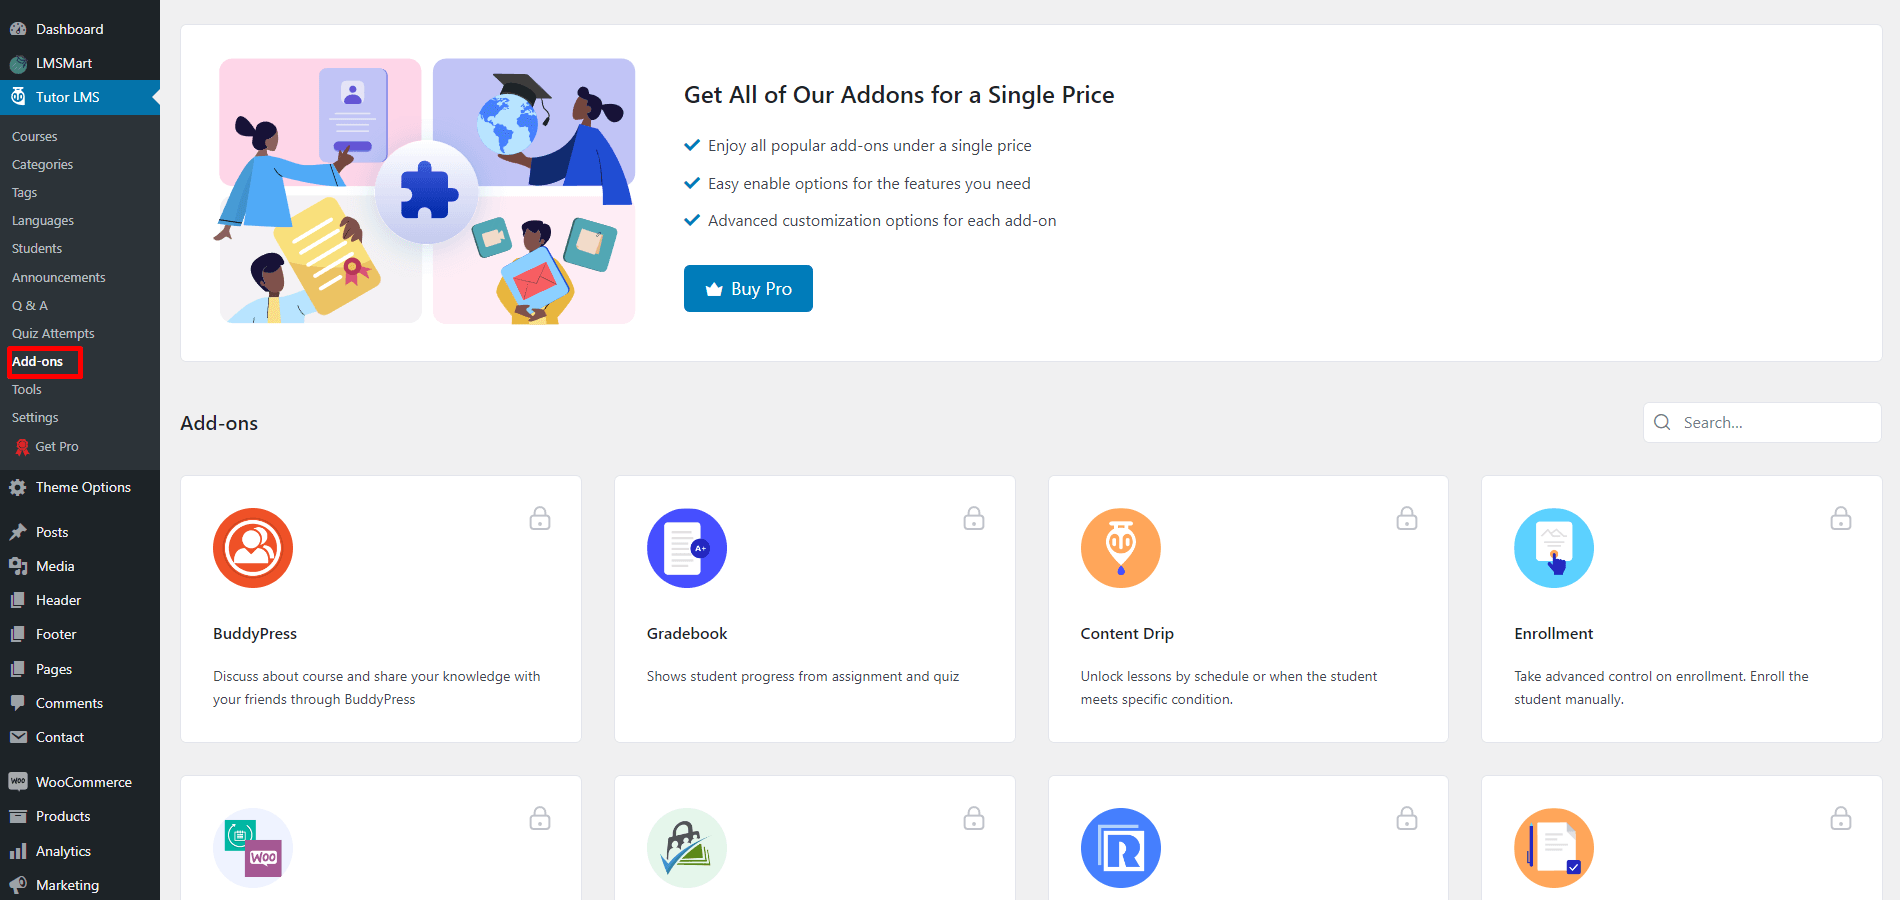
Add-ons
From here you can use addon of tutor LMS. But you can only use these add-ons if you buy Tutor Pro LMS.
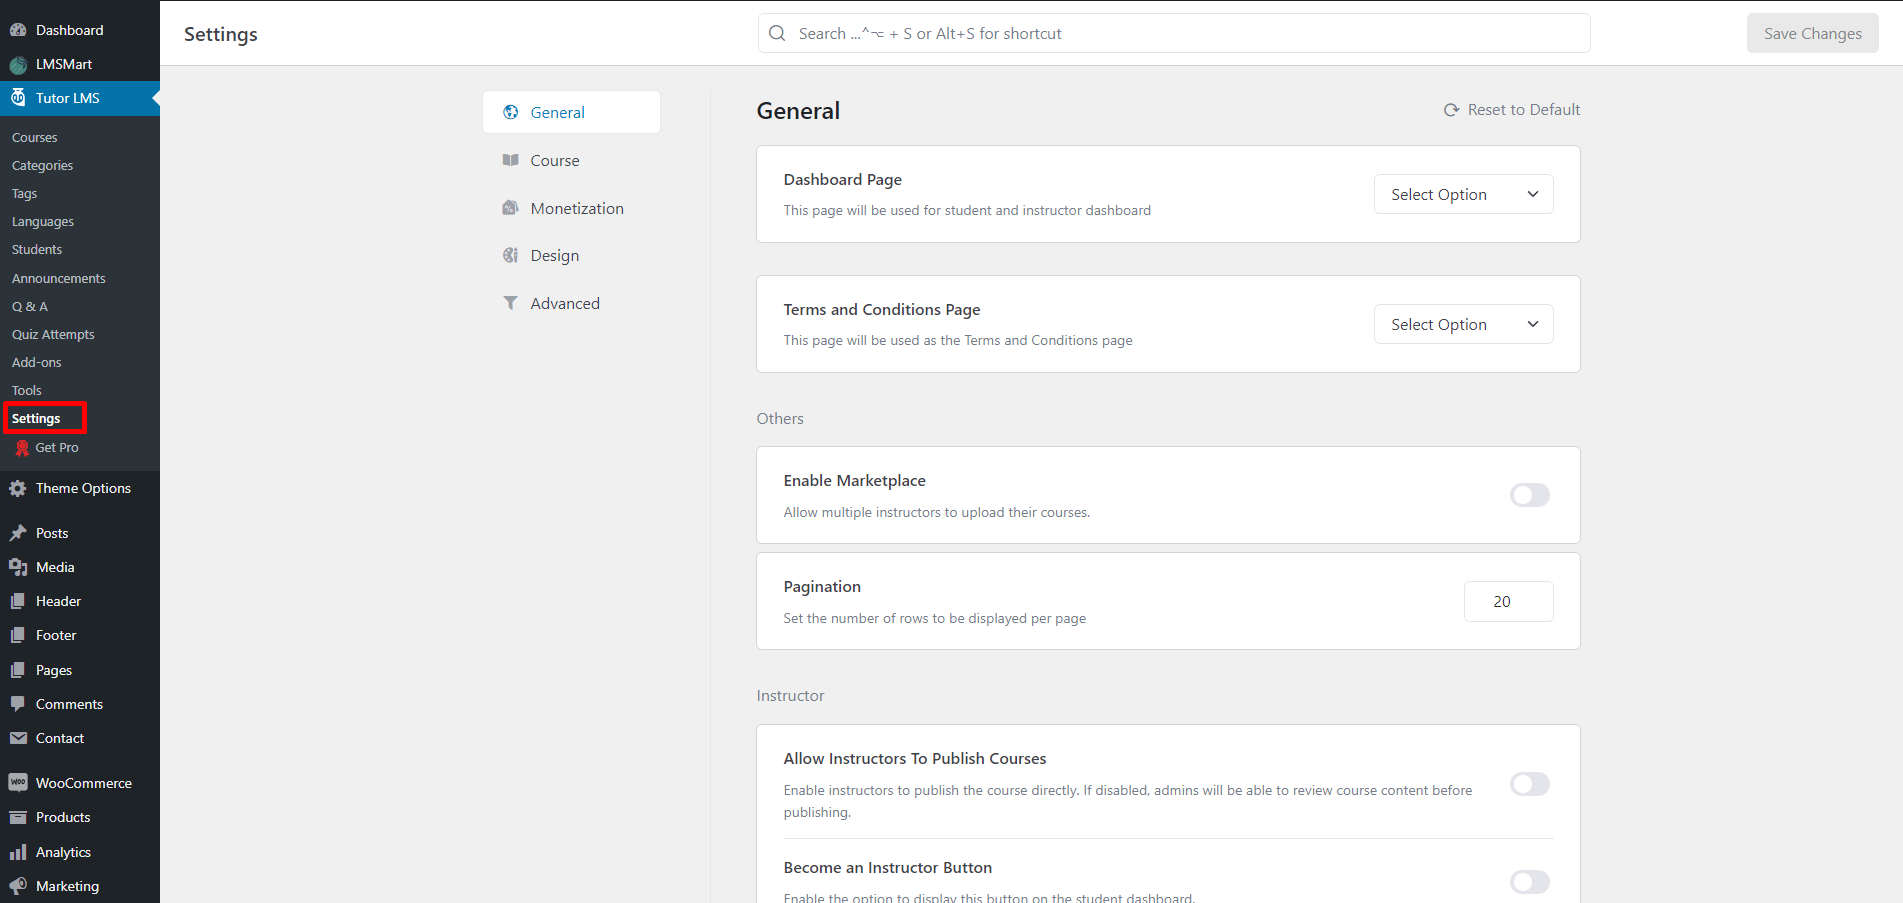
Settings
In the general settings of the LMS you can set the pages like the Dashboard page, terms and condition page and many more from the general section. See the screenshots below
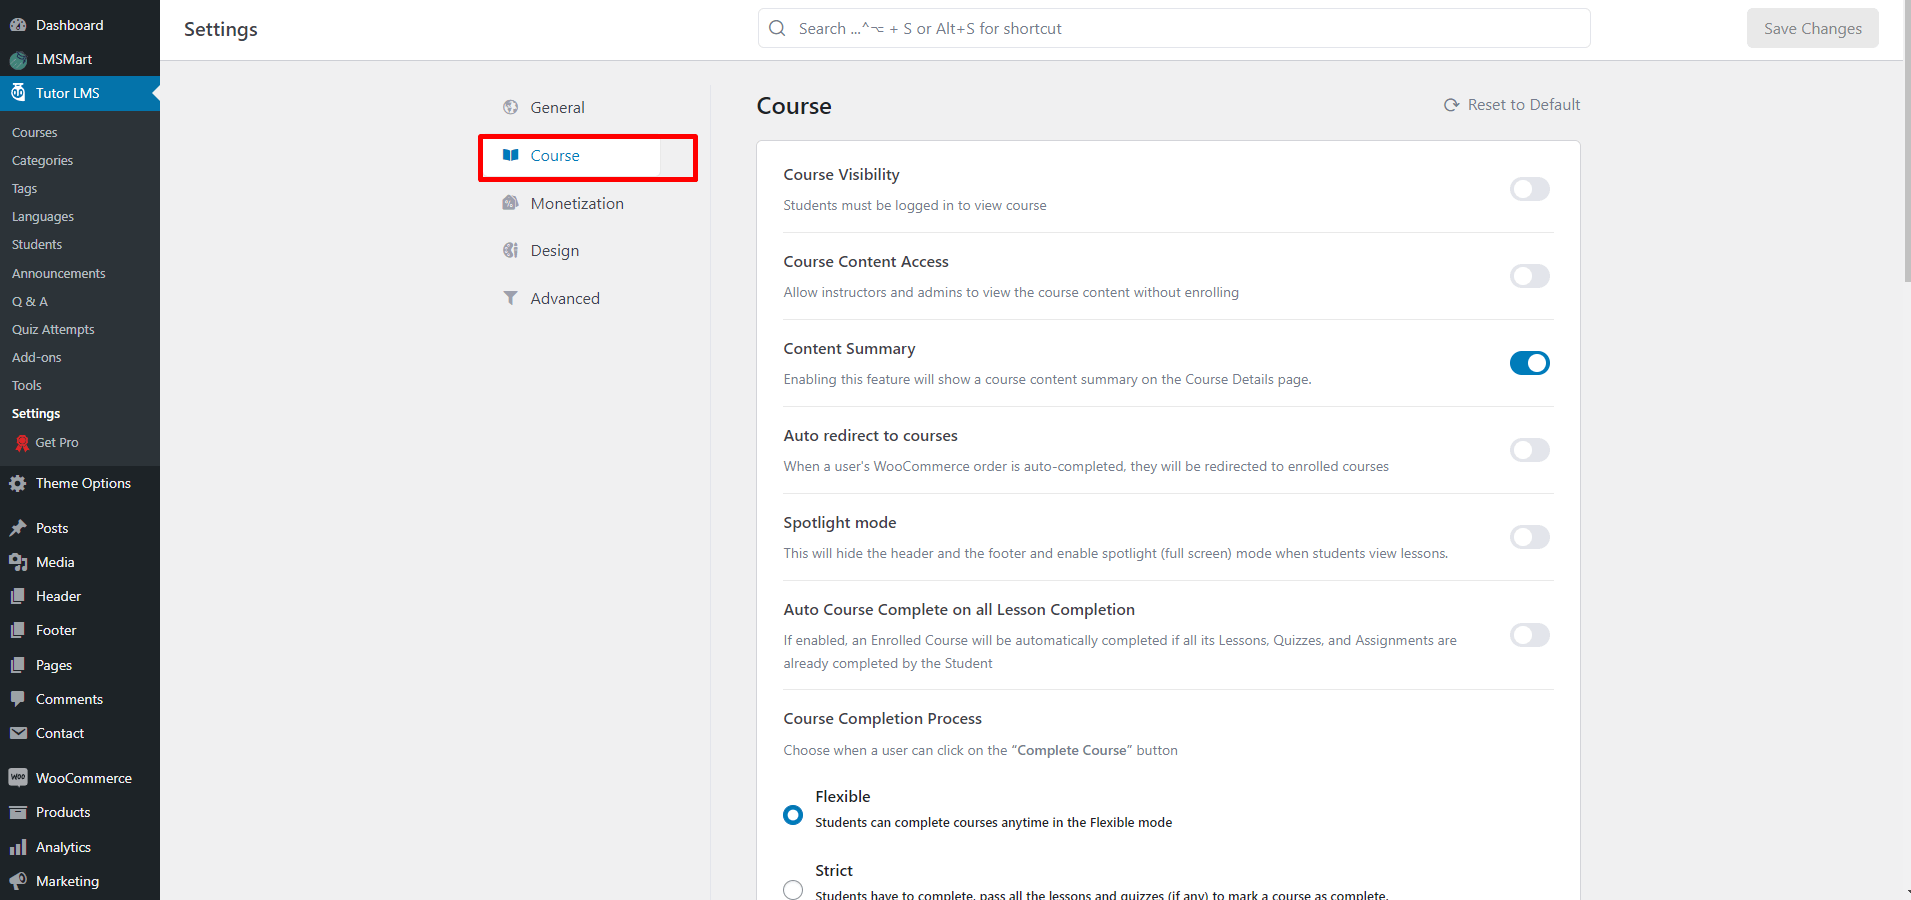
In the course section you can find all of the course settings. see the screenshot below.
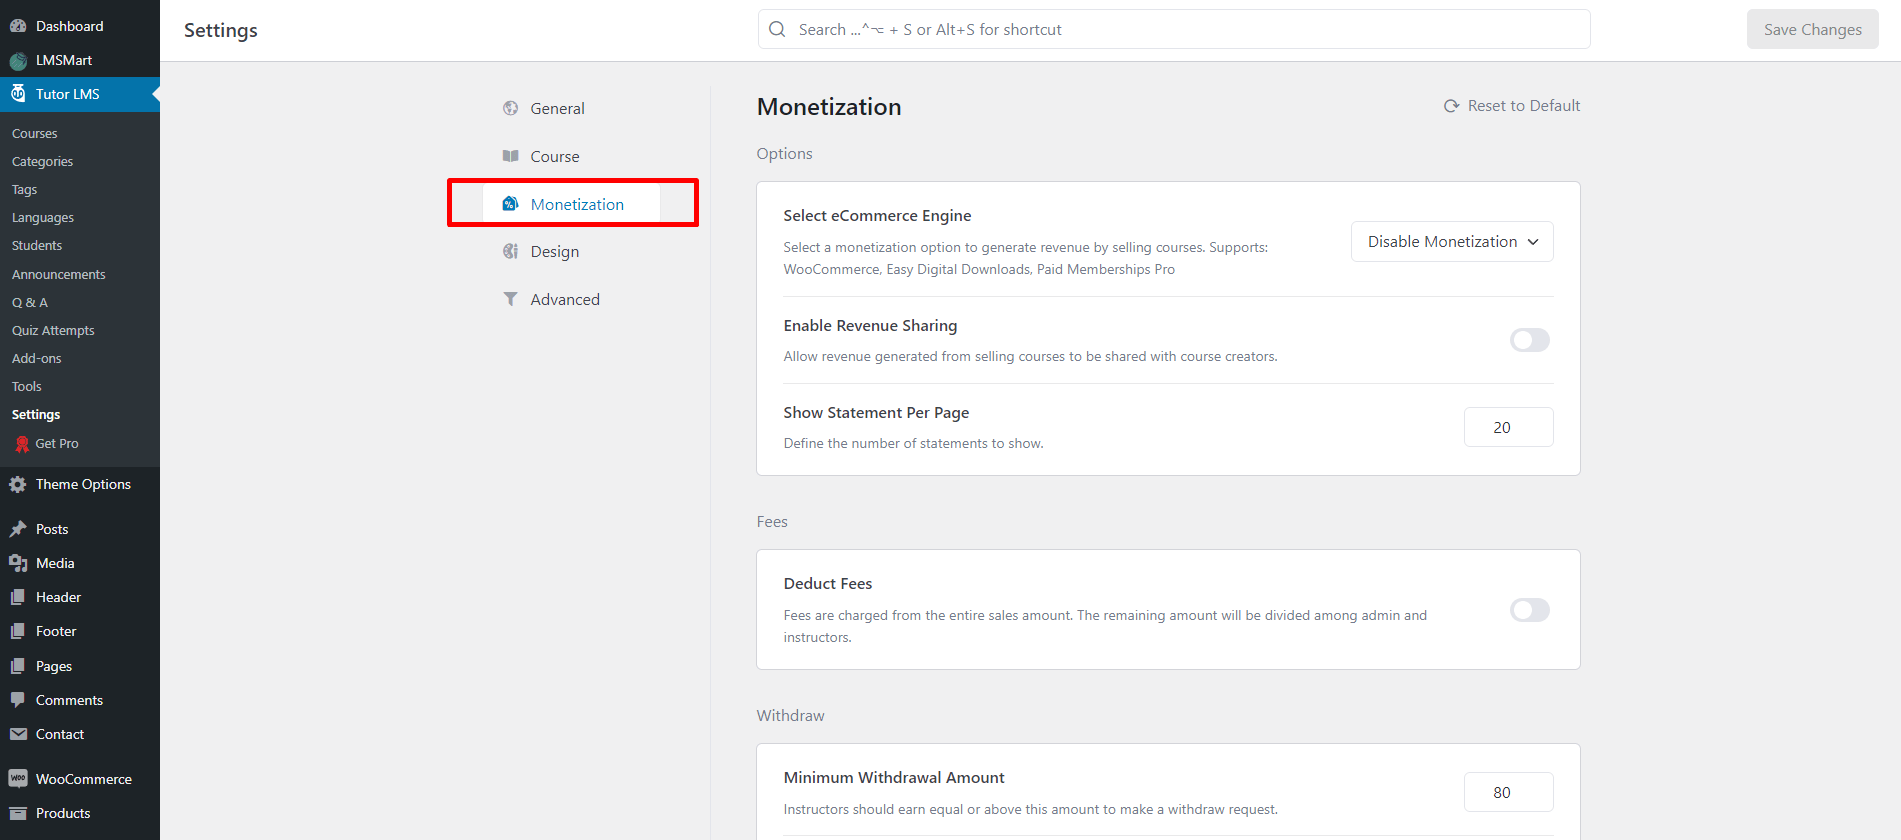
You can find monetization section under the setting. From here you can find all kind of monetization related settings.
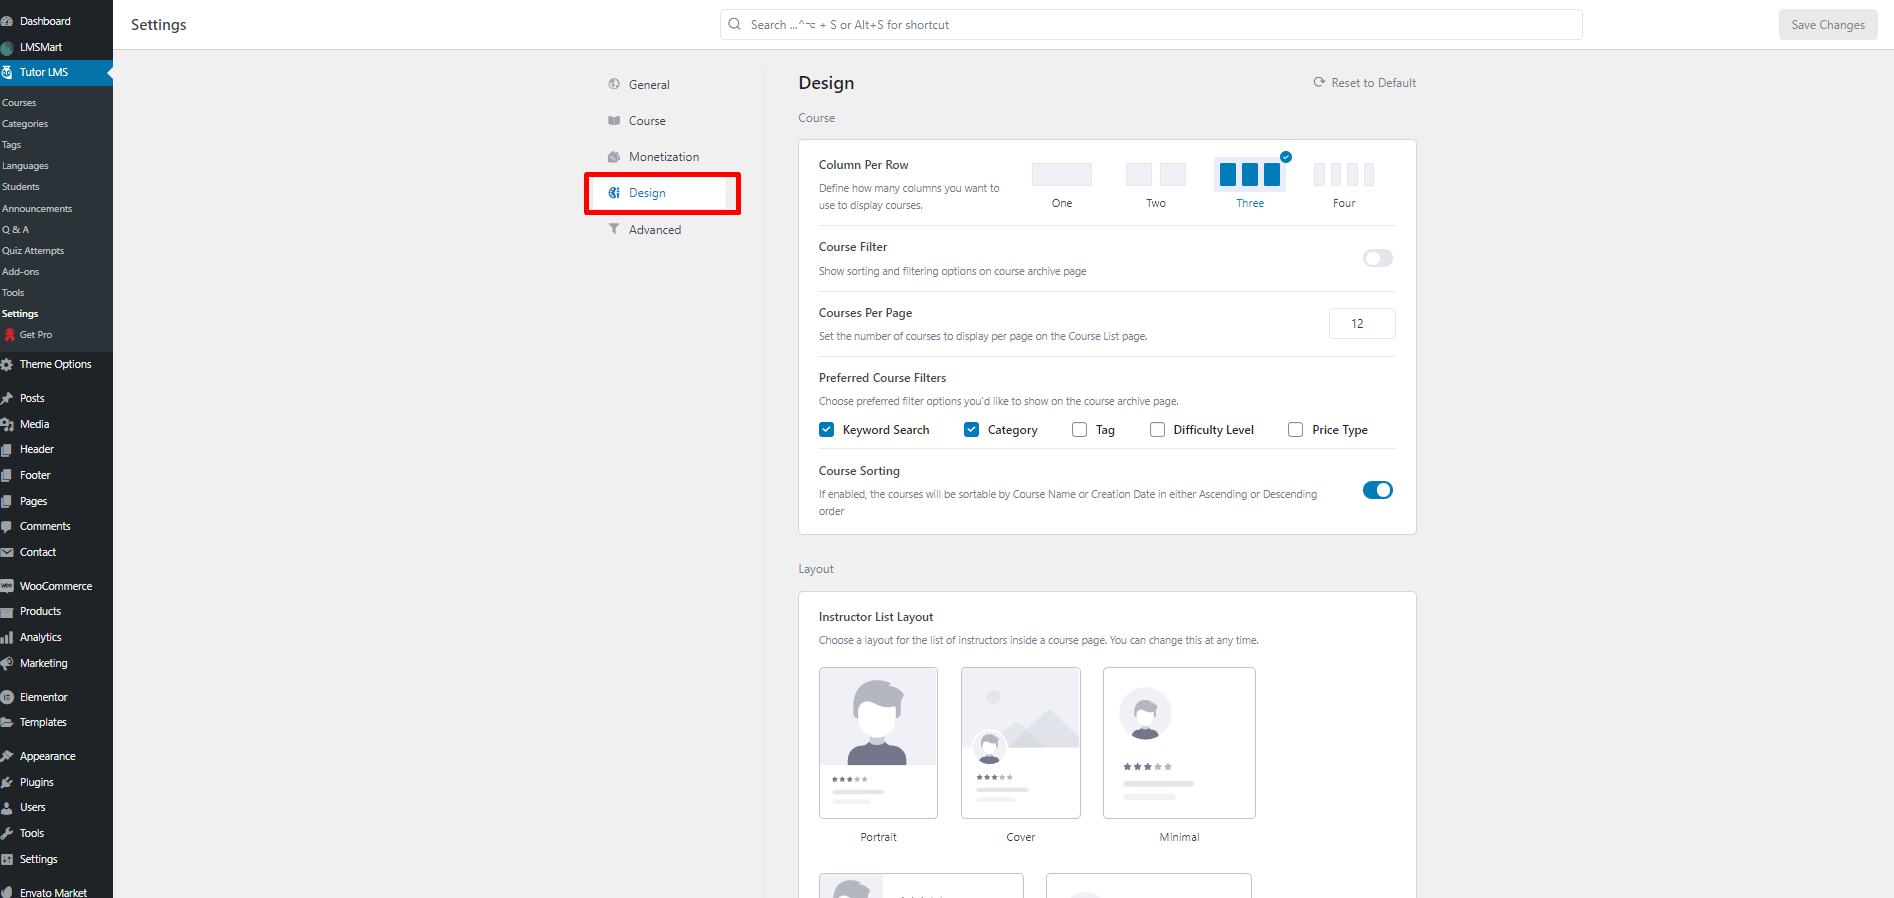
You can also find Design section under the setting. From here you can find all kind of design related settings like the course column, author design etc. But you don't need to use there for most of the time. Our theme has the perfect design for all of these.
LMSMart Header Modules
We have created several elementor elements for header area. You can find them from LMSMart Header Modules in the elementor widget section, You'll find header related elements to build the header. Follow the discussions below.

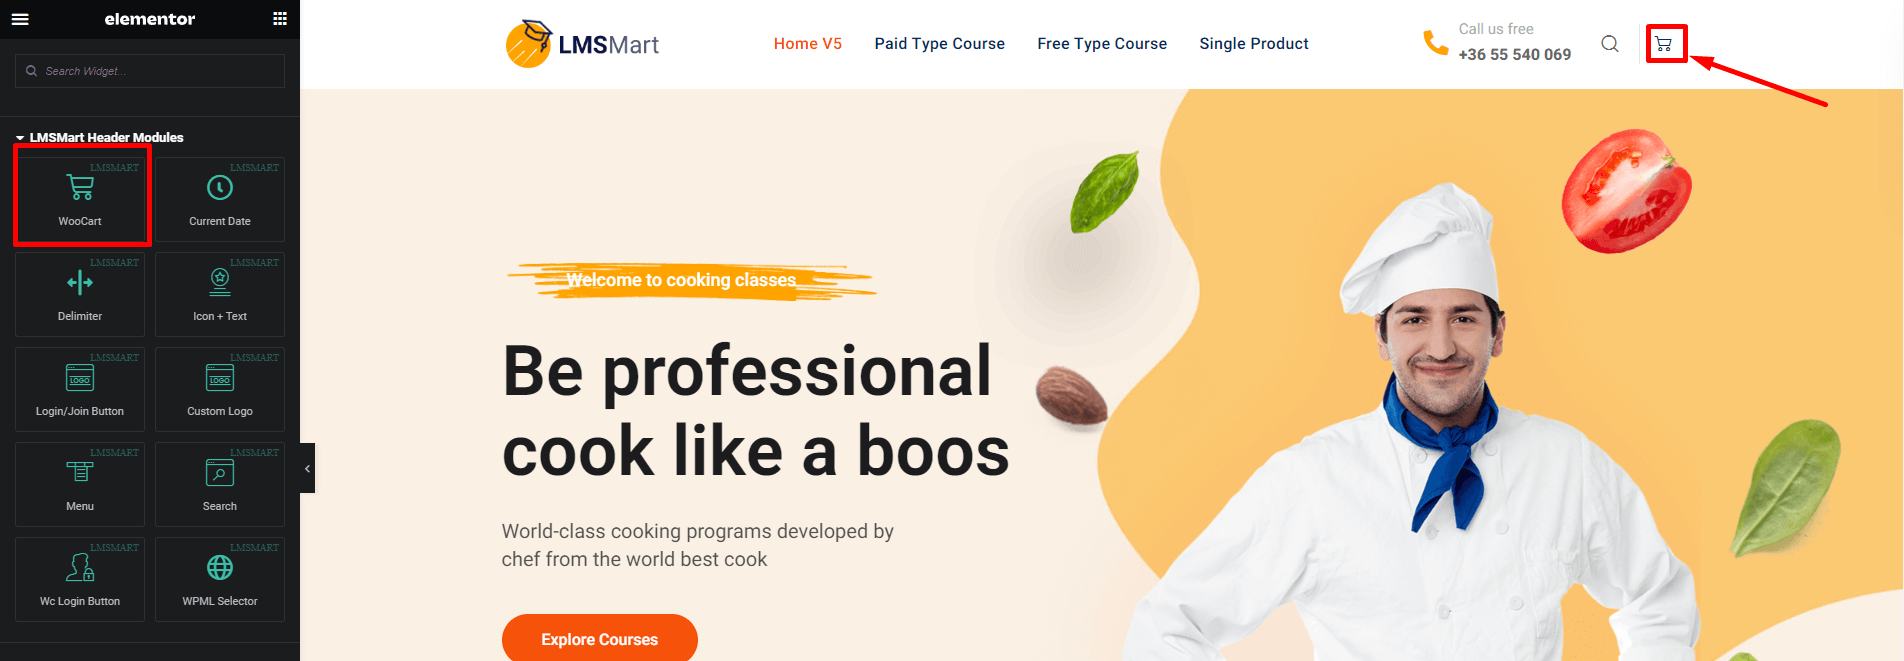
WooCart
Using this element you can add cart button in the header. See the screenshot below.
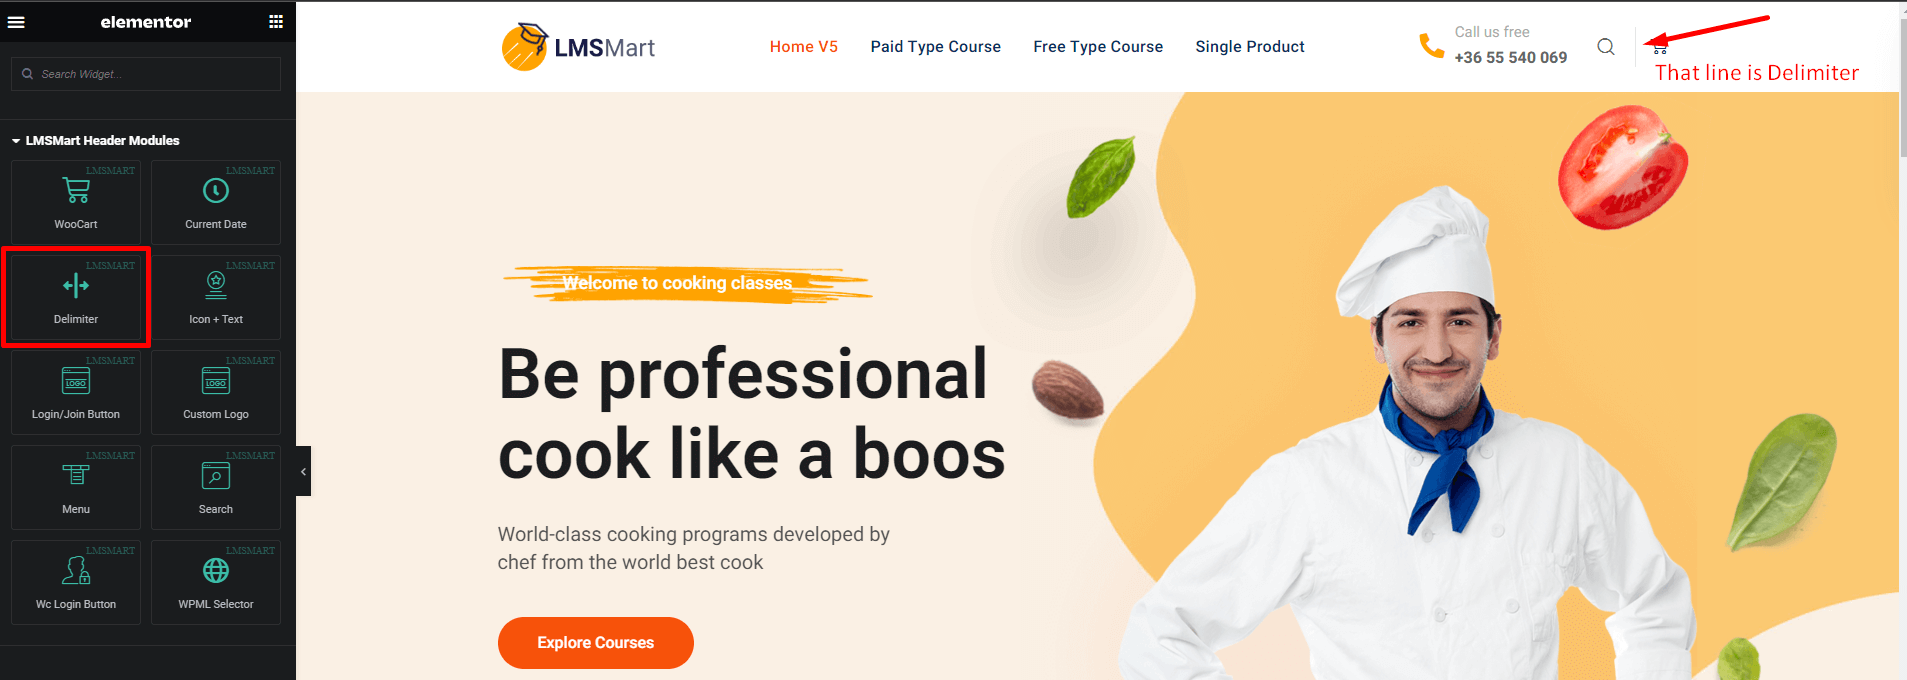
Delimiter
Using this element you can add a vertical line as a separator. See the screenshot to understand.
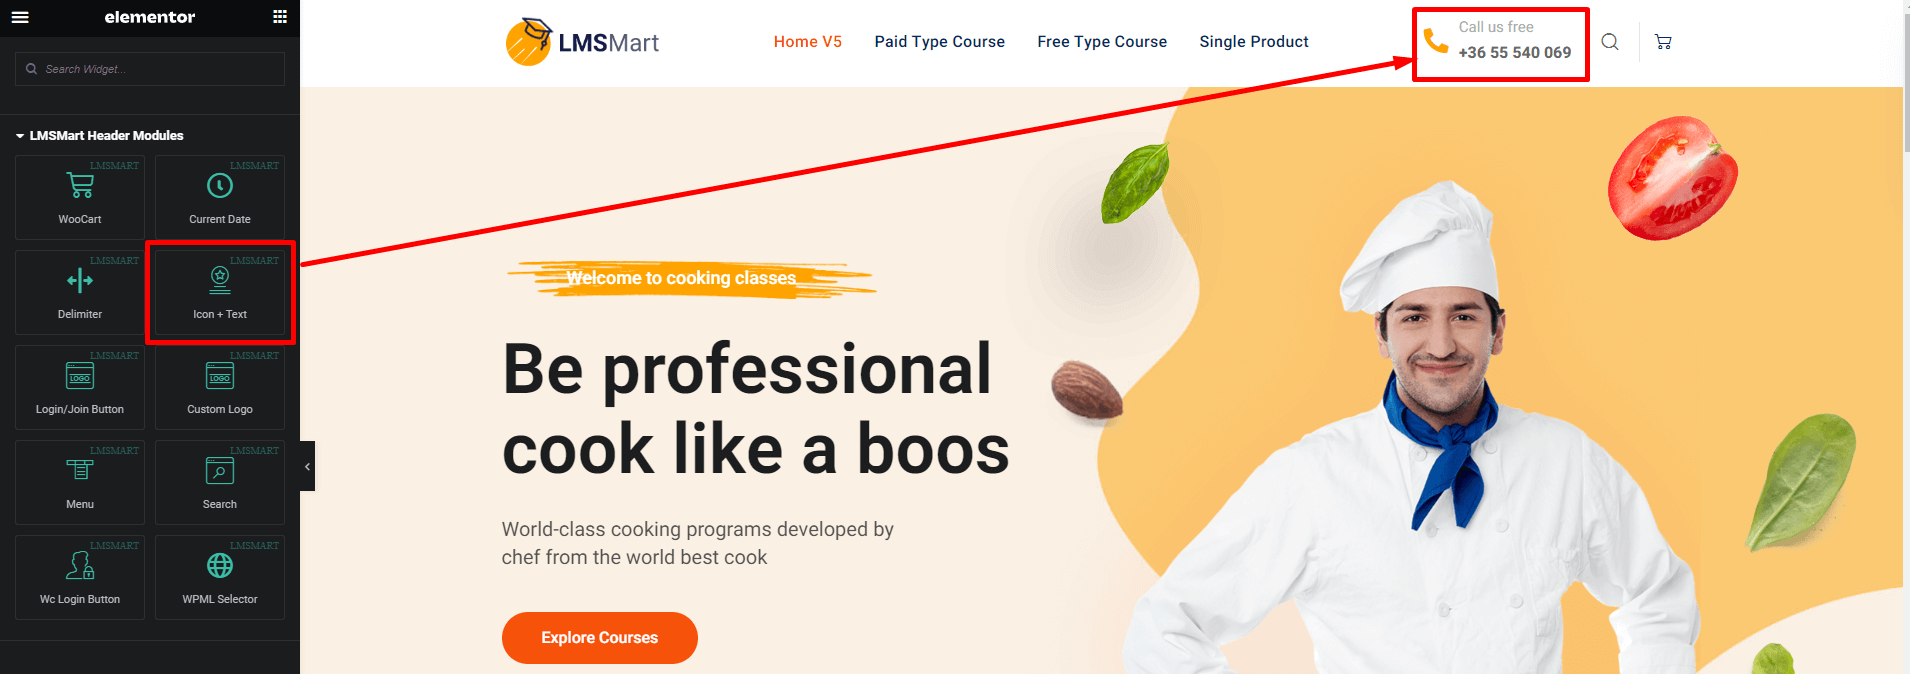
Icon + Text
Using this element you can add call us now section in the header like the screenshot below.
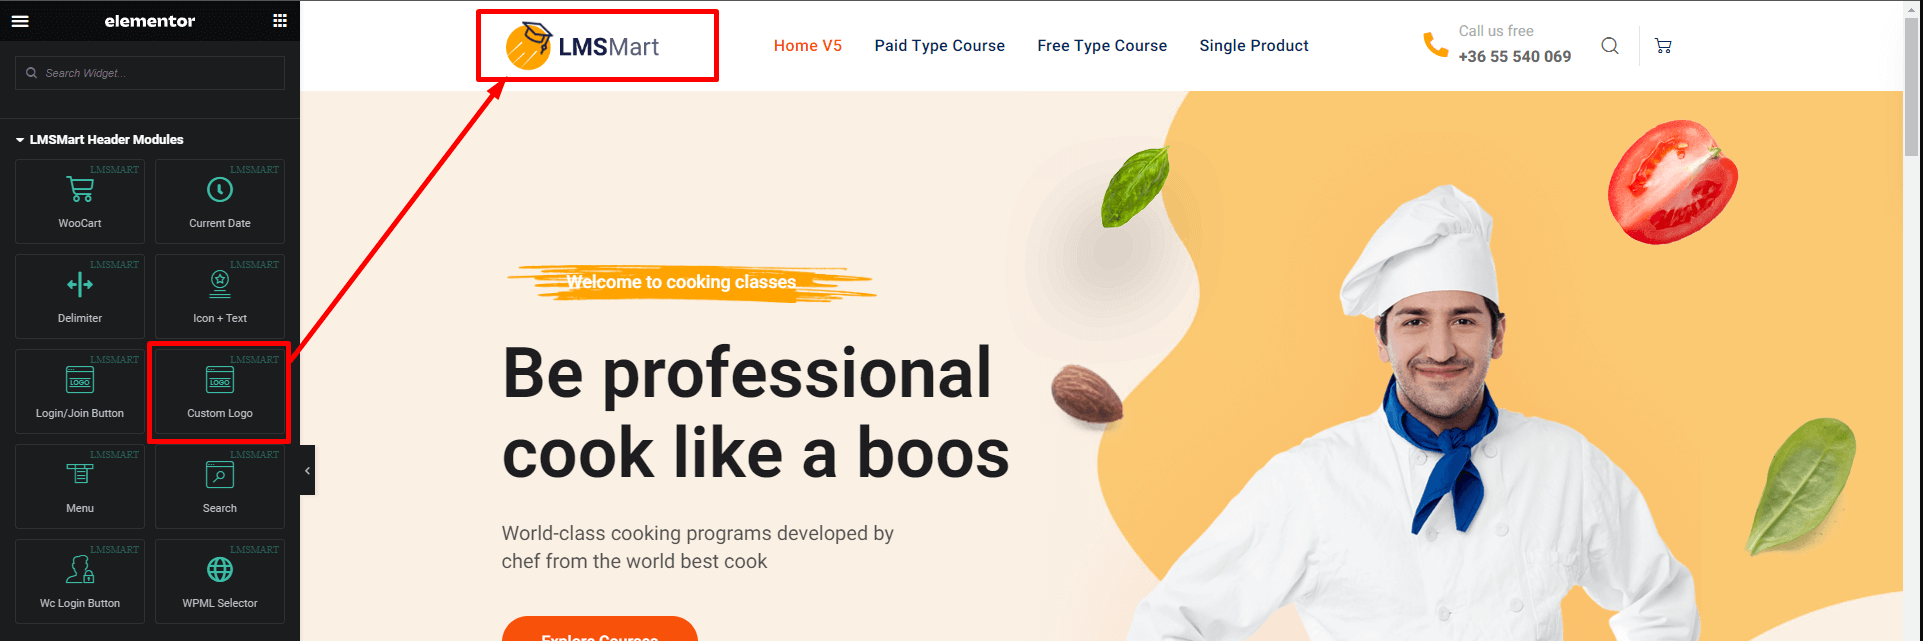
Custom Logo
Using this element you can add logo in the header section. See the screenshot below.
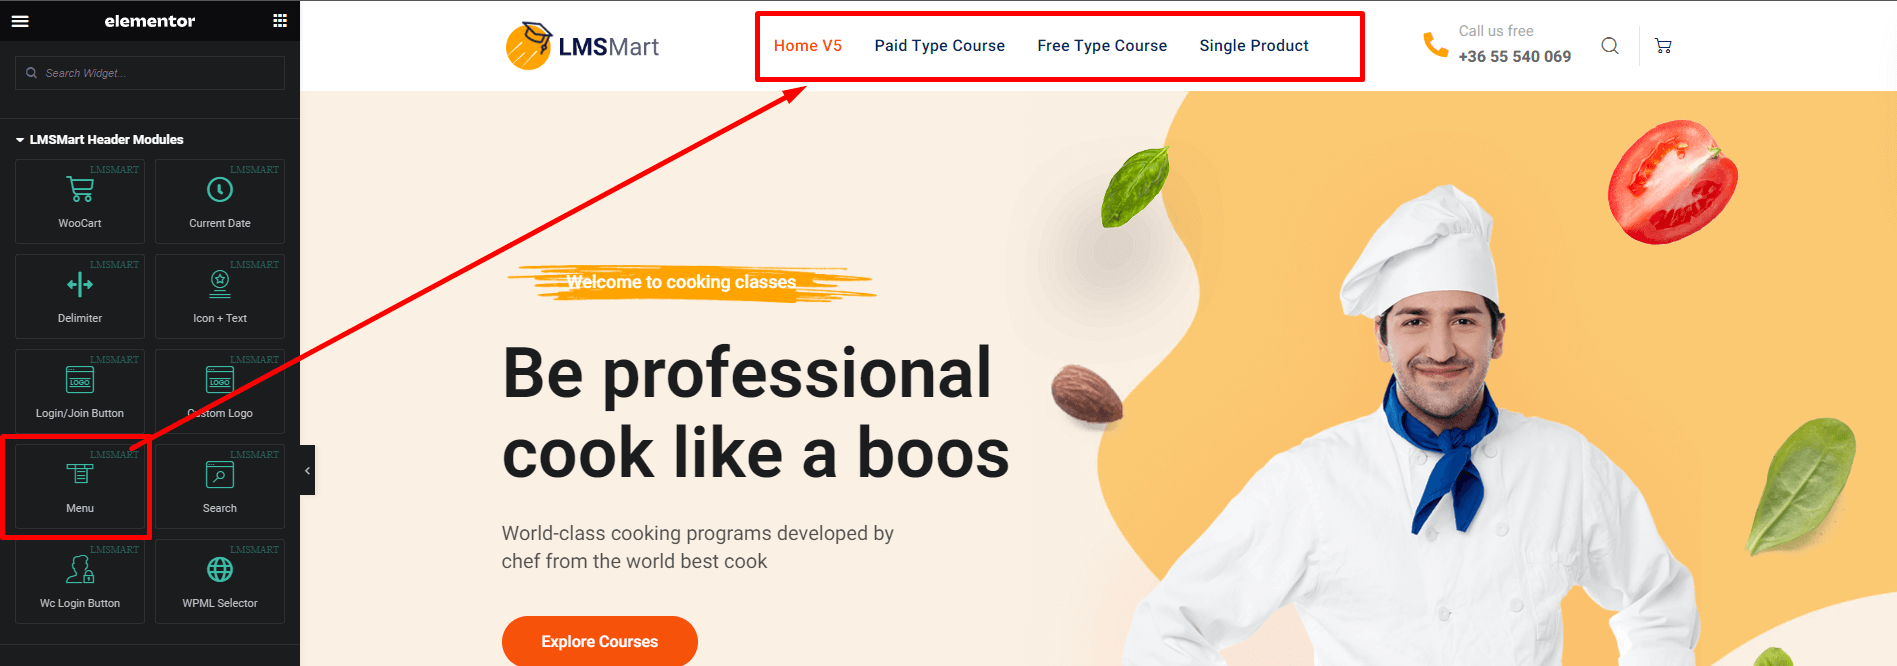
Menu
Using this element you can create menu for the header like the screenshot below.
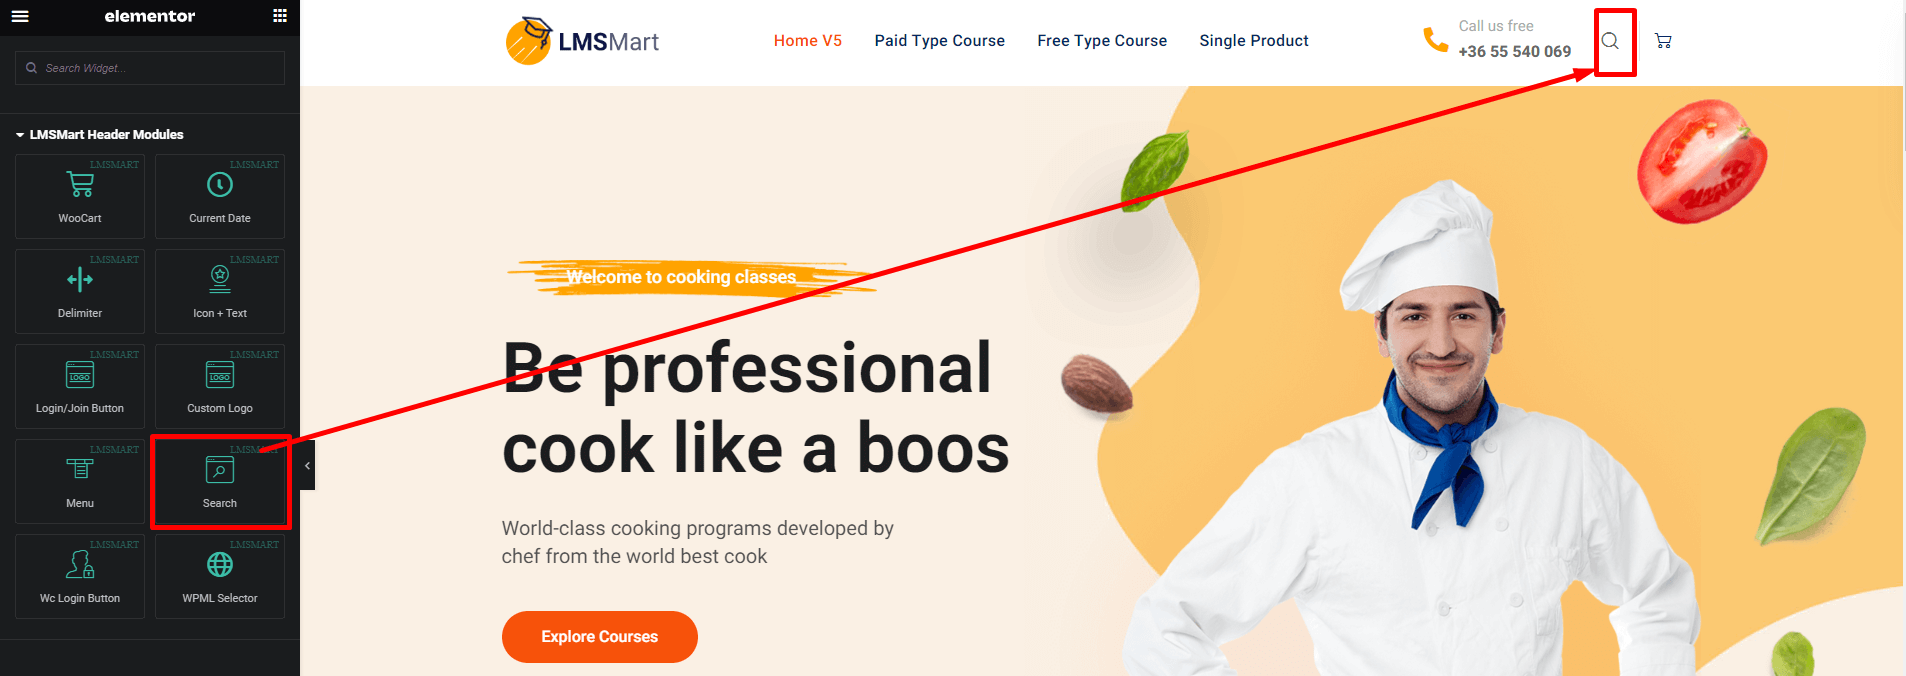
Search
Using this element you can add Search button in the header. See the screenshot below.
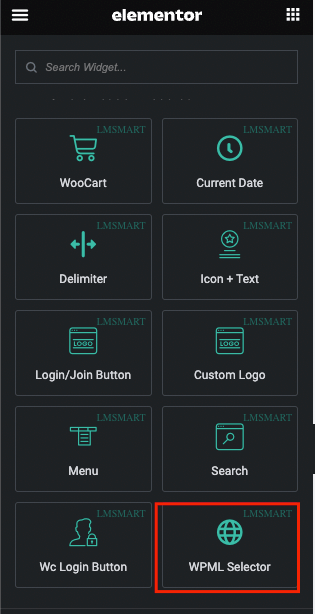
WPML Selector
If WPML plugin is installed in your site you can make your site multilingual using this element.
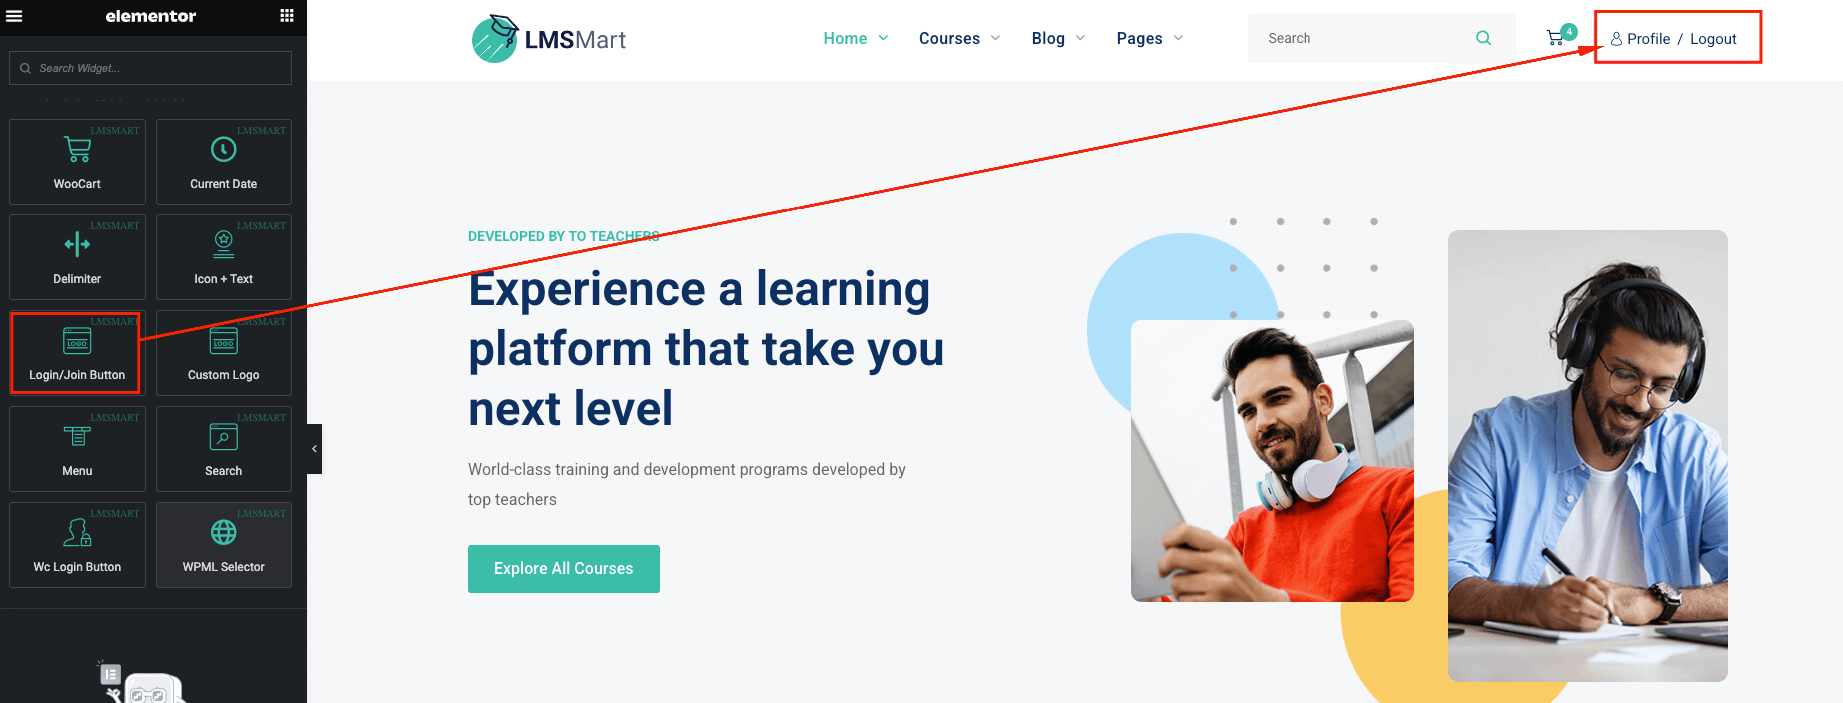
Login Joint Button
This element will allow you to add login/register joint button in the header. See the screenshot below
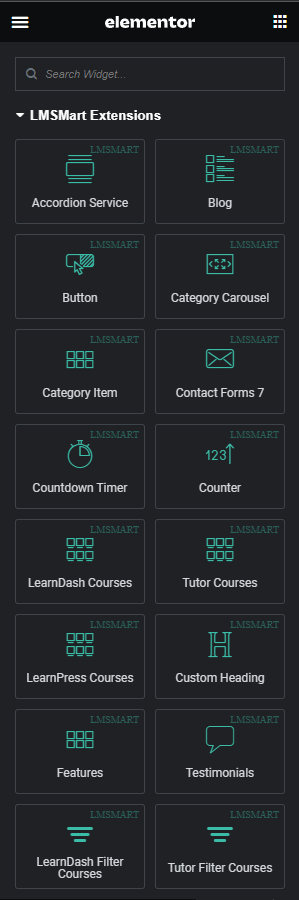
Elementor Elements
We have created several elementor elements to design our theme easily. You can find them from LMSMart Addons tab in the elementor. Let's discuss with some of our created elementor elements.
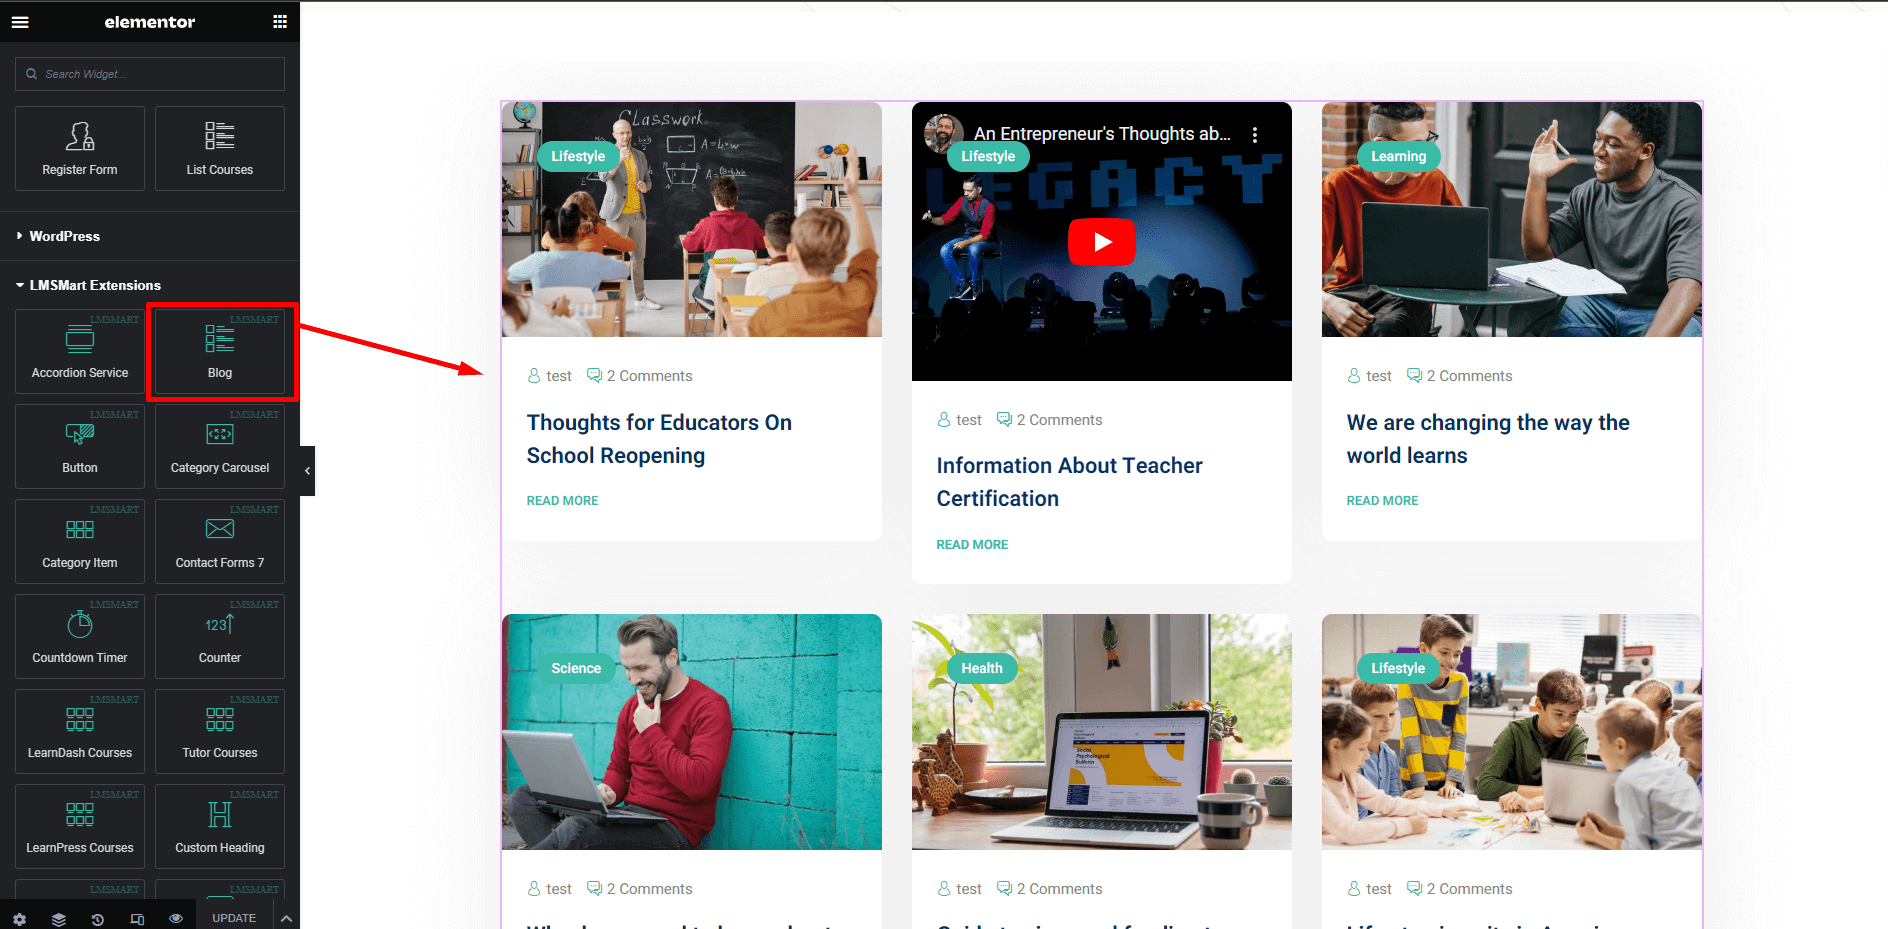
Blog
Using this element you can create awesome blog layout like in the following screenshot.You will find 2 different styles in blog element
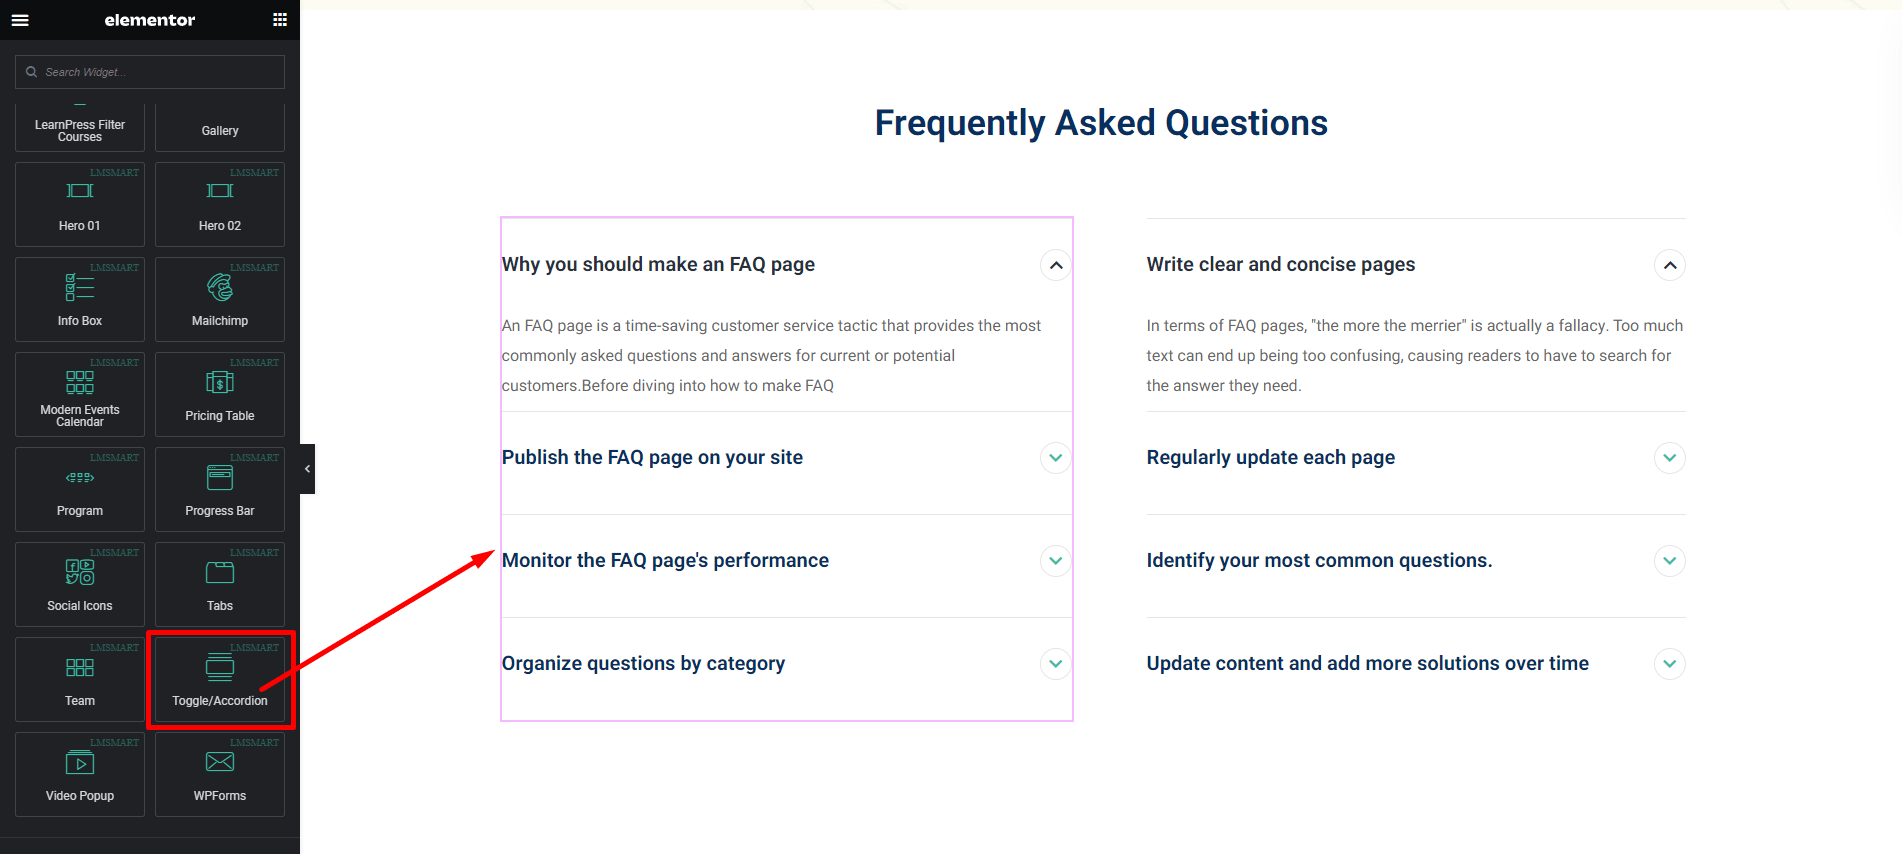
Toggle/Accordion
Using this element you can create accordion like in the following screenshot.
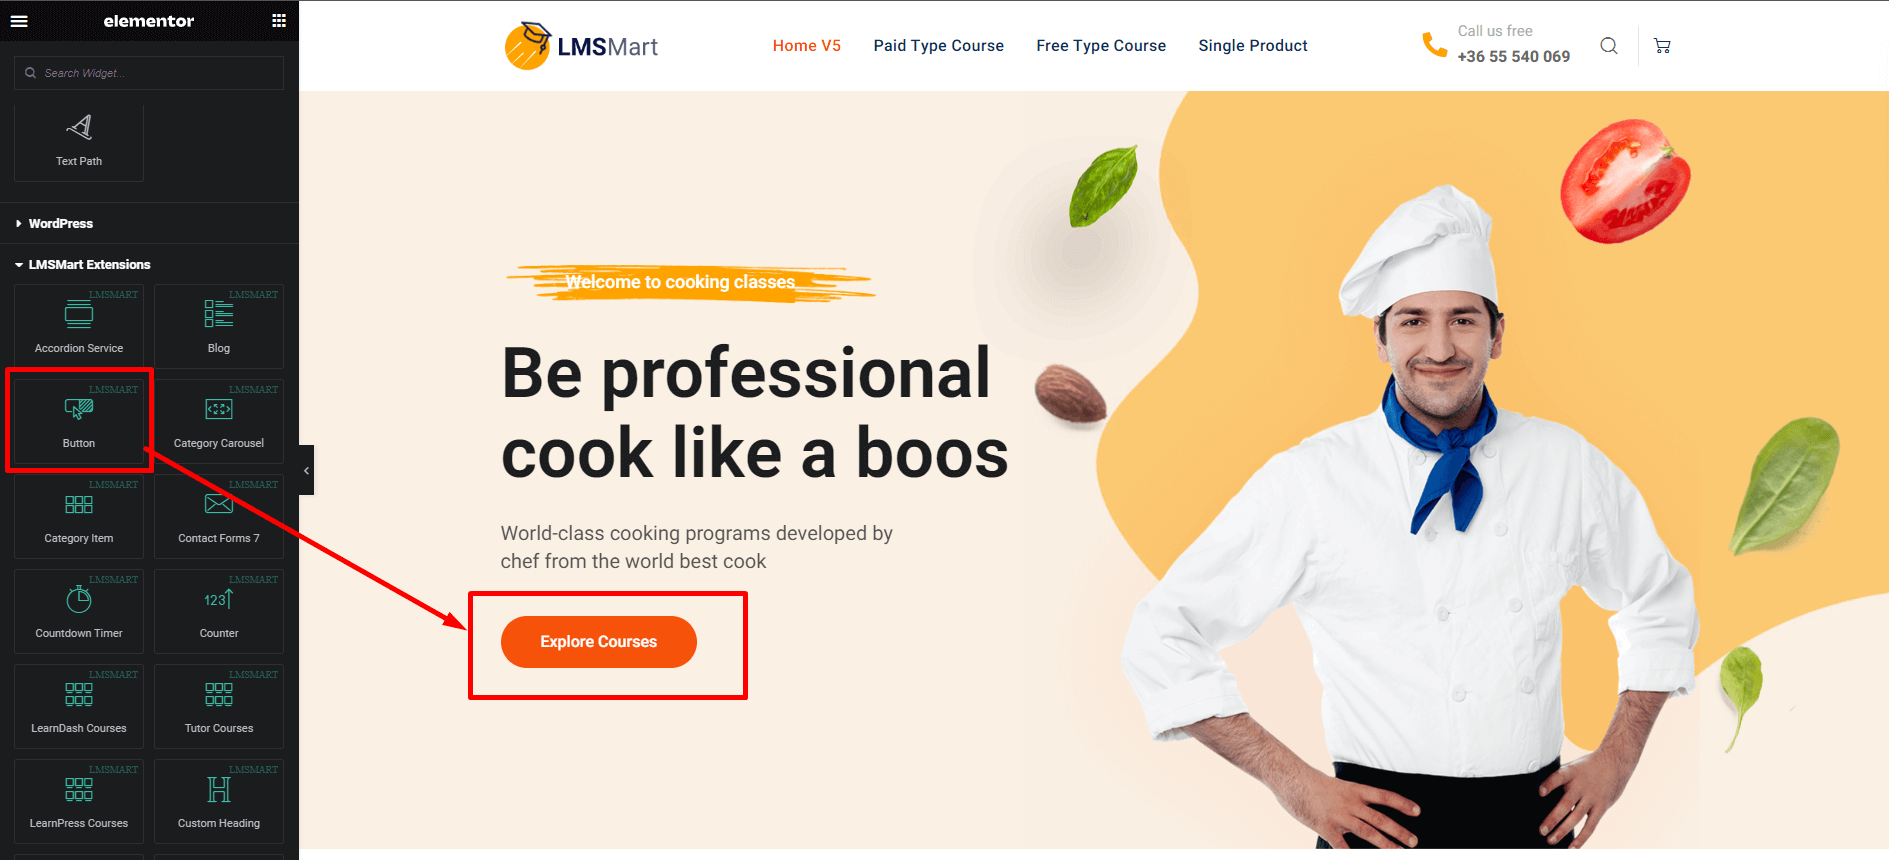
Button
Using this element you can custom button like in the following screenshot.
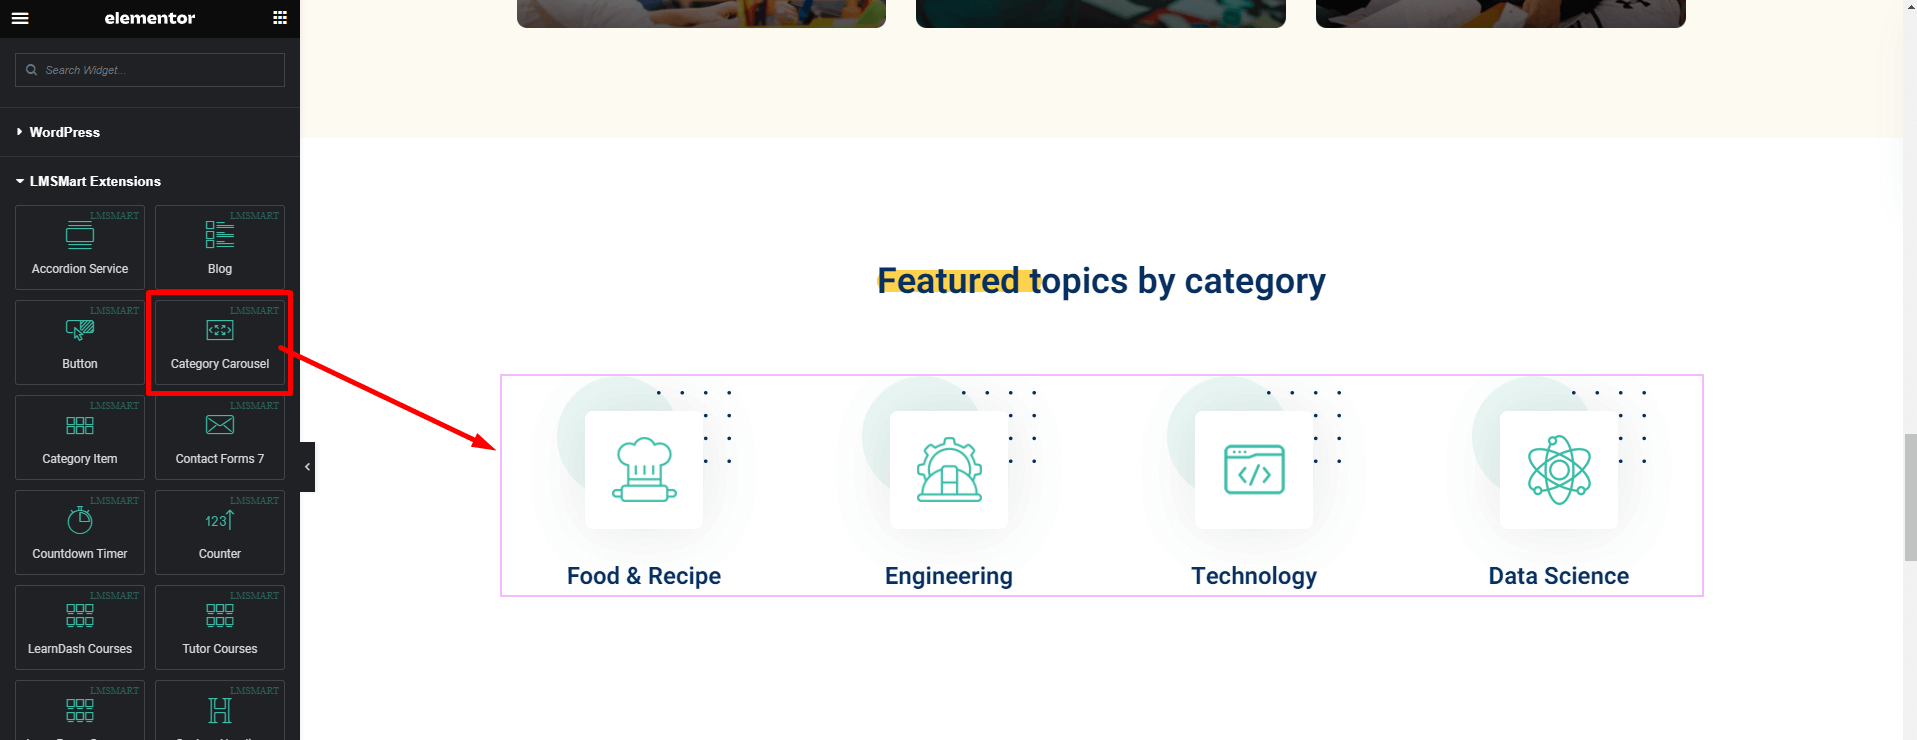
Category Carousel
This element will allows to make category carousel item. Follow the screenshot.
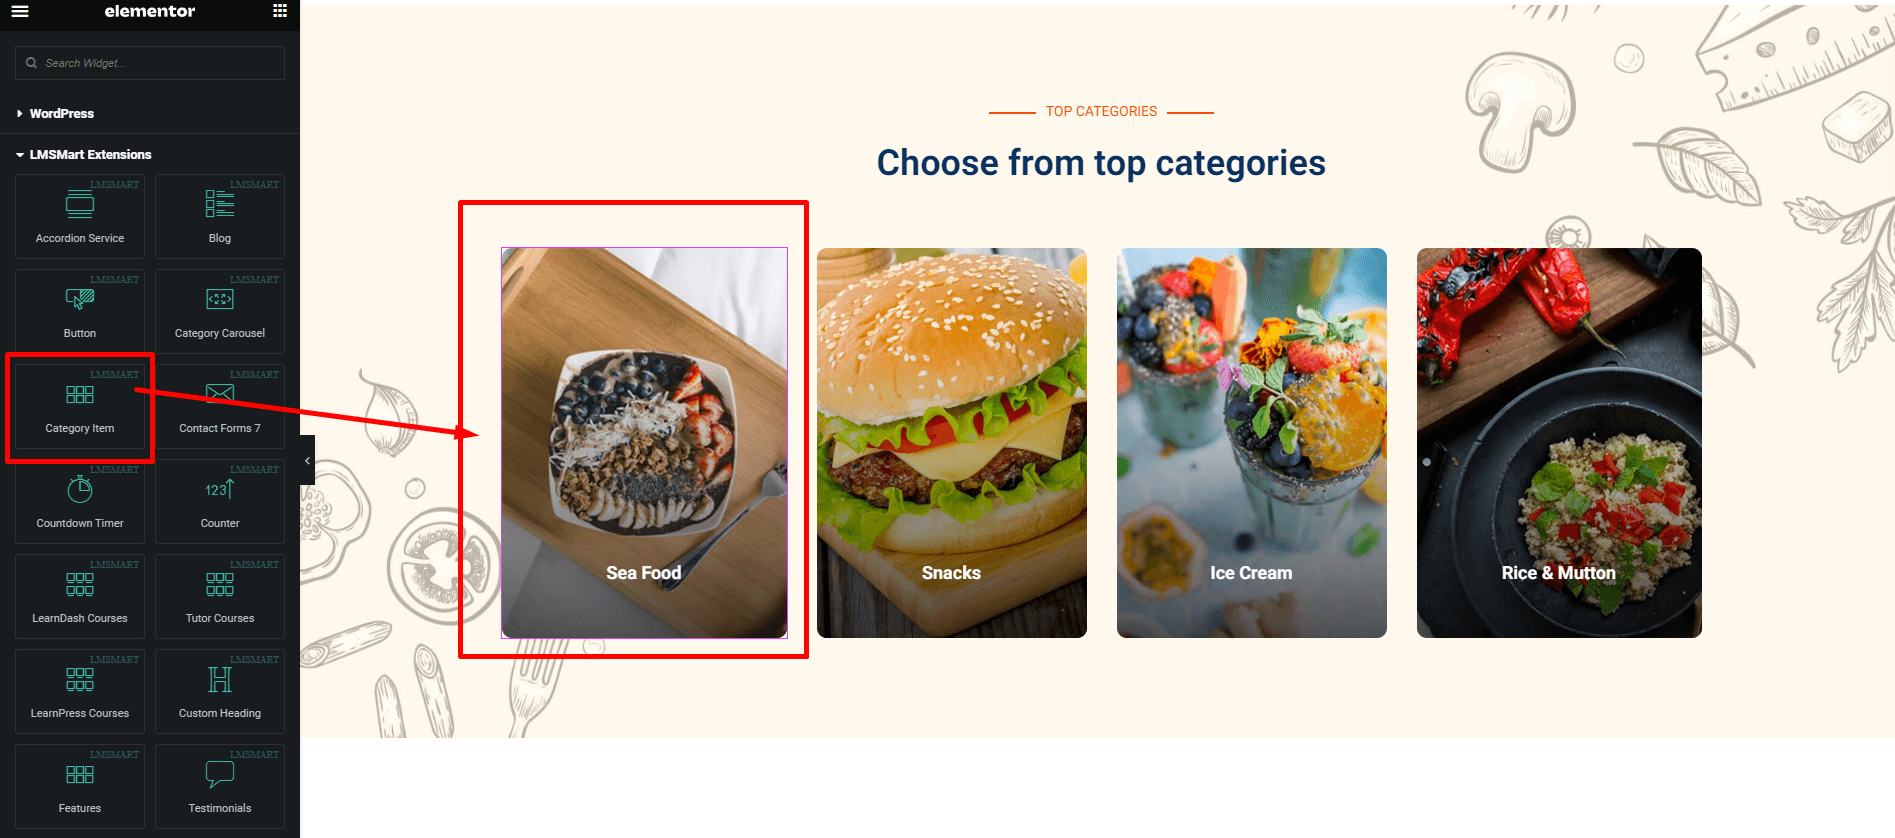
Category Item
This element will allows to make category item without carousel. Follow the screenshot. You will find 3 different styles in category item
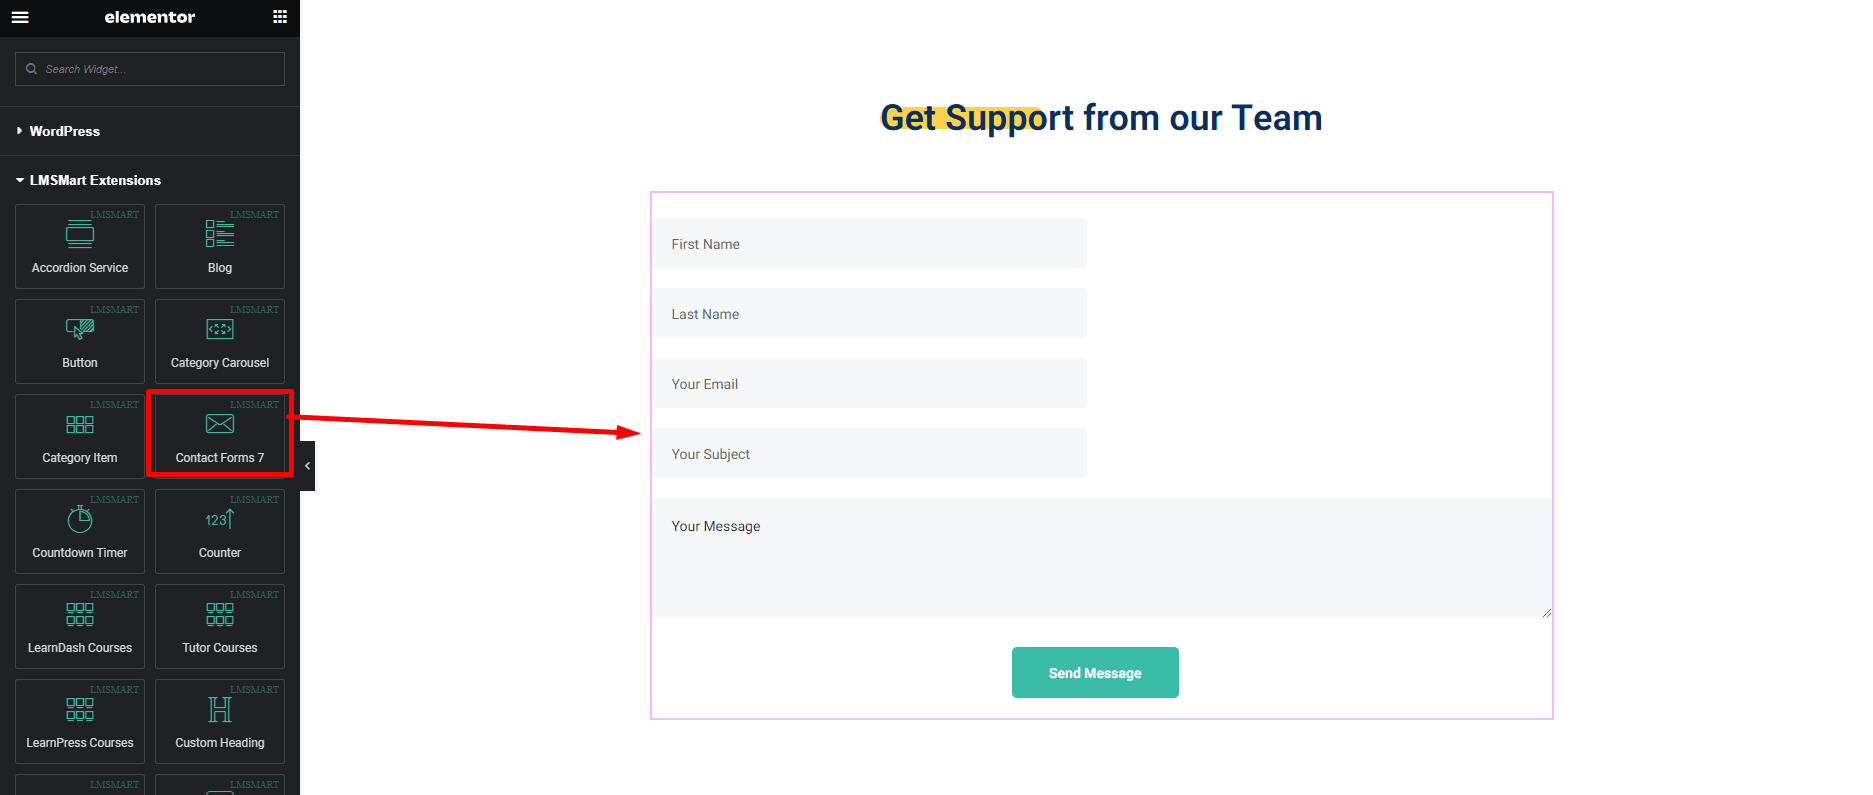
Contact Forms 7
To design contact form easily we've created this element. Follow the screenshot below.
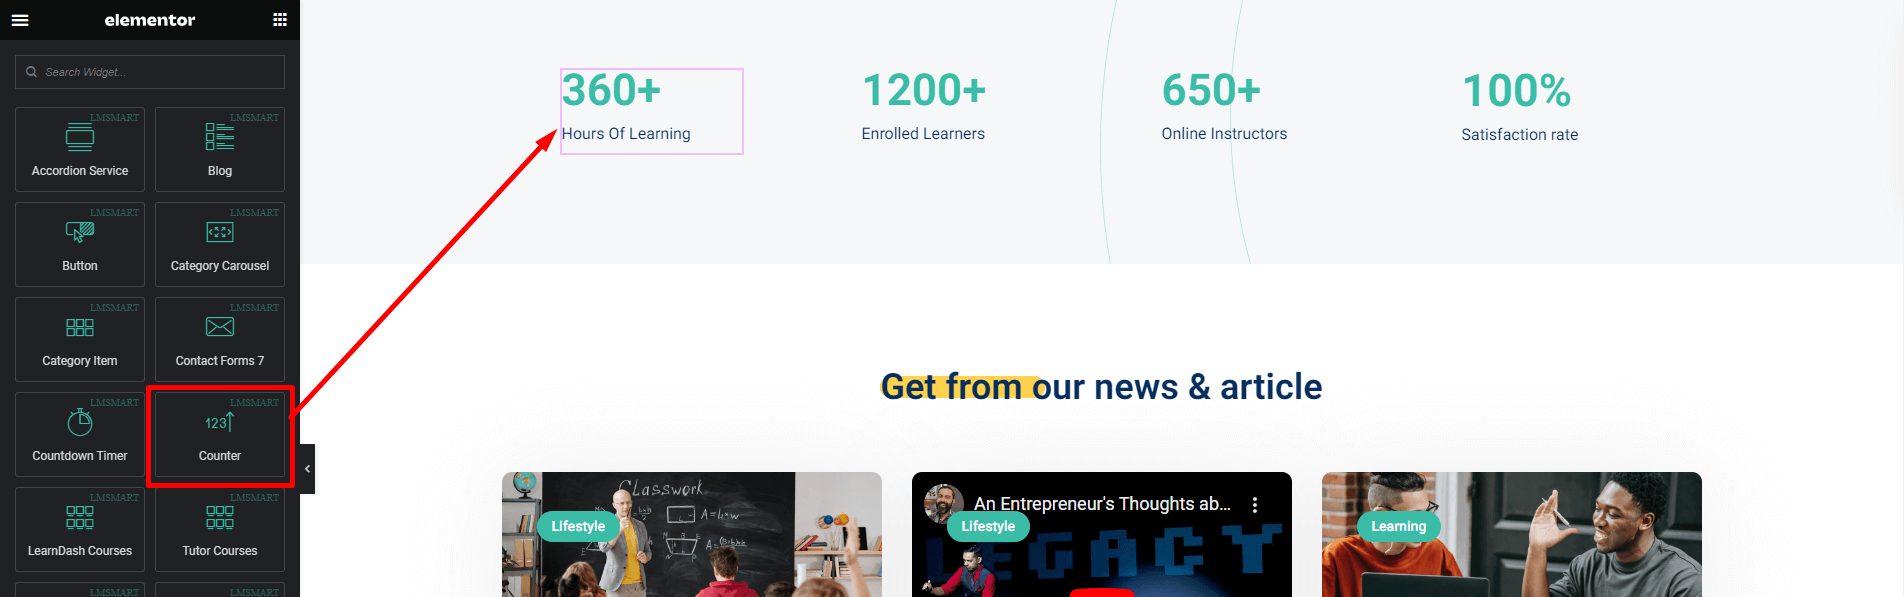
Counter
Using this element you can build counter like in the following screenshot below.
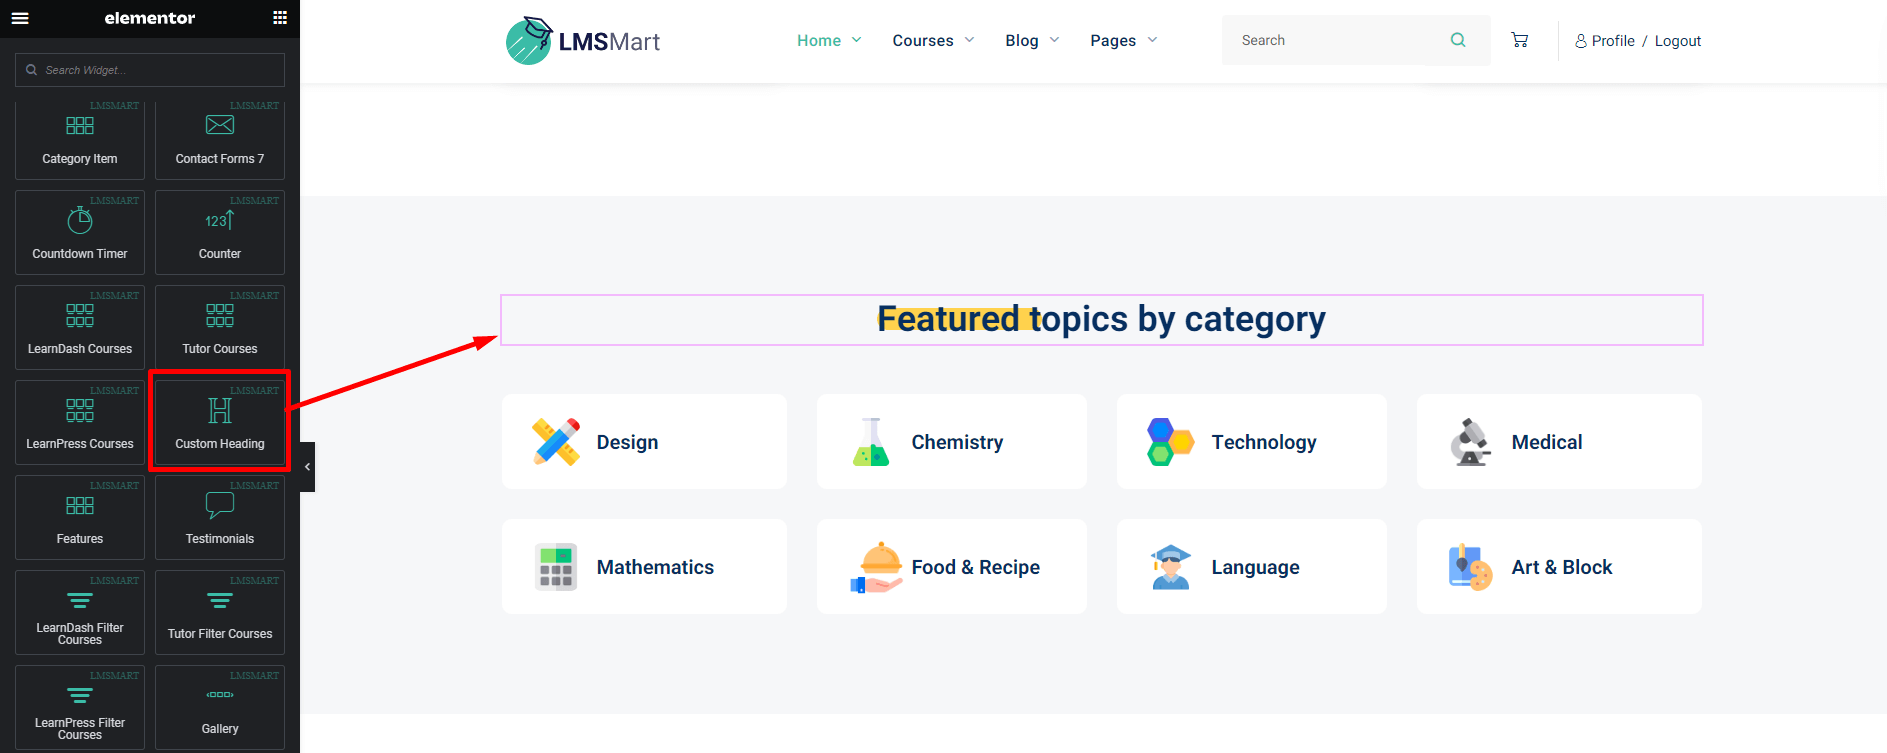
Custom Heading
Using this element you can create custom pre styled heading like in the following screenshot.
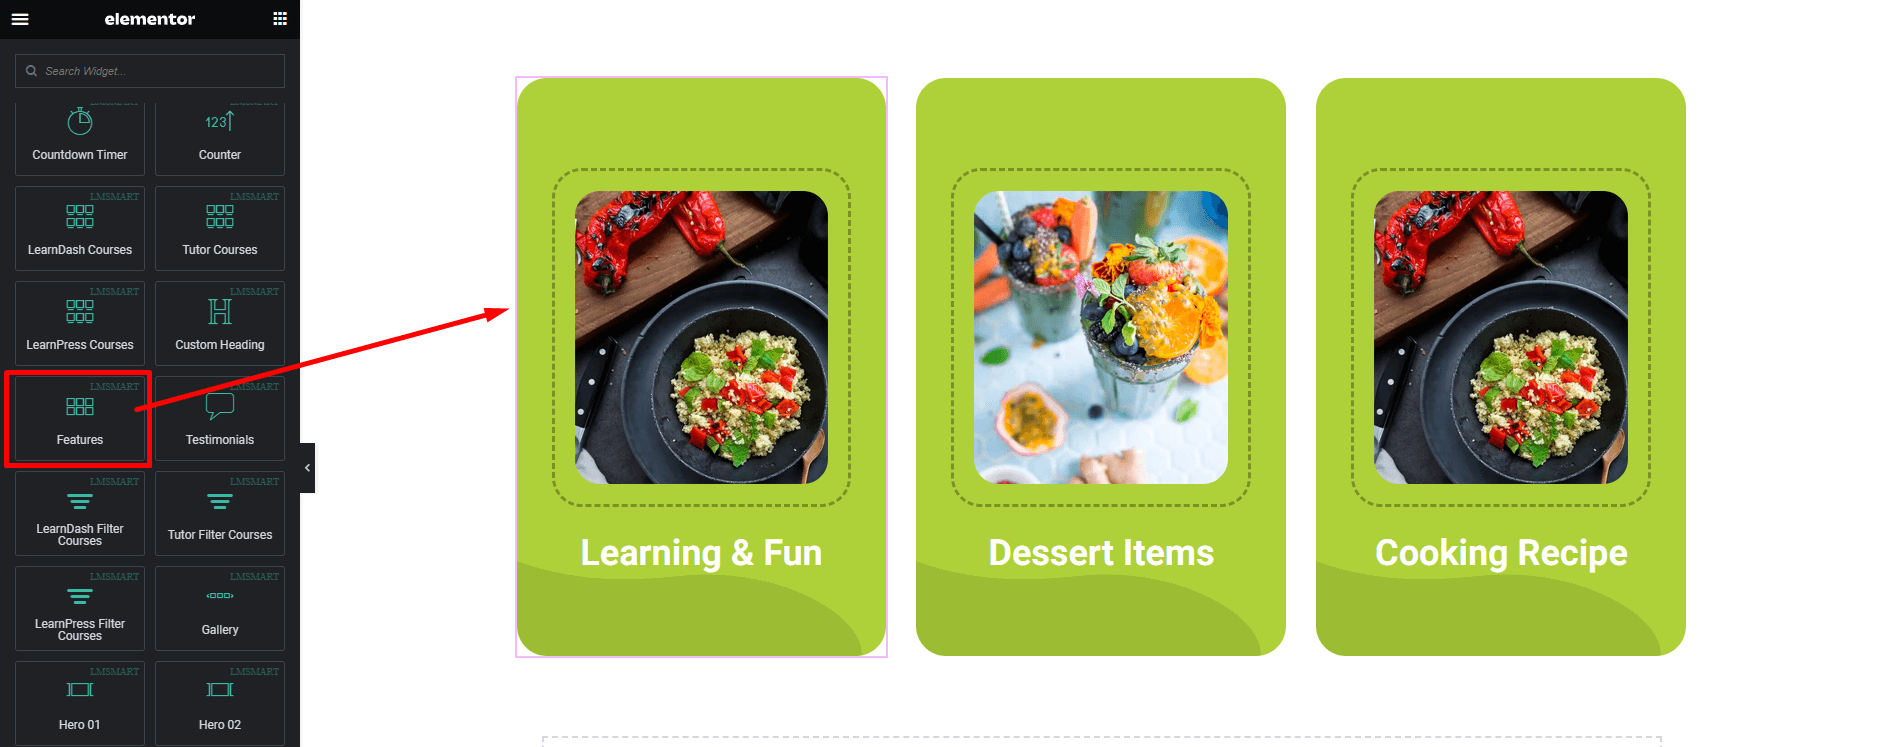
Features
If you want to add some featured items you can use this element. Follow the screenshot below.
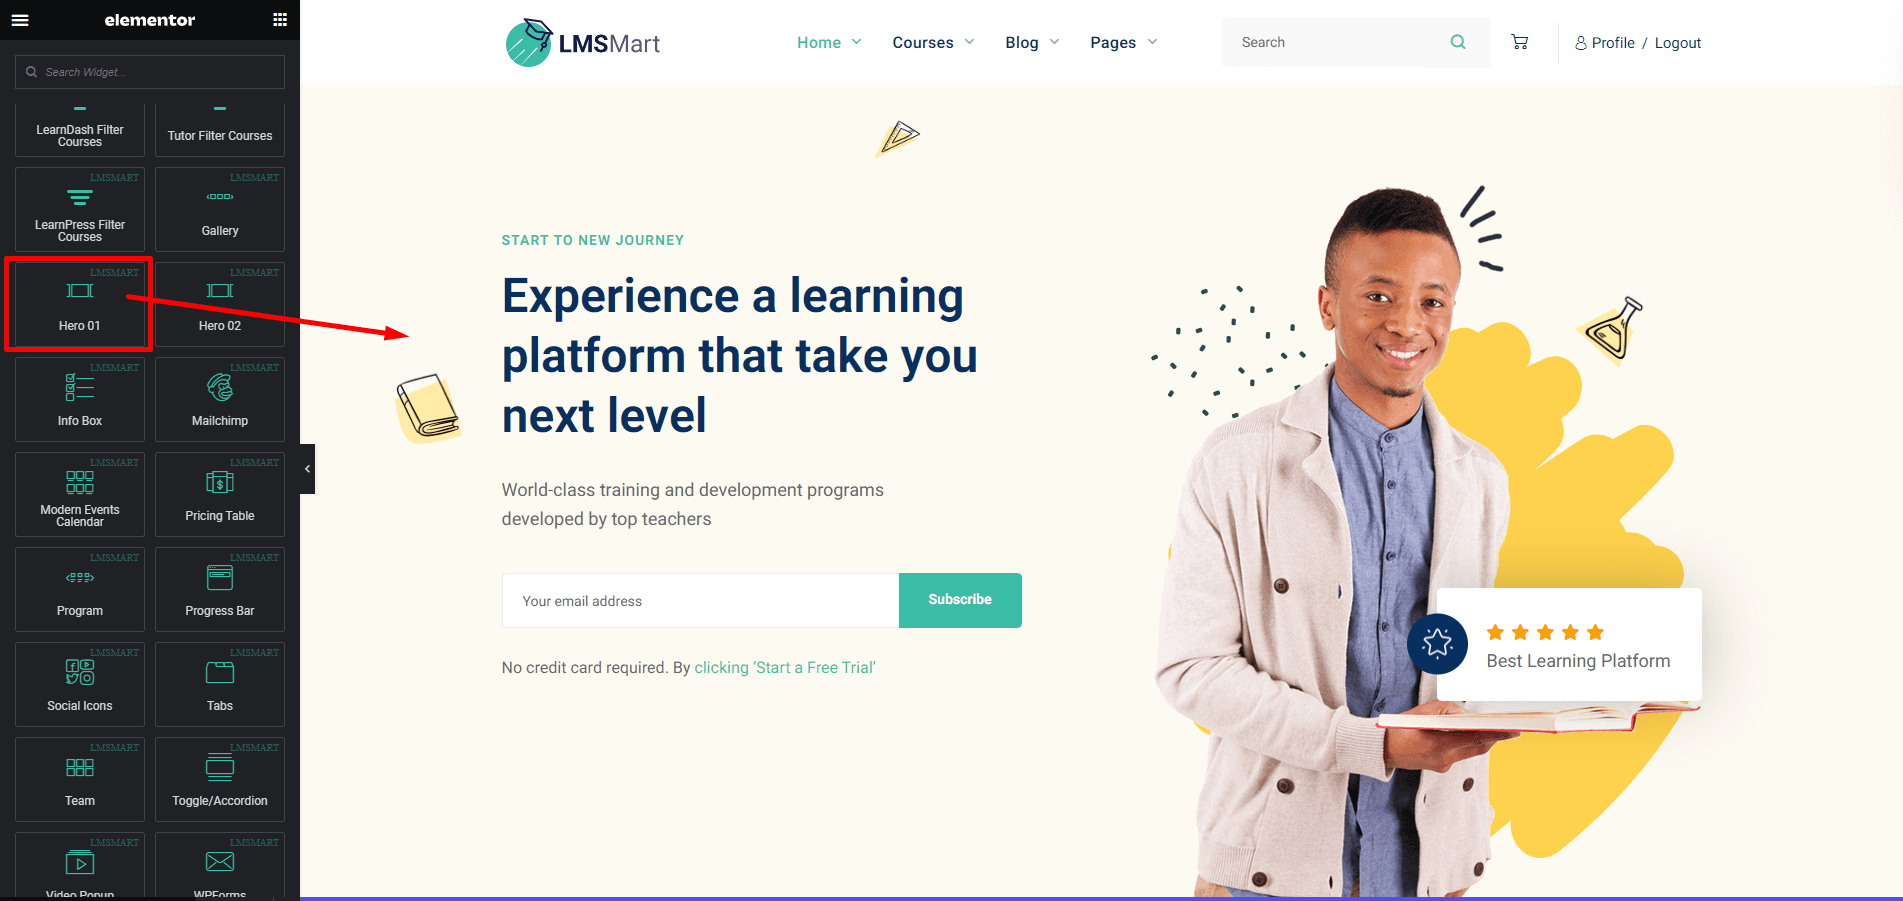
Hero 1
Using this element you can easily create pre styled hero. This is hero element 1. Follow the screenshot.
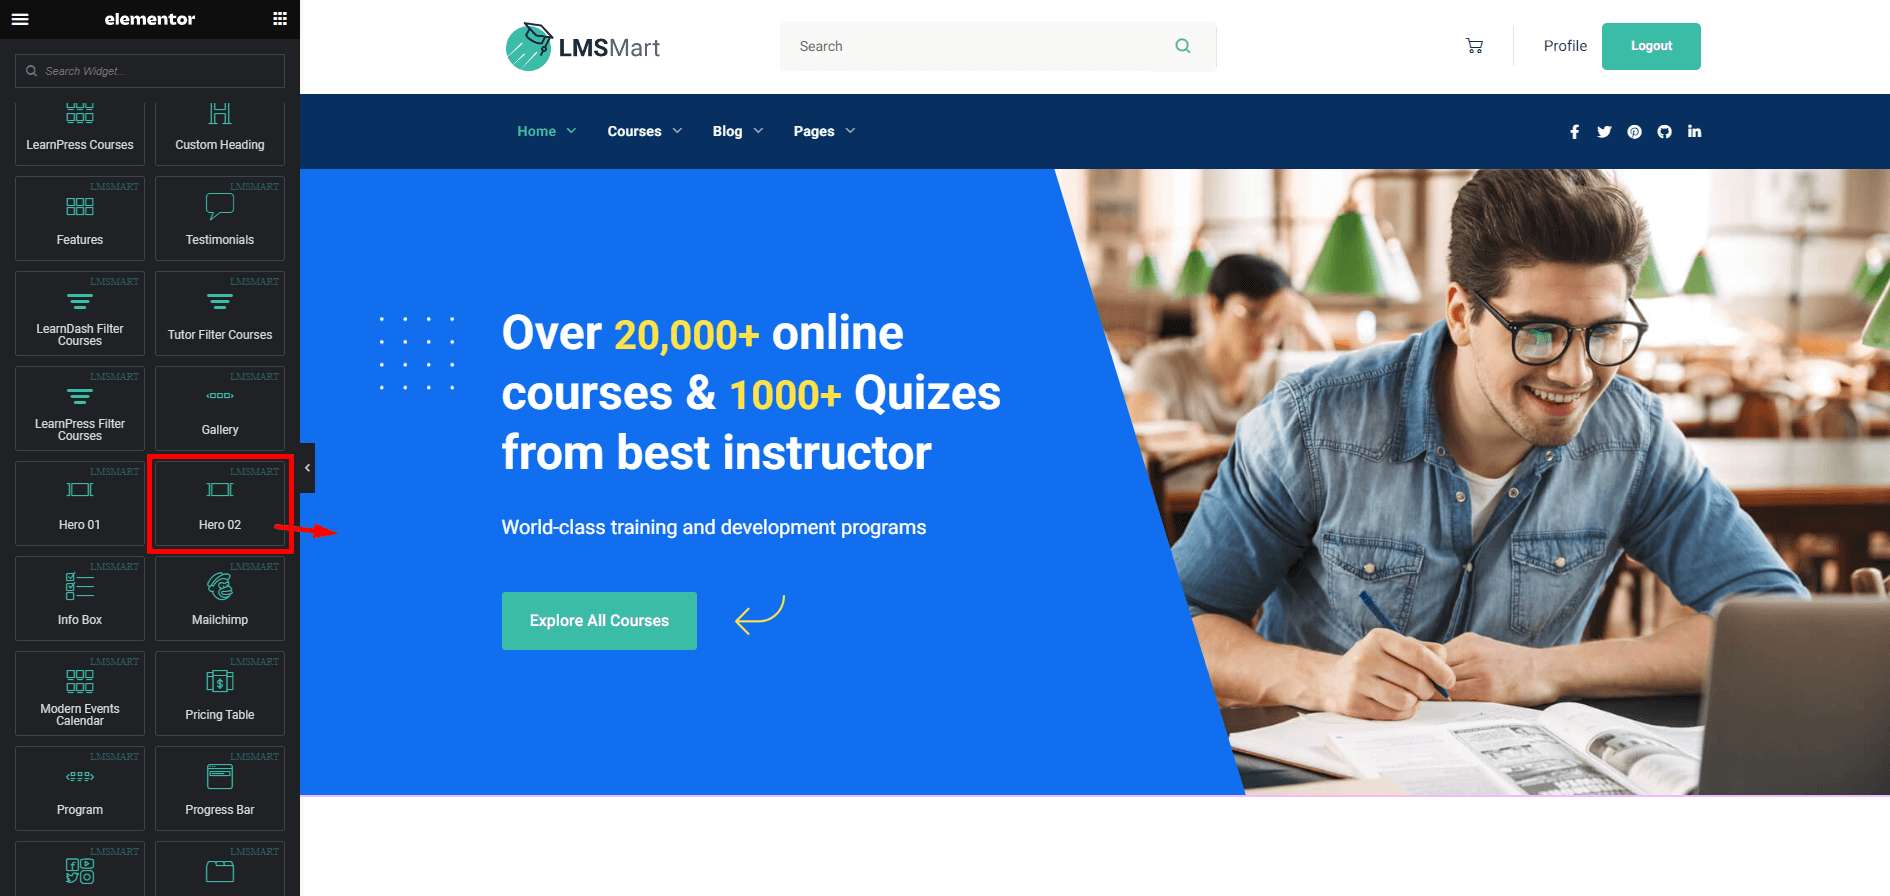
Hero 2
Using this element you can easily create pre styled hero. This is hero element 2. Follow the screenshot.
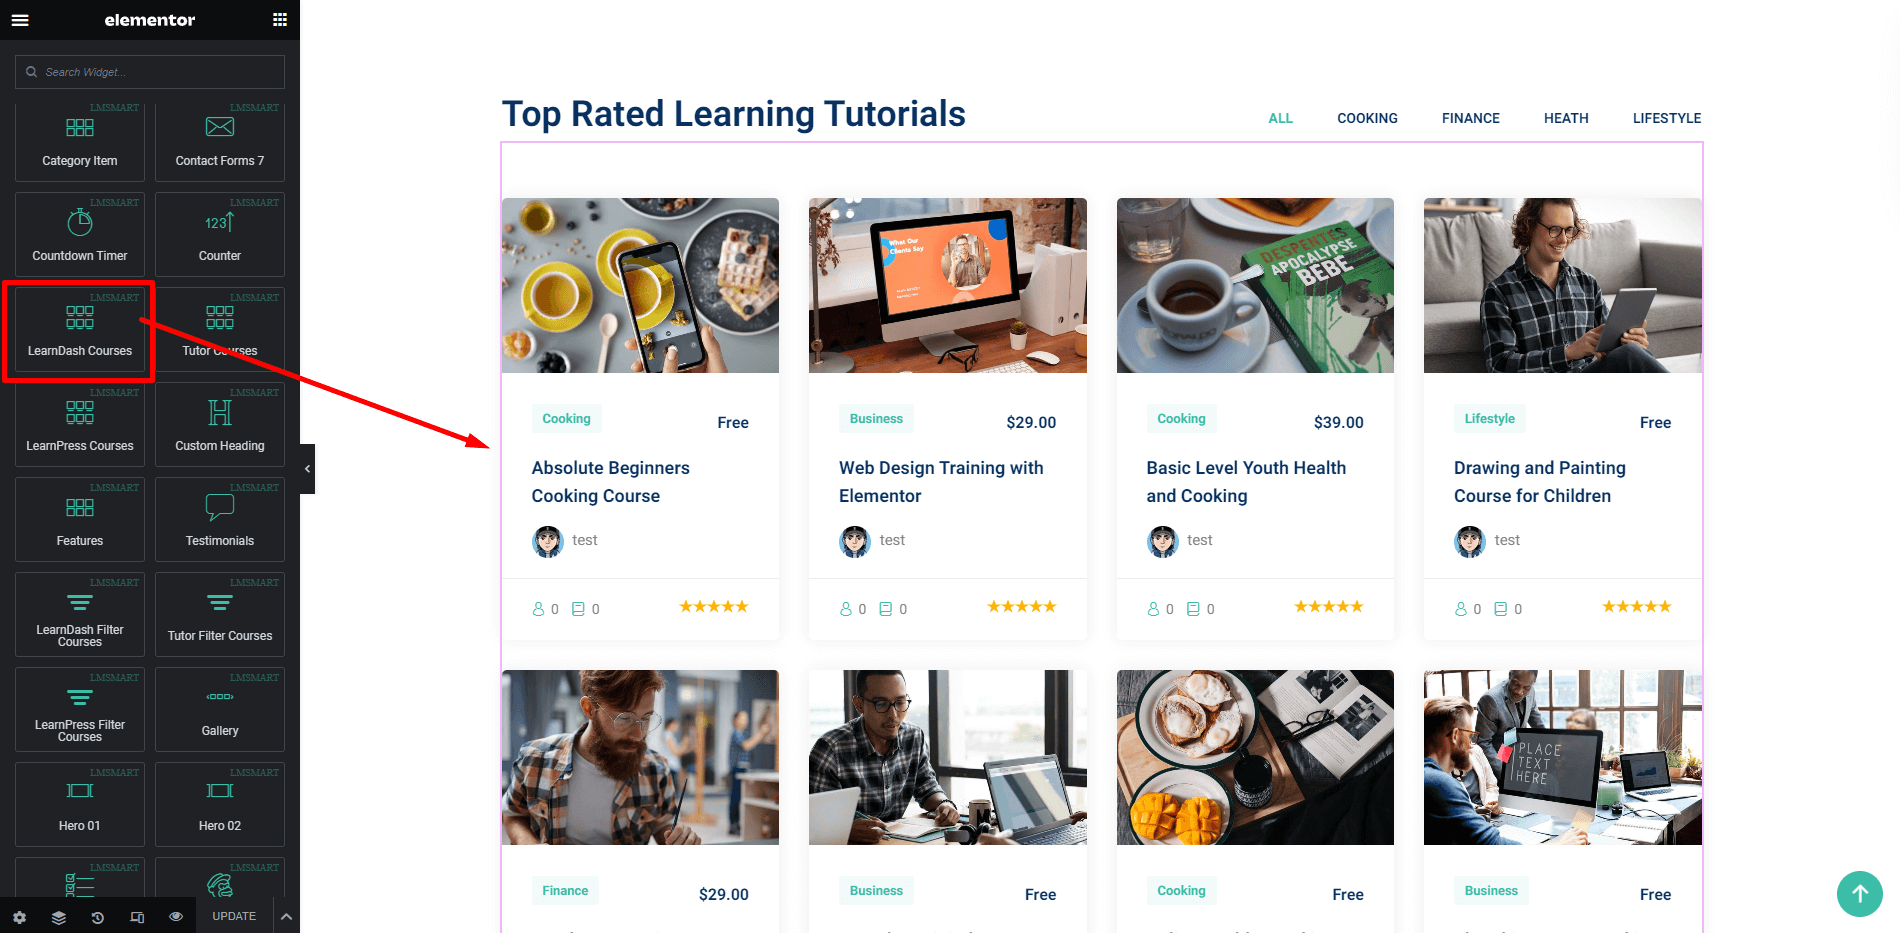
LearnDash Courses
Using this element you can create awesome course section with drag and drop like in the screenshot. You will find 3 different styles in LearnDash courses element.
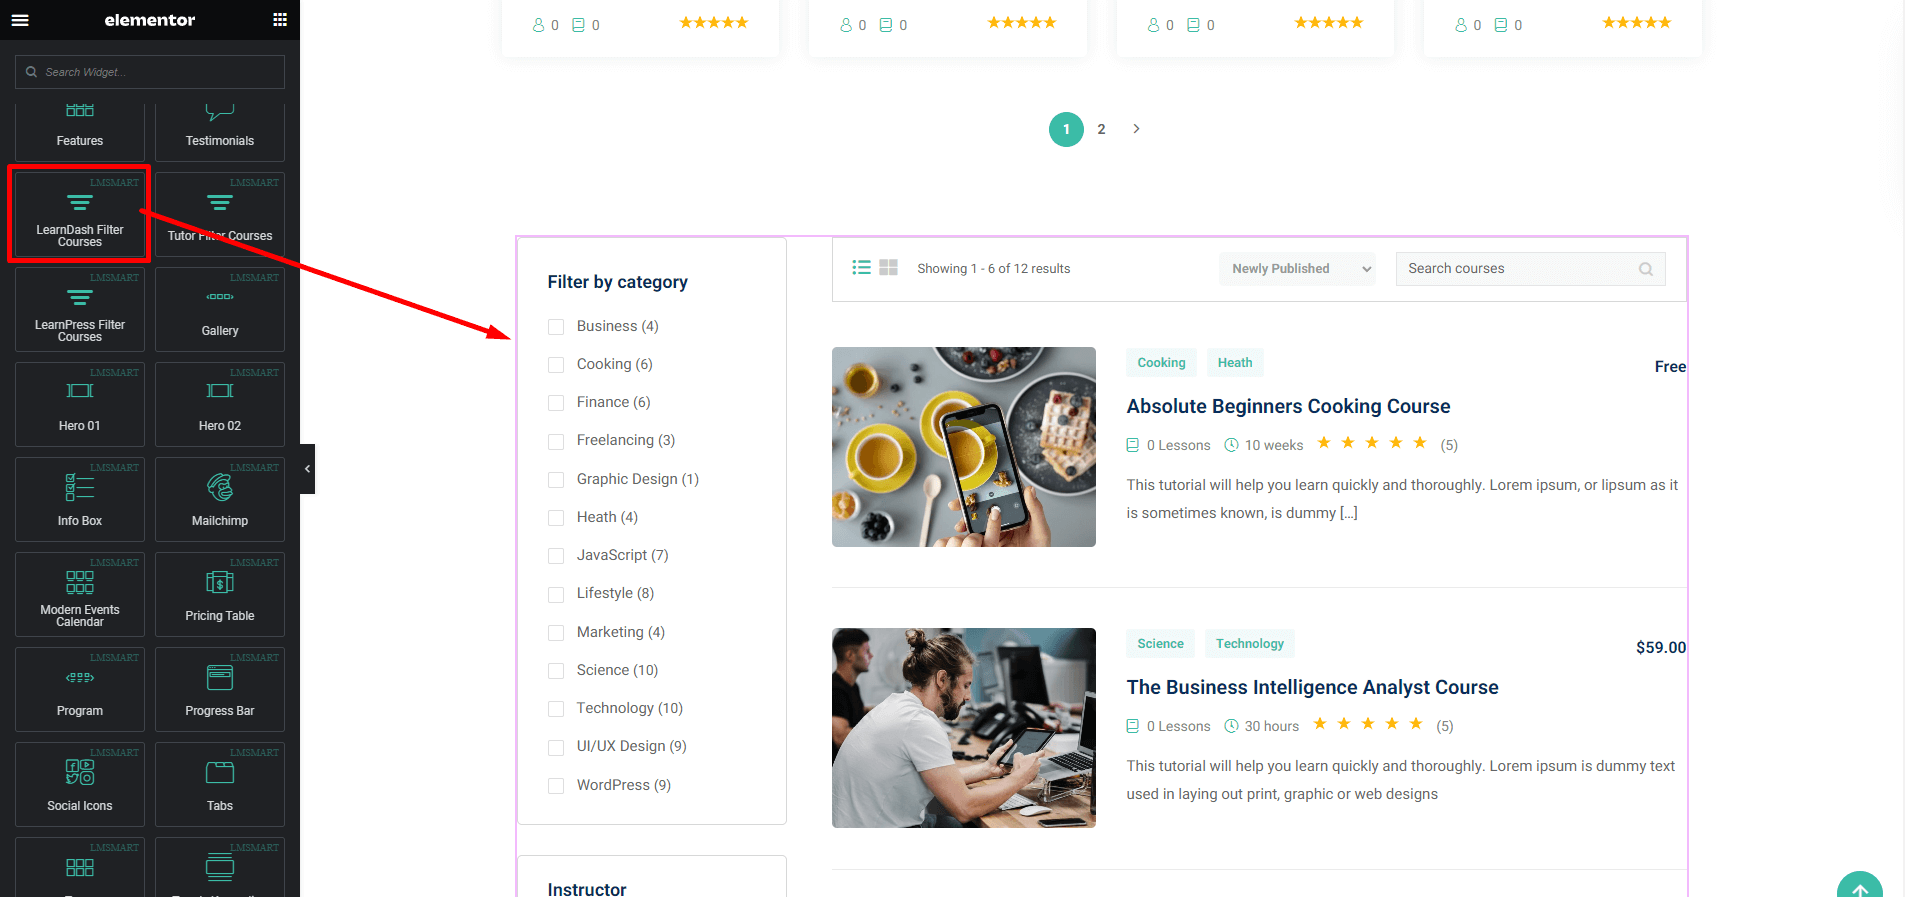
LearnDash Course Filter
This element will allow you to create course filter like in the following screenshot. You will find 3 different styles in LearnDash courses filter element.
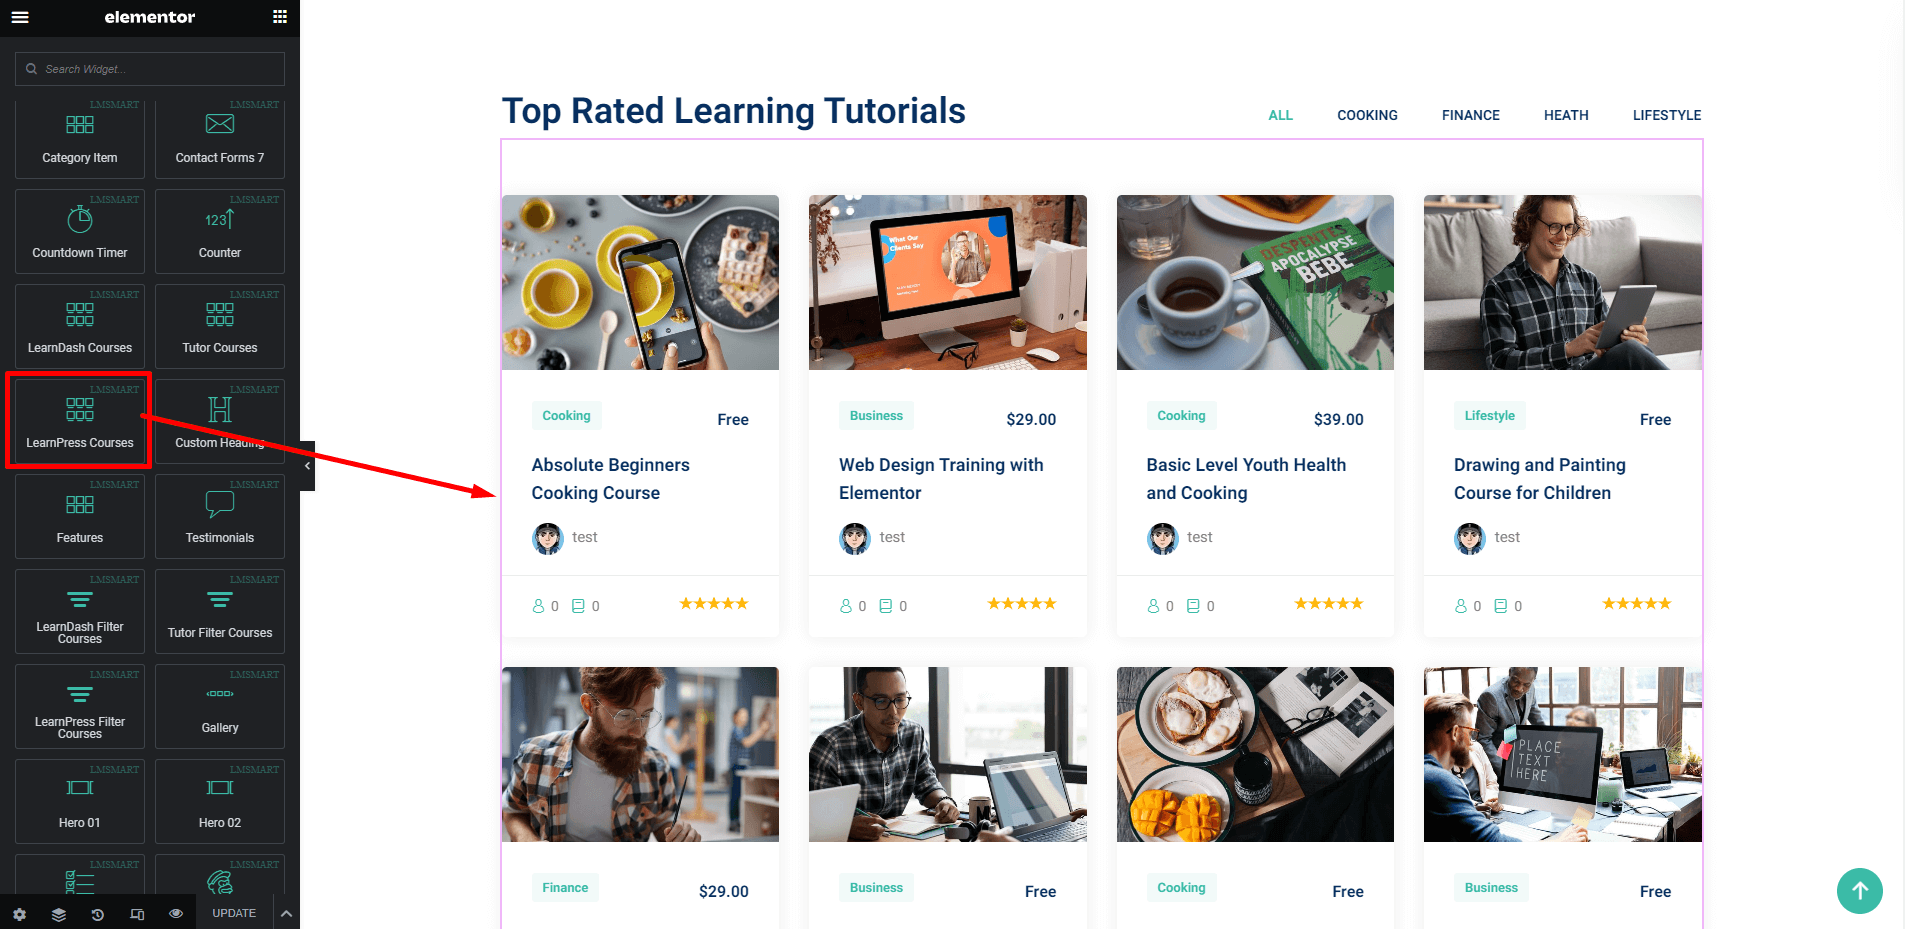
LearnPress Courses
Using this element you can create awesome course grid section with drag and drop. Follow The screenshot. You will find 3 different styles in LearnPress courses element.
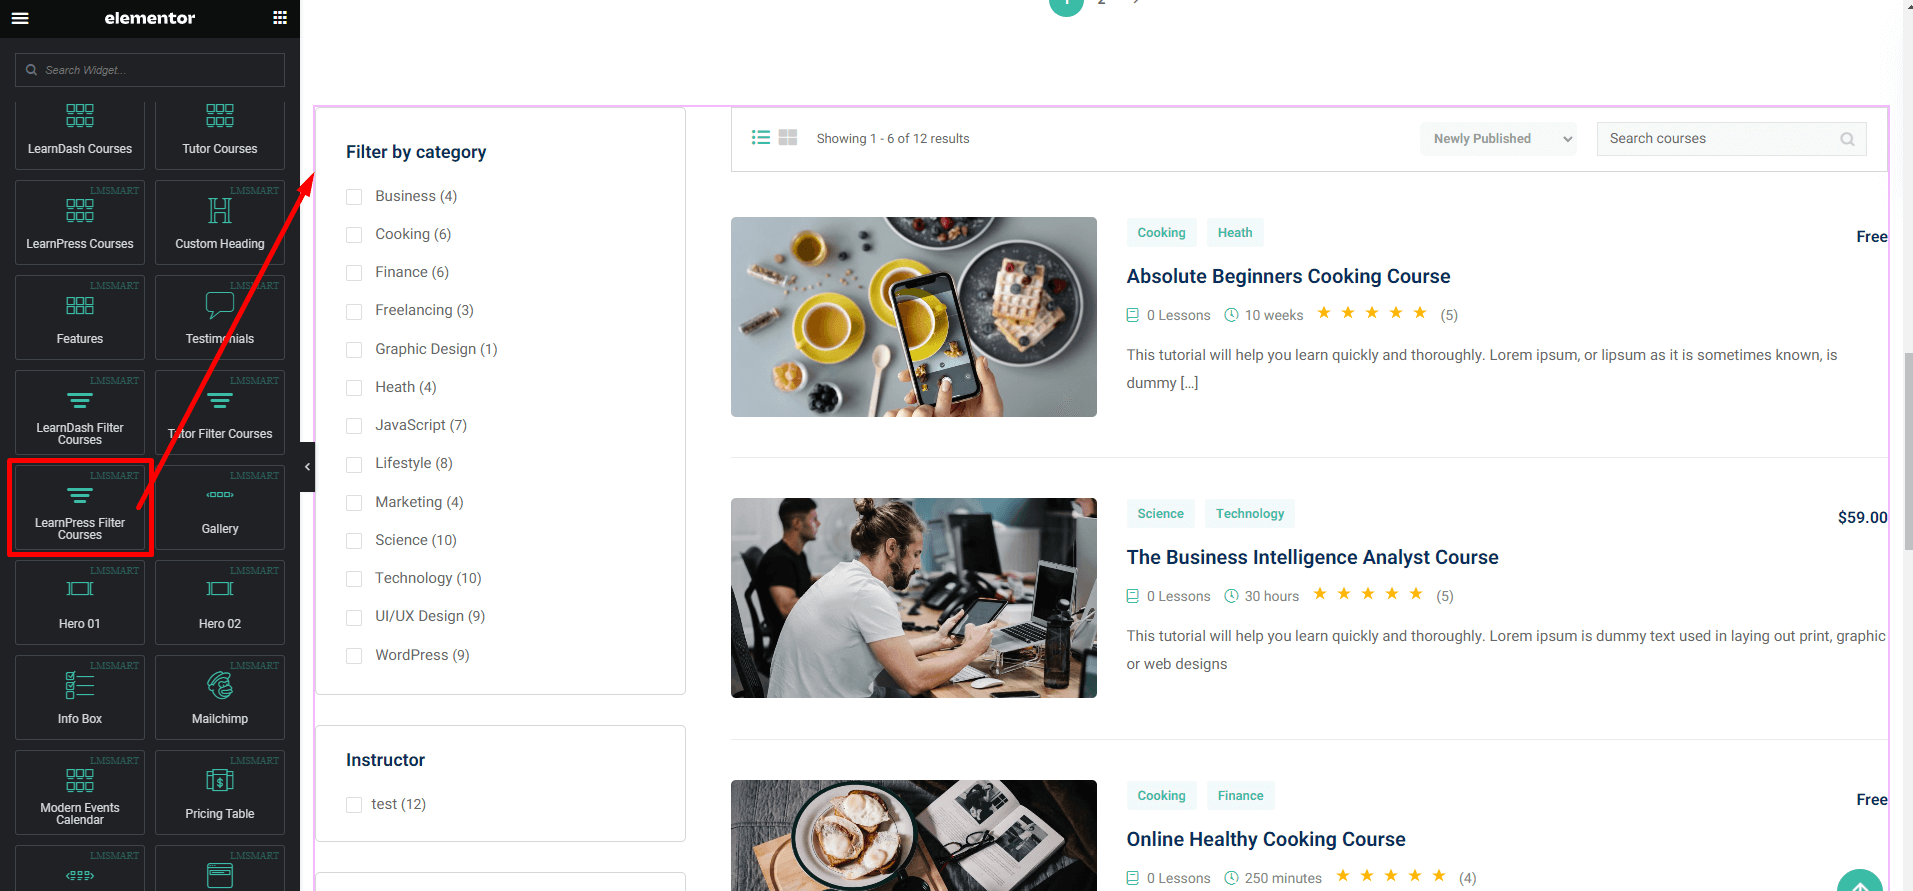
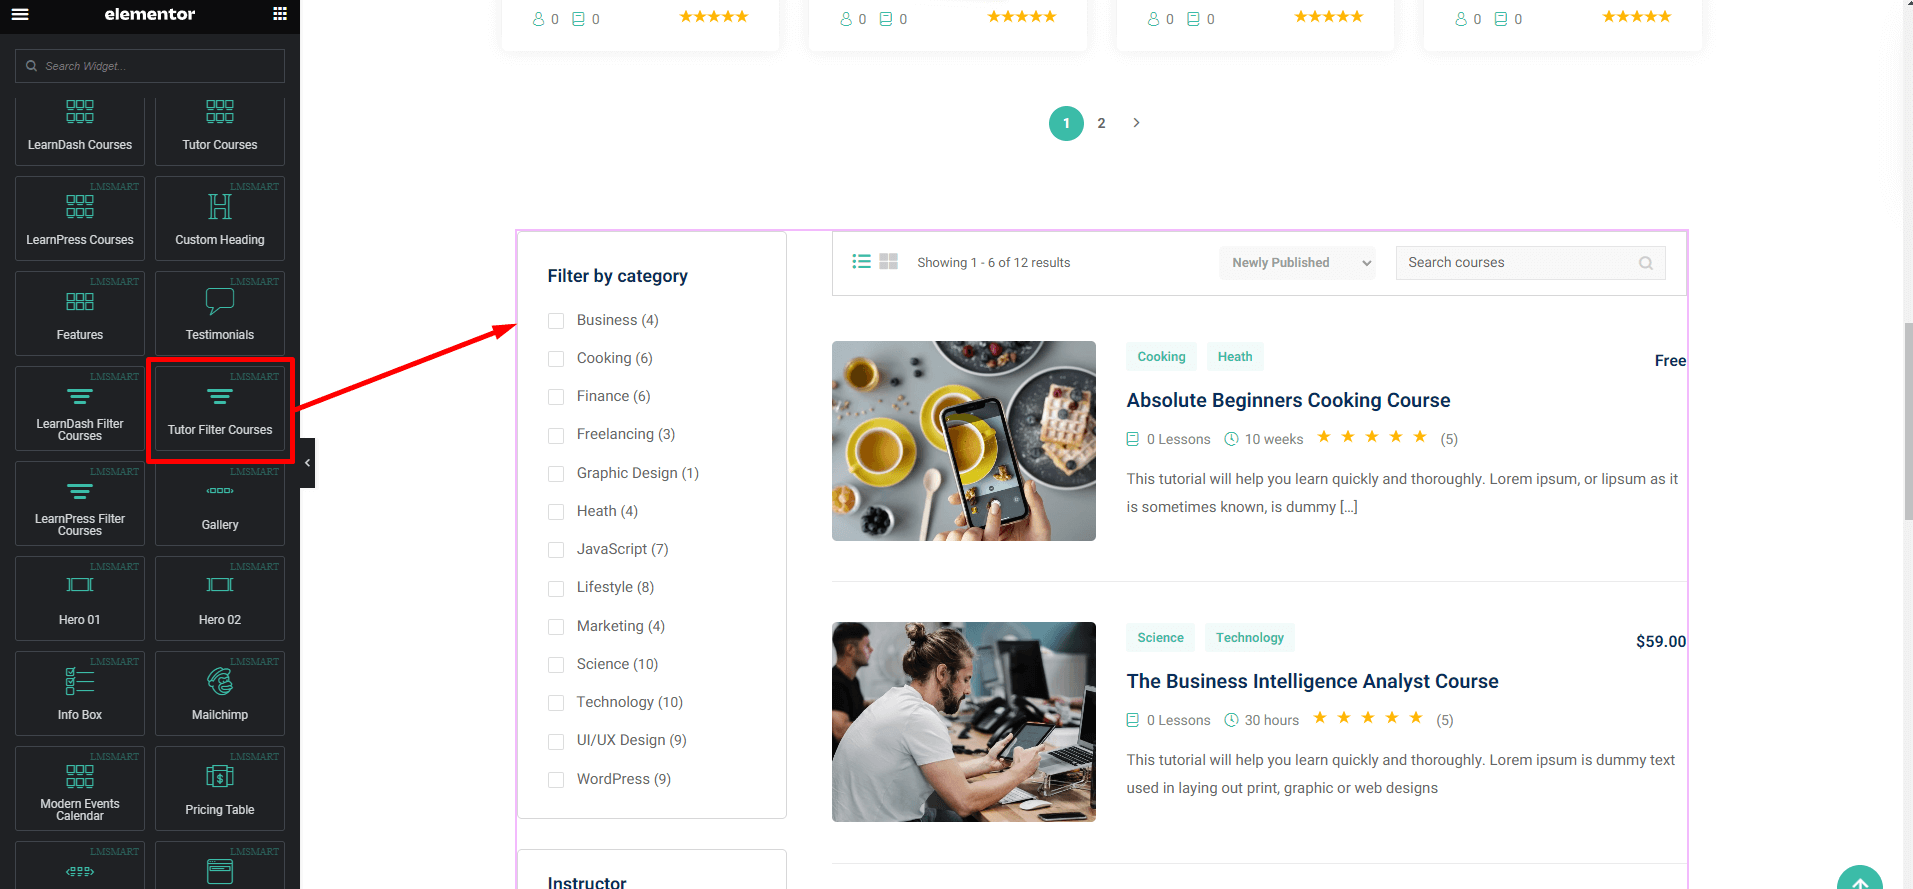
LearnPress Course Filter
This element will allow you to create course filter like in the following screenshot. You will find 3 different styles in LearnPress courses filter element.
Tutor Courses
Using this element you can create awesome course grid section with drag and drop. Follow The screenshot. You will find 3 different styles in Tutor courses element.

LearnPress Course Filter
This element will allow you to create course filter like in the following screenshot. You will find 3 different styles in Tutor Courses Filter element.
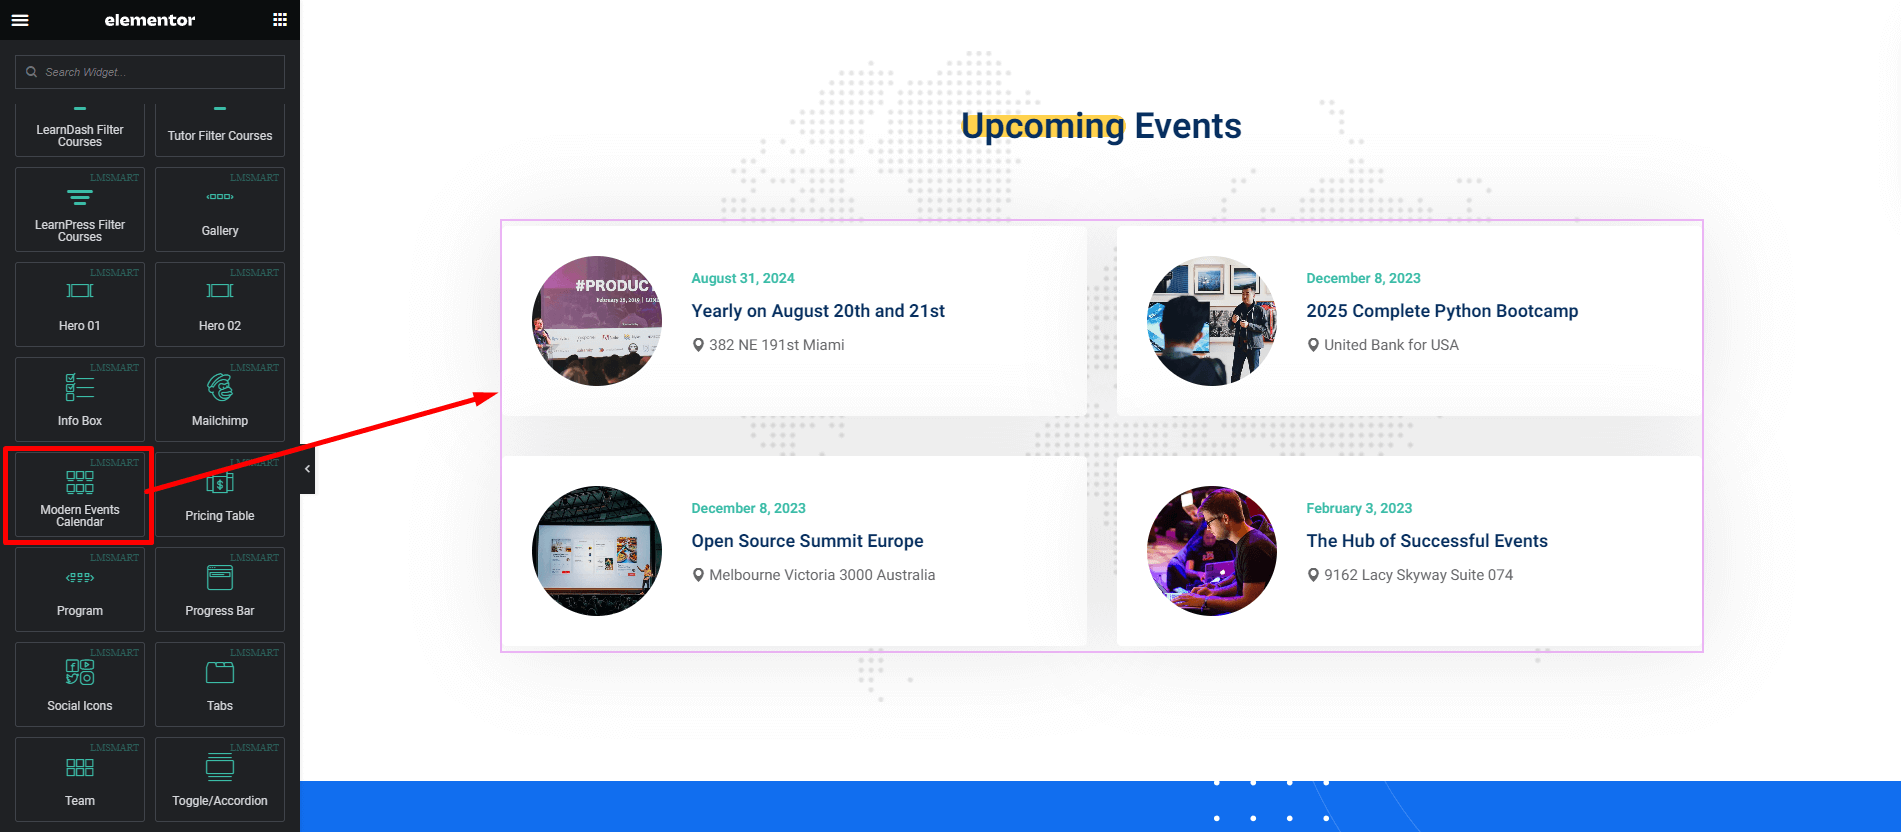
Modern Events Calendar
You can use this element to create calender sections like in the following screenshot.
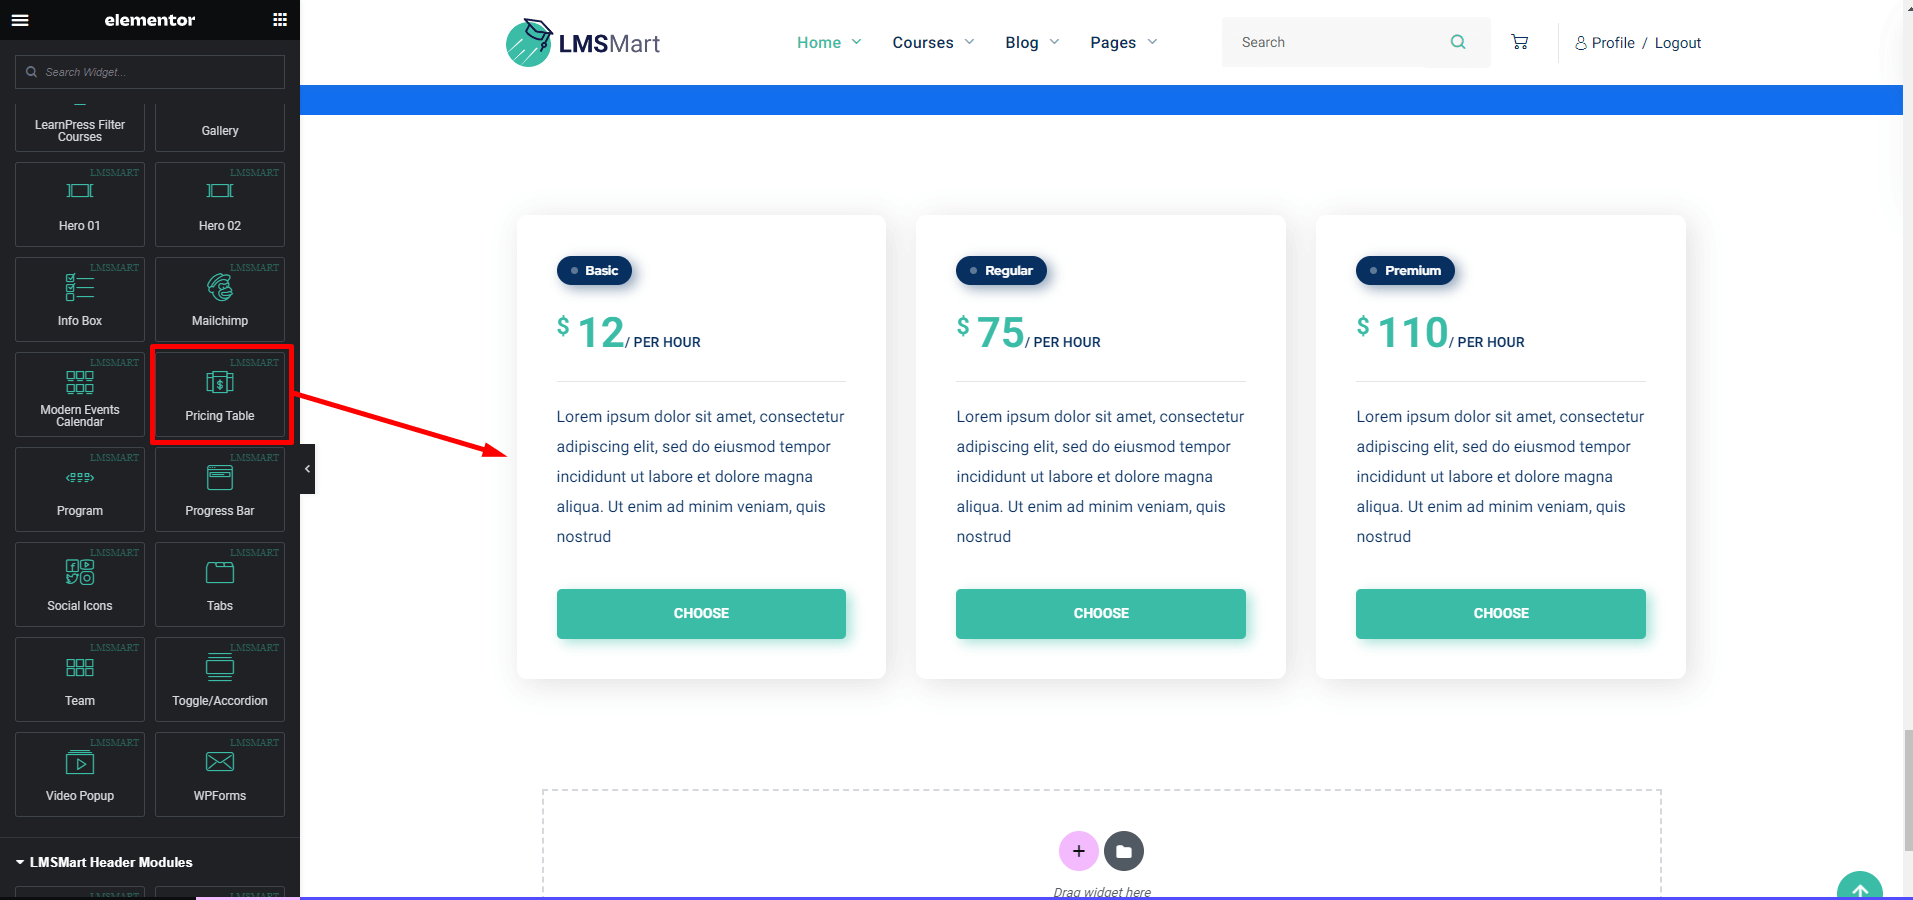
Pricing Table
Using this element you can create pricing table like in the following screenshot.
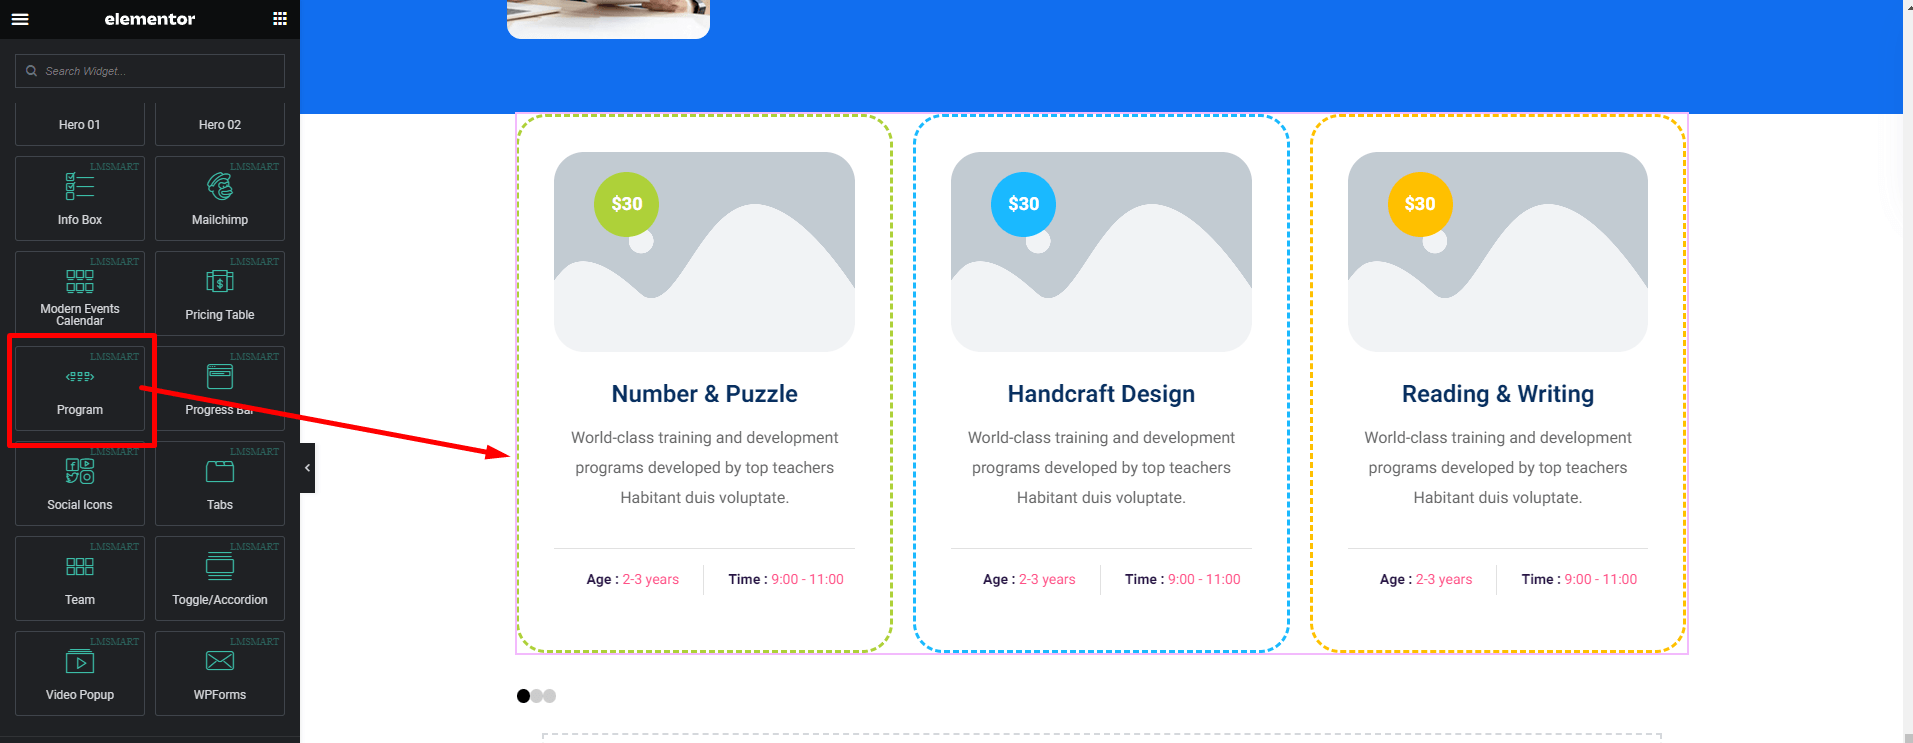
Program
Using this element you can create program section like in the following screenshot.
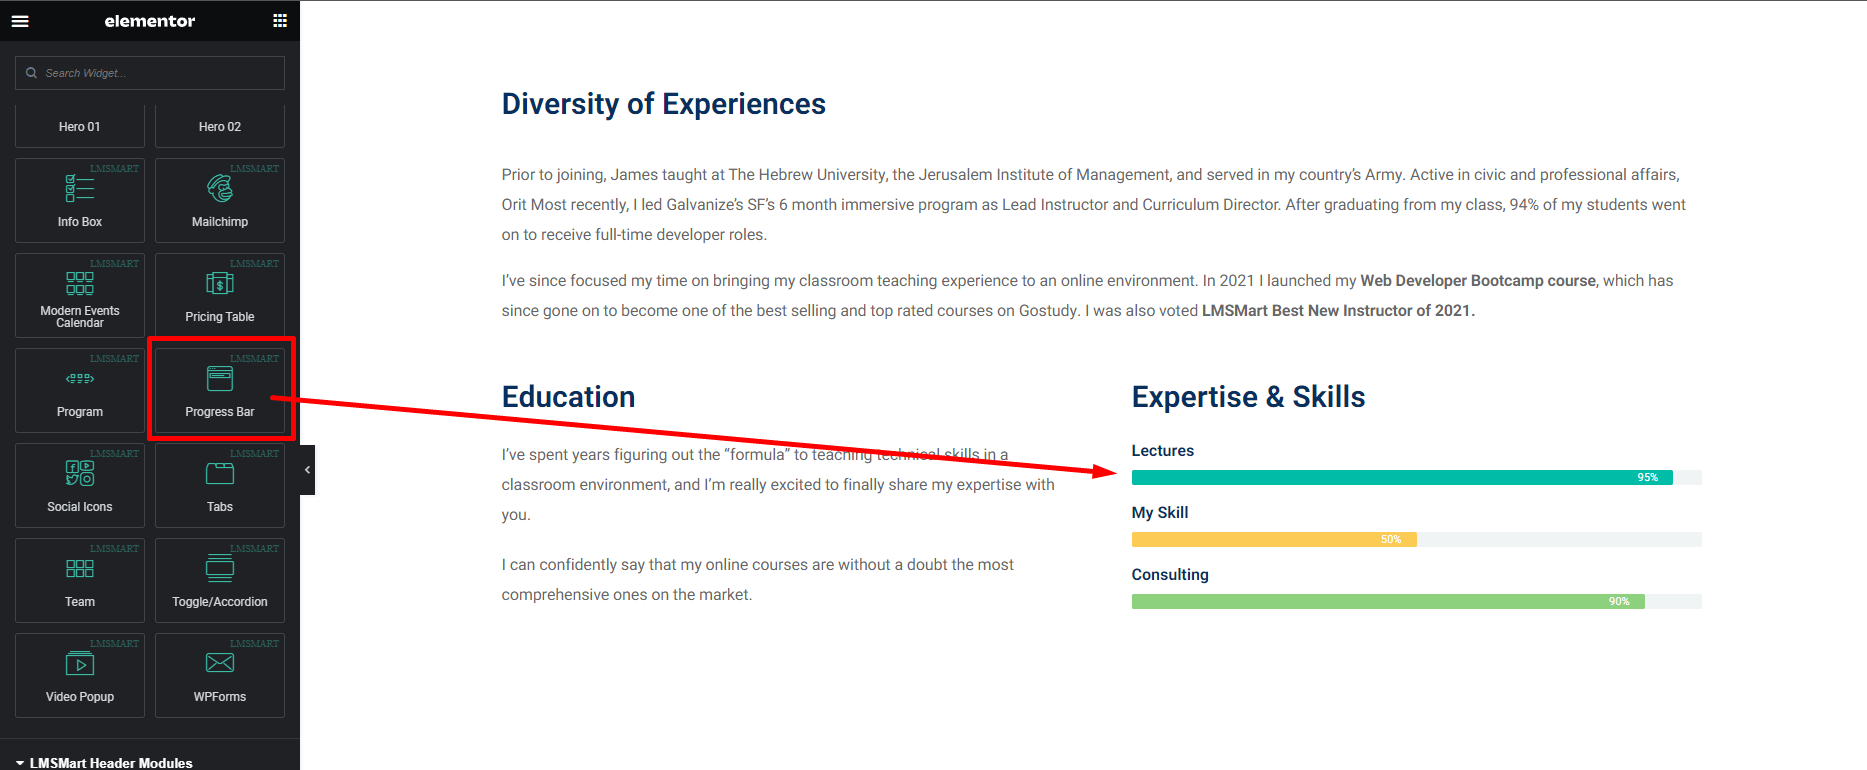
Progress Bar
You can create awesome progress bar. Follow the screenshot.
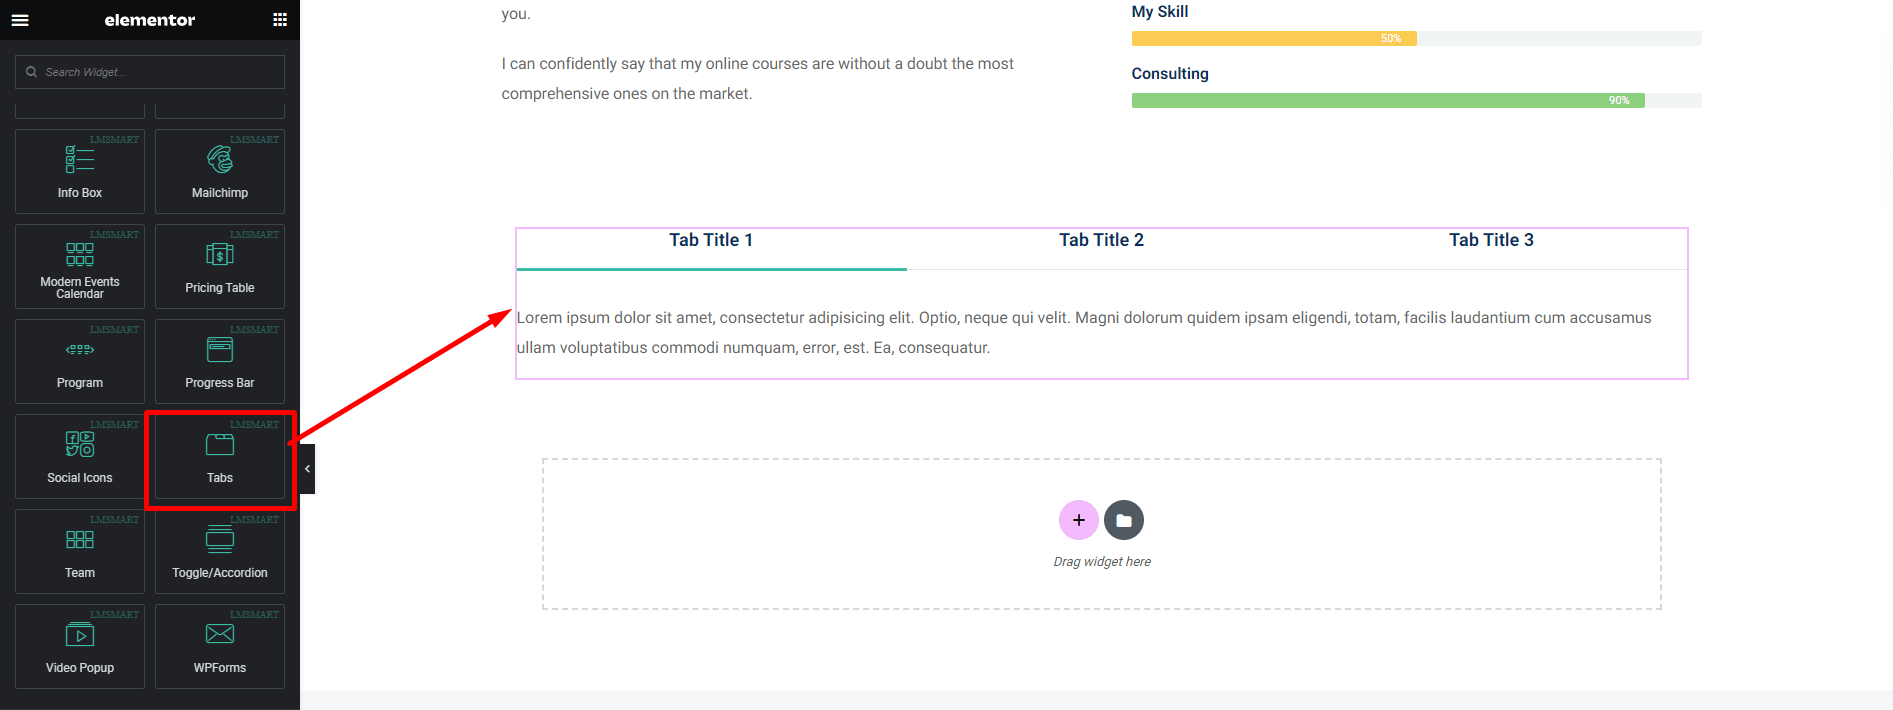
Tabs
Using this element you can create tab section like in the following screenshot.
Team
Using this element you can create pre styled team element like in the following screenshot.

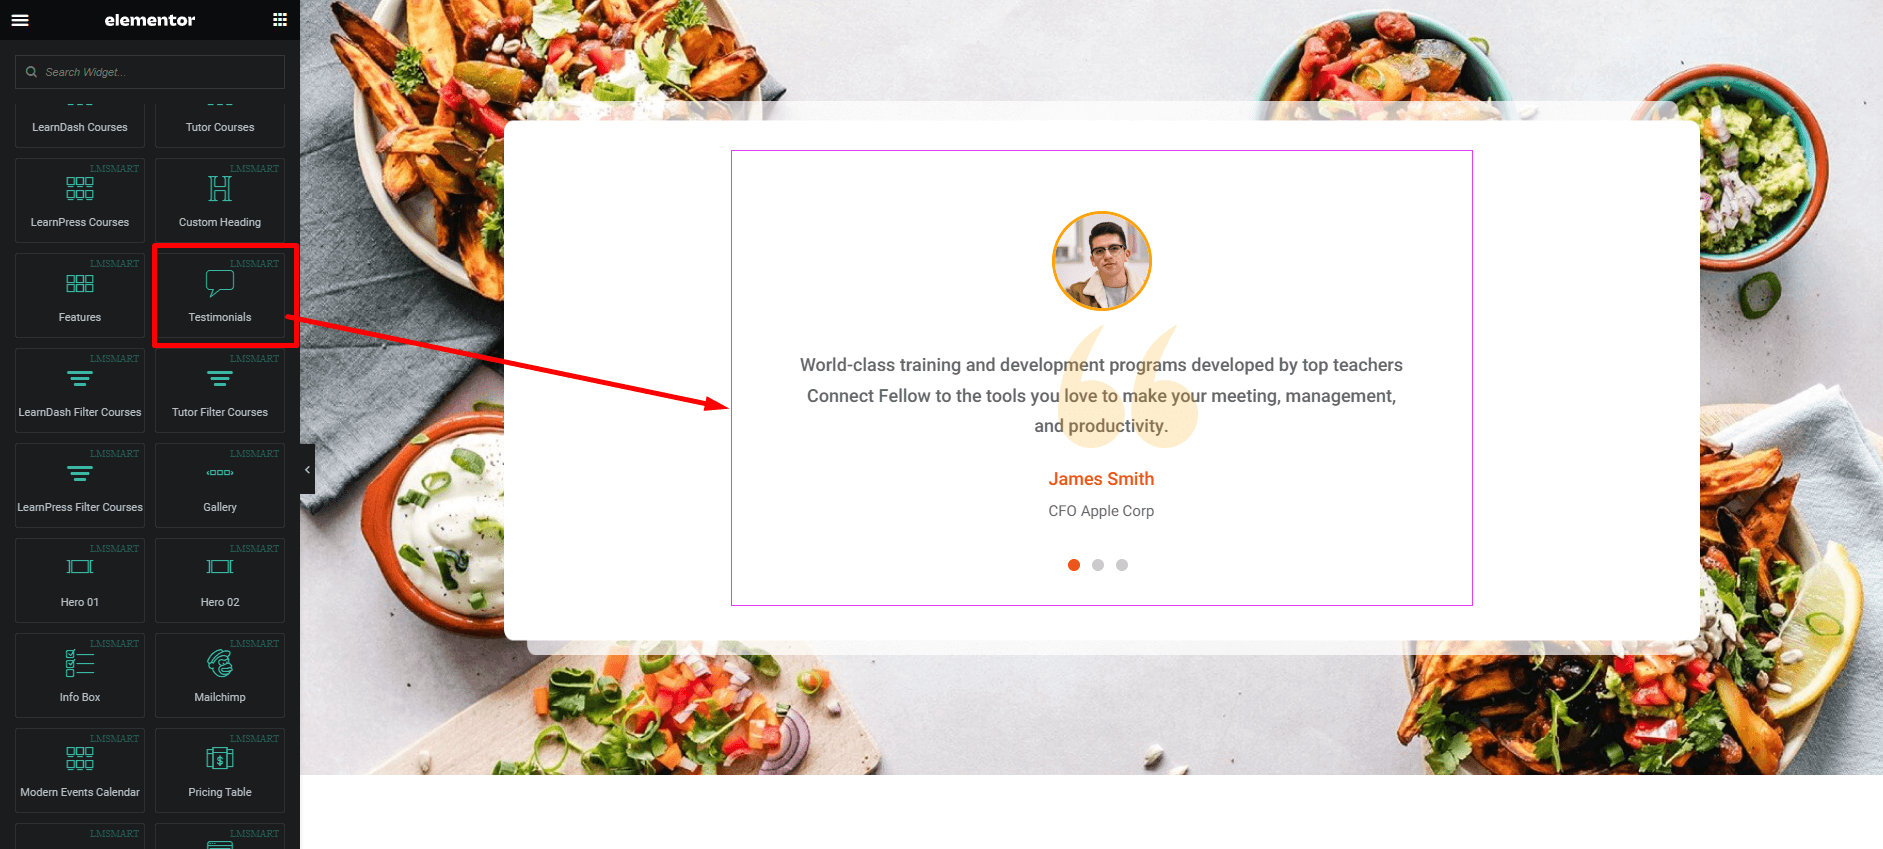
Testimonial
Using this element you can create testimonial like this. Follow the screenshot. You will find 7 different styles in testimonial element
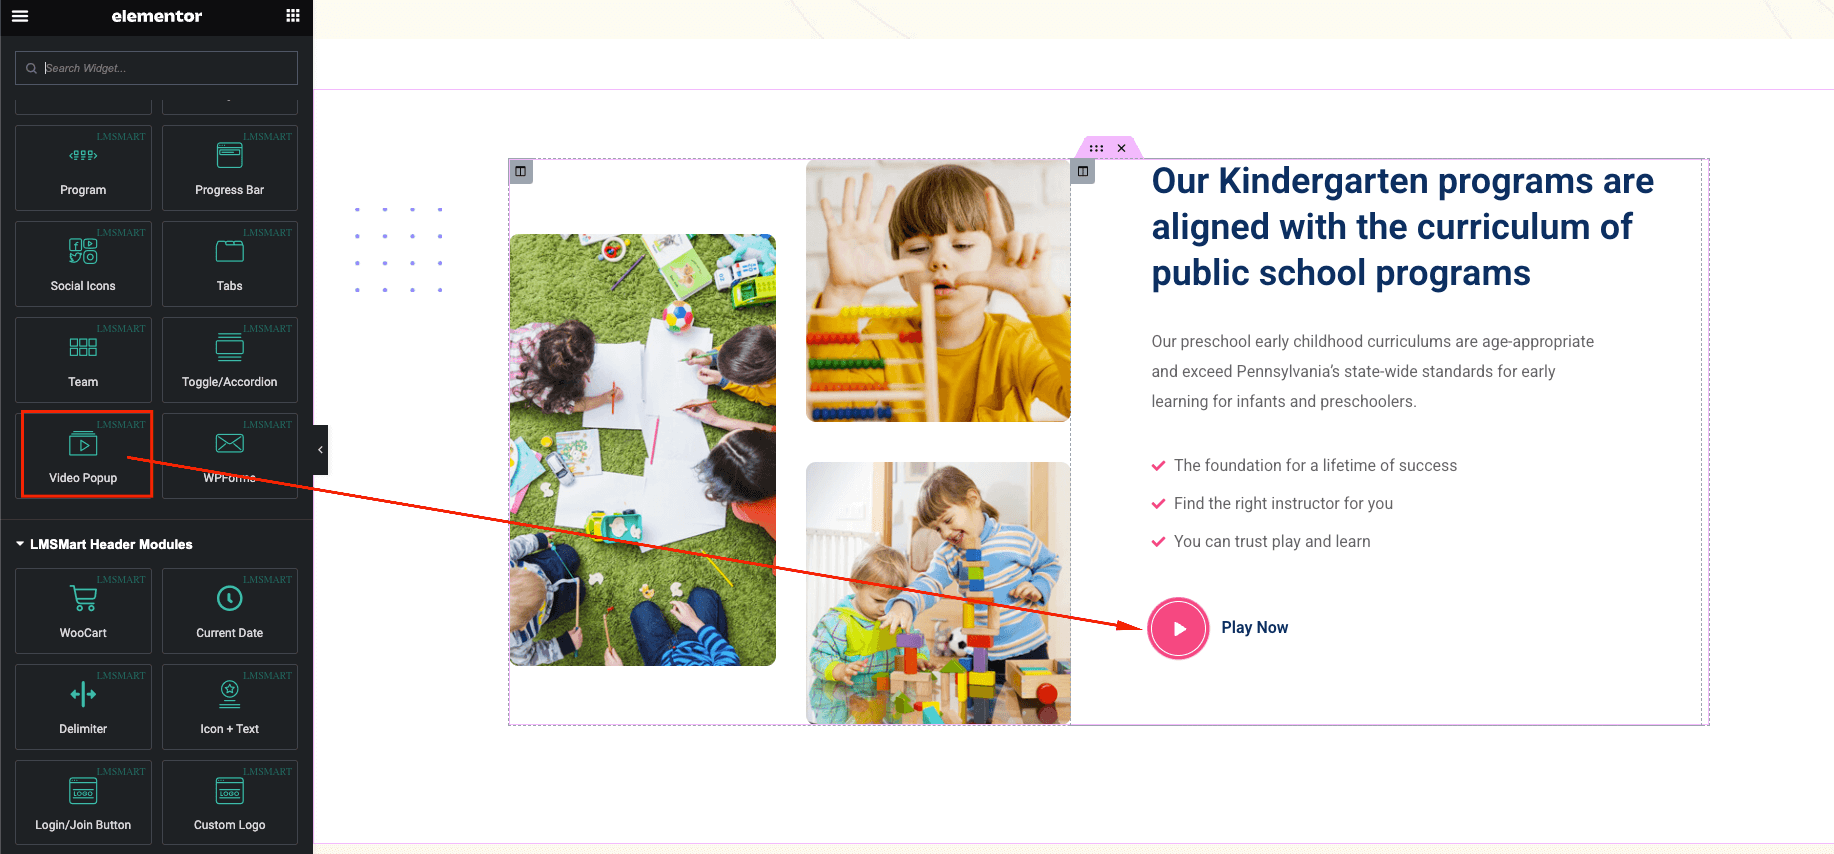
Video Popup
You can create video Popup button using this element. Follow the screenshot below.
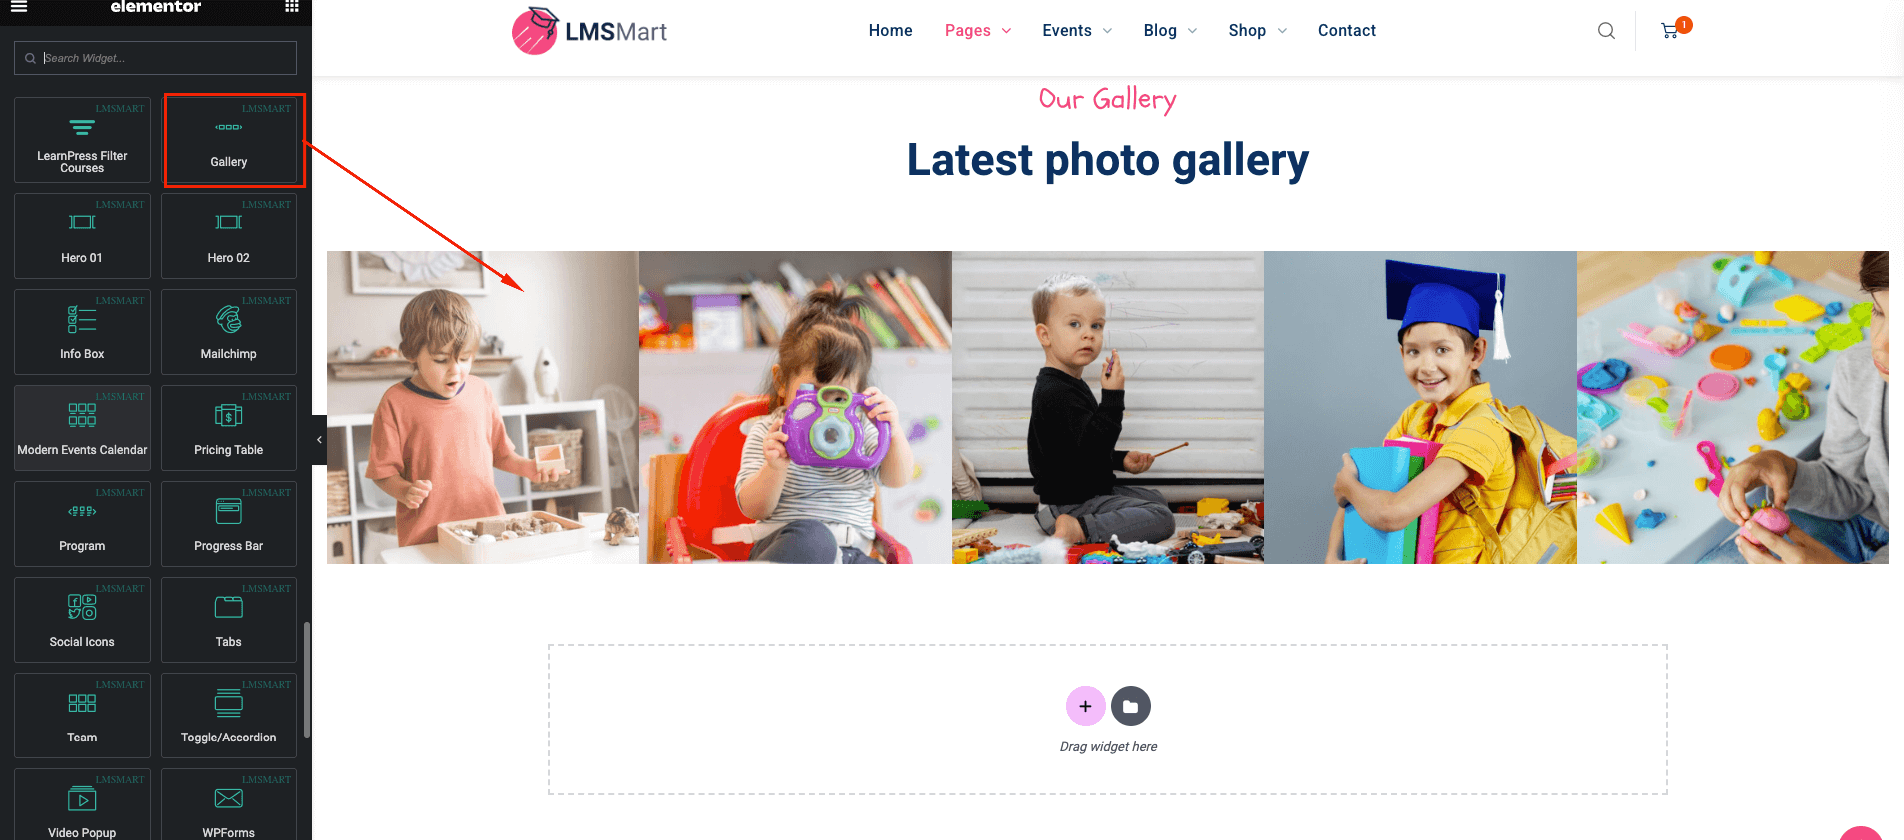
Gallery
This element will help you to create gallery like in the following screenshot below.
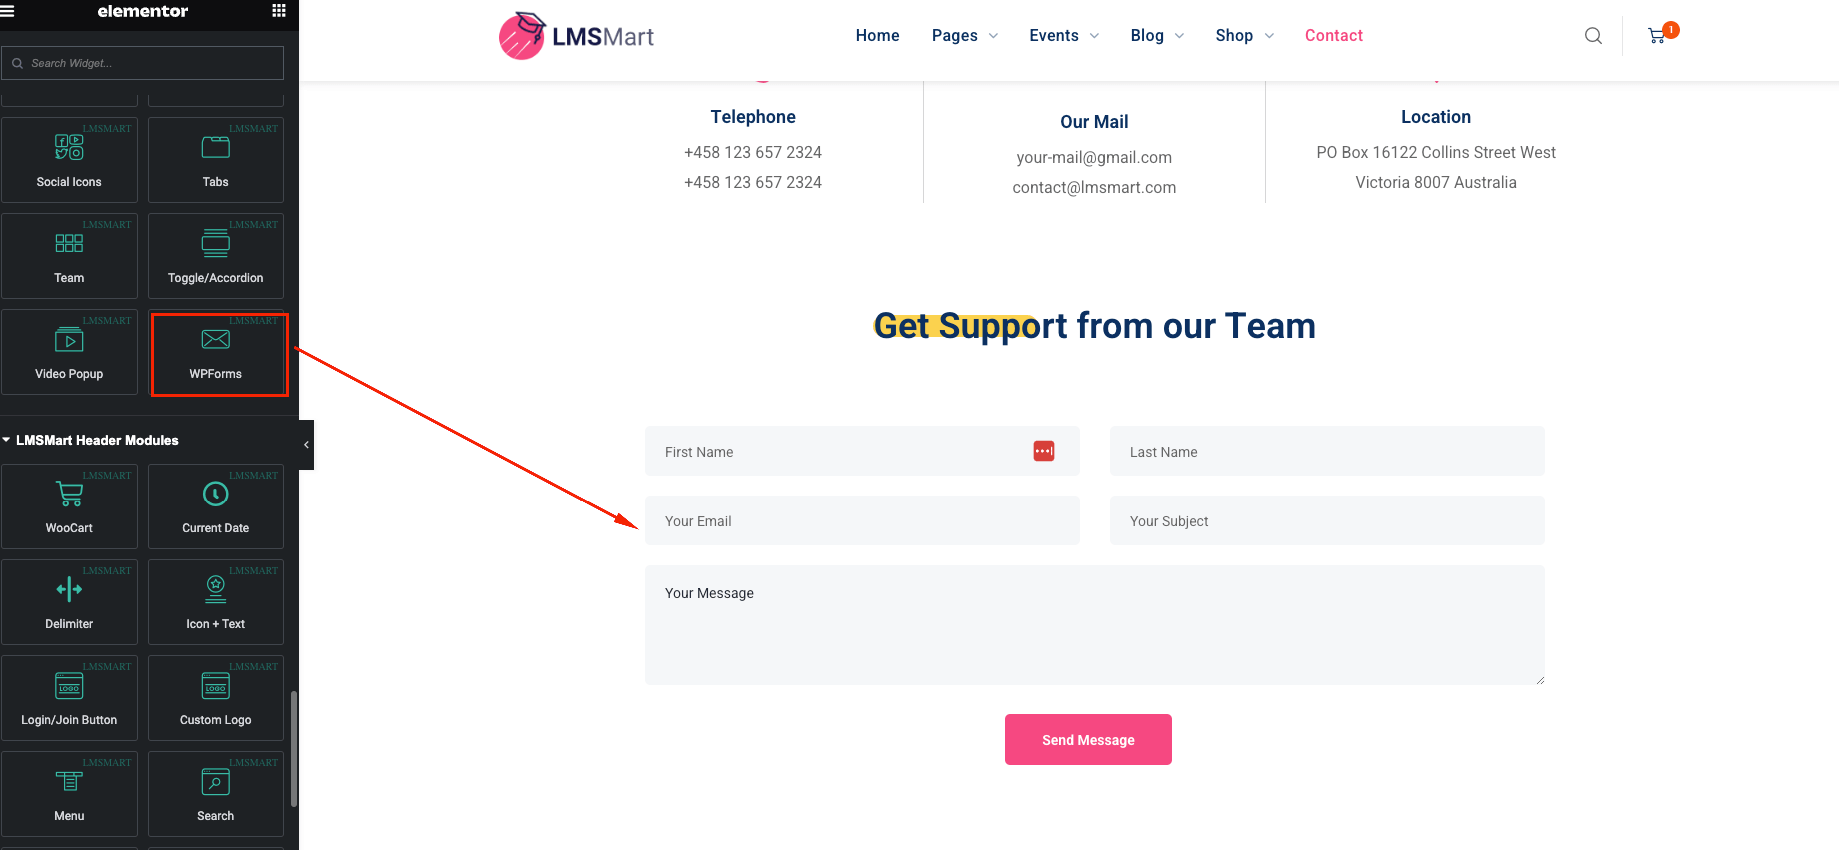
WPForm
To design contact form easily we've created this element. Follow the screenshot below.
Info Box
Using this element you will able to create info box like in the following screenshots.

Social Icons
This element will create social icons like in the following screenshot below.
![]()
Modern Event Calender (MEC)
This plugin will allow to manage all kind of events in your site. To know more about this follow the given video playlist below.
WooCommerce Shop
WooCommerce is the world's most popular open-source eCommerce solution. The theme is fully compatible with WooCommerce. To know how to buy or sell your products using our theme follow the video Playlist
Child Theme
A child theme allows you to change small aspects of your site’s appearance yet still preserve your theme’s look and functionality. To understand how child themes work it is first important to understand the relationship between parent and child themes.
FAQs
Support
If you have any questions, ideas or suggestions, please create ticket through our support channel Support Desk
We usually respond within 24 hours of each ticket. But it can take up to 2 days.
Don’t forget to Rate this theme
Go to your Themeforest Profile > Downloads Tab > & then You can Rate & Review for our theme.
Thank You.
Changelog
See what's new added, changed, fixed, improved or updated in the latest versions.
For Future Updates Follow Us @themeforest
= 1.7.2 - 11-January-2025
- Fix: Swiper carousel library issue
= 1.7.1 - 17-December-2024
- Fix: Conflict issue fix with latest version Elementor
= 1.7.0 - 17-March-2024
- Fix: Conflict issue fix with SitePress class
= 1.6.9 - 01-December-2024
- Updated: Compatible with latest version WordPress
= 1.6.8 - 17-March-2024
- Update: Old WooCommerce template files
= 1.6.7 - 17-January-2024
- Update: Old WooCommerce template files
= 1.6.6 - 13-January-2024
- Update: Rename course search widget to search and added blog search option
Version 1.1 (16 May, 2023)
Initial Release